To add a device group:
- Go to Devices on the main menu.
- Be sure the tab for iOS/iPadOS is selected.
- Click the Add iOS/iPadOS Group button at the top right.
- Enter a name for the group in the Group Name field.
- Choose a school where the device group should be located. Note that this cannot be changed after it is created, although devices can be moved to device groups that are in different schools.
- Complete any optional fields (described below)
- Click the Save button at the top right.
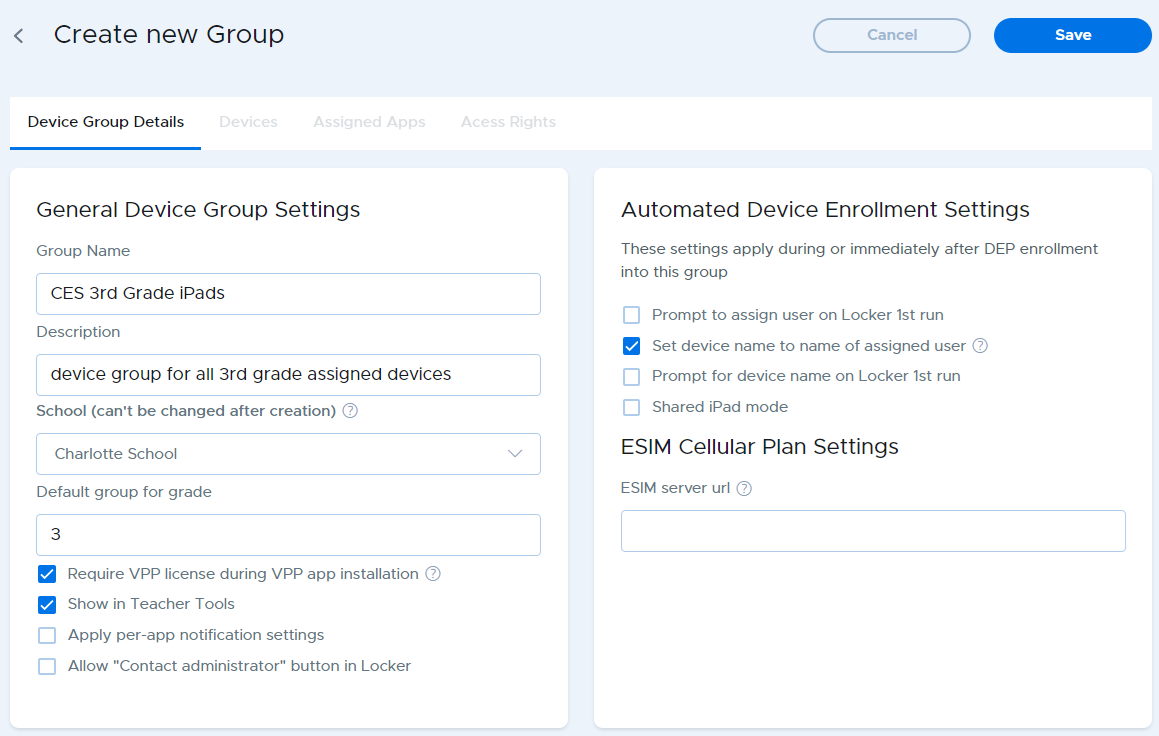
General Device Group Settings
Group Name: An easily-identifiable name for the group
Description: An optional description or note about the device group.
School: One of the defined school locations.
Default group for grade: When using Automated Device Enrollment, there is an option to assign a student to the iPad the first time the Securly Locker app is run on the device by simply selecting the student name from a list as described in the "Configuring Automated Device Enrollment Settings for a device group" section.
When using this method for assigning students, the feature can also automatically move the newly enrolled device to a device group if the student’s grade matches the grade entered in this setting. For example, you might have a device group named GCHS 10th Grade iPads configured to have a 10 in this field. When enrolling devices and assigning students via Securly Locker, students who are assigned to grade 10 would have their device automatically moved into this device group.
Require VPP license during VPP app installation: This setting is enabled by default. When installing apps with user-based VPP app assignment (as opposed to device-based app assignment), and with this item enabled, if there are not enough VPP licenses to install onto every iPad in the group, Securly MDM will stop installing onto remaining devices until more licenses are available.
However, if you disable this option, Securly MDM will treat the installation on the remaining iPads as if it were an App Store installation. This will attempt to install using the Apple ID through the App Store on each of the remaining devices. In most cases, this also means the user will be prompted to enter the password for the Apple ID on the device. It is recommended that you leave this item enabled.
Show in Teacher Tools: This setting is enabled by default. Disable the setting if you wish to hide this device group from appearing in Teacher Tools. Note that the group will still appear in Teacher Tools for users in the Organization Admin role. In some scenarios, particularly 1:1 deployments, an organization might grant teachers rights to a device group so that they can see devices in the group to add them to classes when building them manually, but they only want classes to show up in Teacher Tools, and not the entire device group. For example, they might have permissions for the group "9th grade iPads" but never need to control the whole 9th grade from Teacher Tools, only their specific classes.
Apply per-app notification settings: When enabled for a device group, the devices in the group can have notifications for specific apps disabled as determined by the "disable app notifications" setting found on App Details for individual iOS/iPadOS apps. If this setting is not enabled for the group, the devices will ignore the setting from App Details.

Allow "Contact administrator" button in Locker: When enabled, the information screen in Securly Locker will contain a "Contact administrator" button that allows the user to send a message to the organization administrator. All organizational admins will receive the message as an email.
Automated Device Enrollment Settings
Check Configuring Automated Device Enrollment Settings for a device group in the Setting Up Securly MDM section of this guide for a description of these settings.