Teachers can create access plans that allow or block specified sites and apps on Windows and Mac devices during class sessions. When starting or scheduling a class, the teacher can choose which access plan to enforce during that class session.
What are access plans?
An access plan is essentially a customizable list that includes both websites and desktop applications. These lists can be configured in one of two ways:
- Block list: This setting allows all sites and Windows and Mac apps except those specified in the list.
- Allow list: Conversely, this setting blocks all sites and apps except those explicitly allowed in the list, akin to the Site Lock or Site Lock to a Collection.
Creating a new access plan
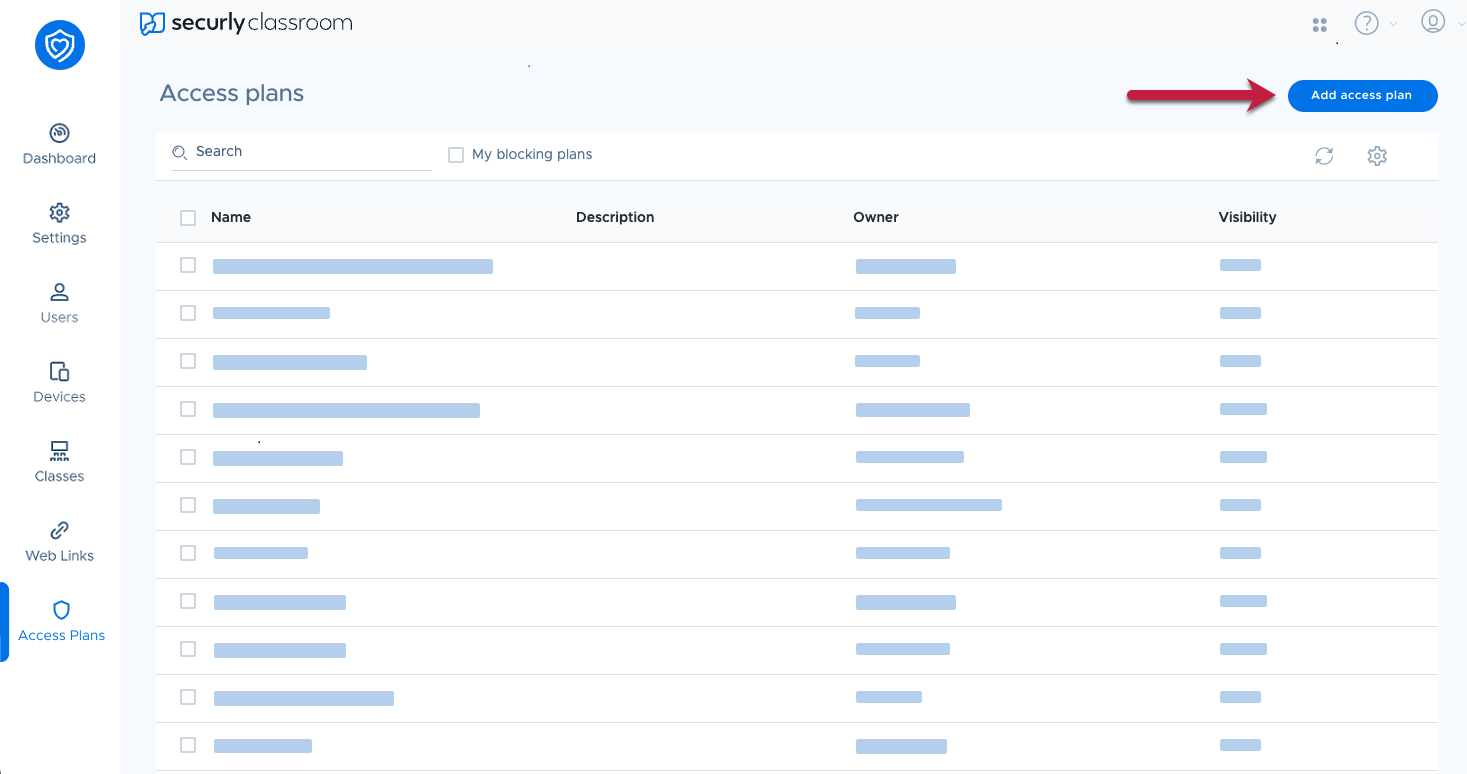
To create a new access plan, go to the Access Plans menu and click Add access plan.
In the Details section at the top of the page, you can enter a Plan name and Description for the block list.
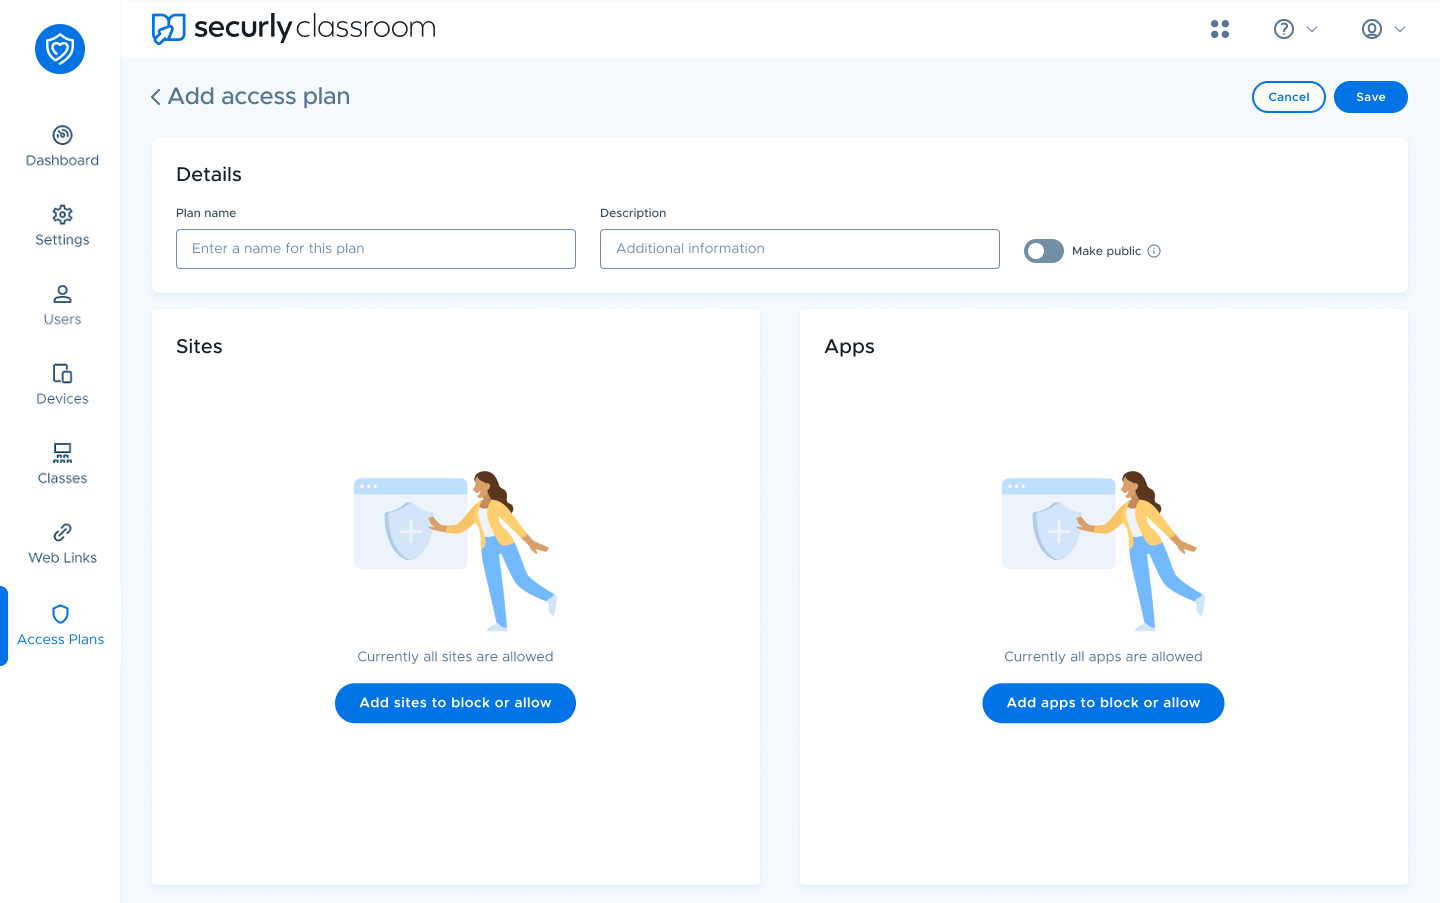
You can also change the visibility of the access plan. If enabled for your role by an admin from the Permissions settings, turning on the Make public toggle will allow other teachers in your district to apply those blocking plans to their own classes. This can be toggled on or off at any time, either during or after the plan’s creation
Other teachers cannot edit or delete public access plans. However, they can clone public access plans to customize their own copies.
Adding sites or apps to block or allow
In the Sites section on the left, click Add sites to block or allow. However, if you don't want to block any websites with this access plan and only block or allow apps, you can move on to the Apps section on the right.

After clicking the button to add sites, you can choose to block sites or allow sites (see above).
When adding sites to block, you can either select sites you've recently closed on student devices or manually enter URLs separated by commas/new line.
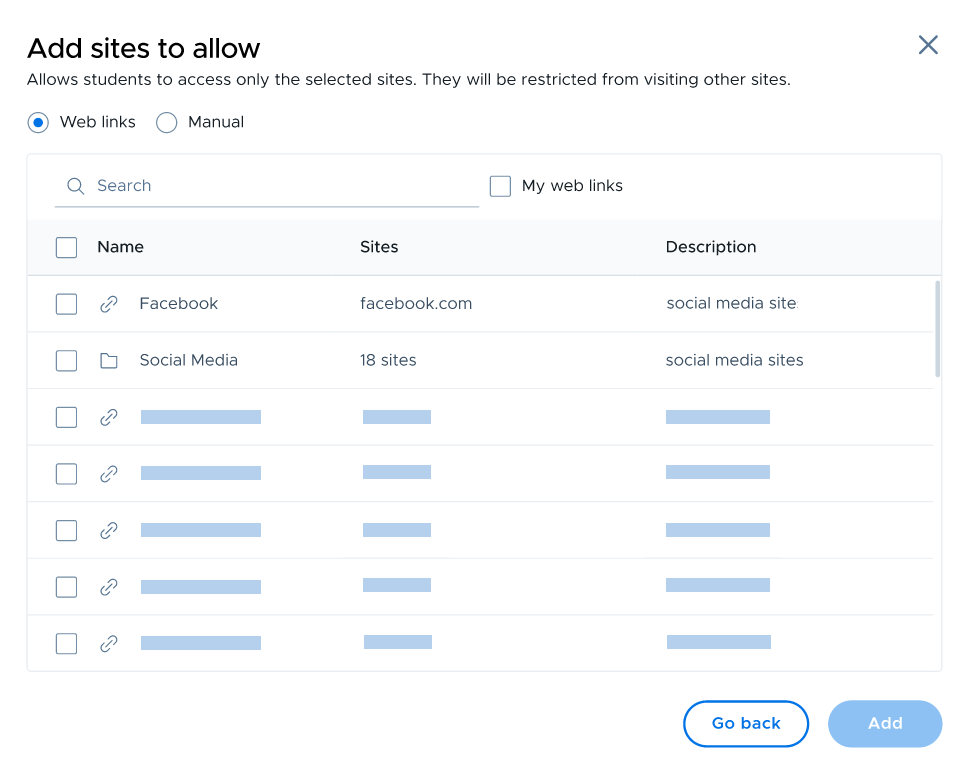
If you are adding sites to allow, you also have the option to filter the list to show only the web links you've added, and remove sites from the plan by selecting them and clicking Remove.
Just like the organization-wide block list, access plans support blocking of full URLs, which allows you to block a specific page or path on a website instead of the whole website. For example, you can block Google Doodles by adding google.com/doodles to the block list without blocking the rest of Google.
When adding an allowed site in access plans, entering the root domain (e.g., blooket.com or www.blooket.com) will automatically allow all subdomains, removing the need to find subdomain dependencies. However, if a specific subdomain is entered (e.g., jr.brainpop.com), only that subdomain will be allowed
Once you've added some sites and clicked Add, you can always add more sites by clicking the plus icon in the upper right of the card.
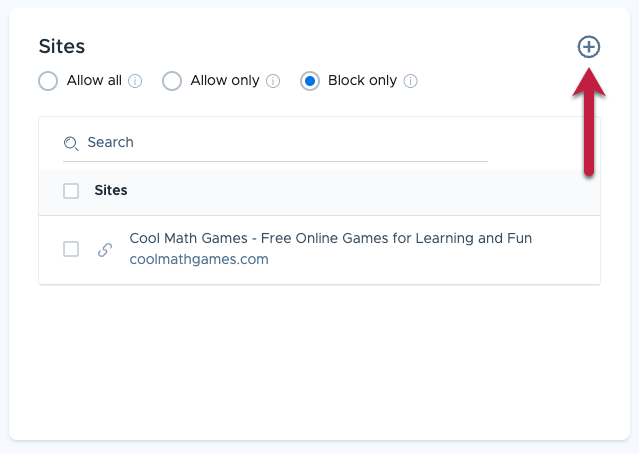
From here, you once again have the option to change the type of blocking plan.
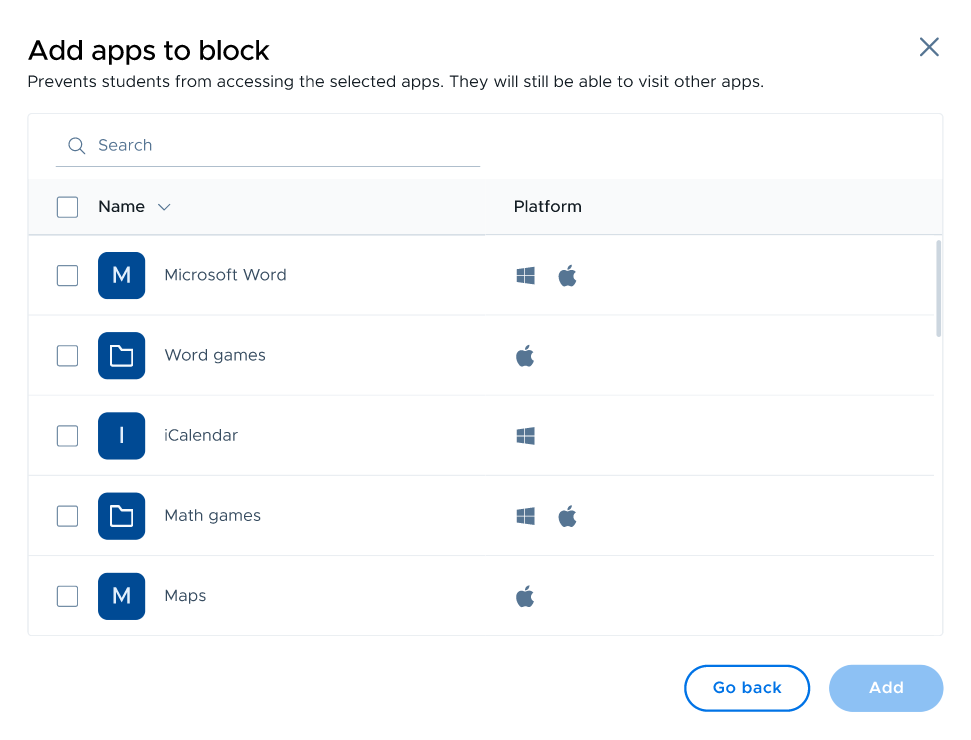
To add apps to the plan, click Add apps to block or allow. The process here is similar to adding sites, except you will select from a list of known Windows and Mac apps. Click the search bar to find the apps you're looking for, then check the boxes to select them. When you're done, click Add.
When your access plan is ready to go, click Save in the upper right corner.
Applying an access plan before starting a class
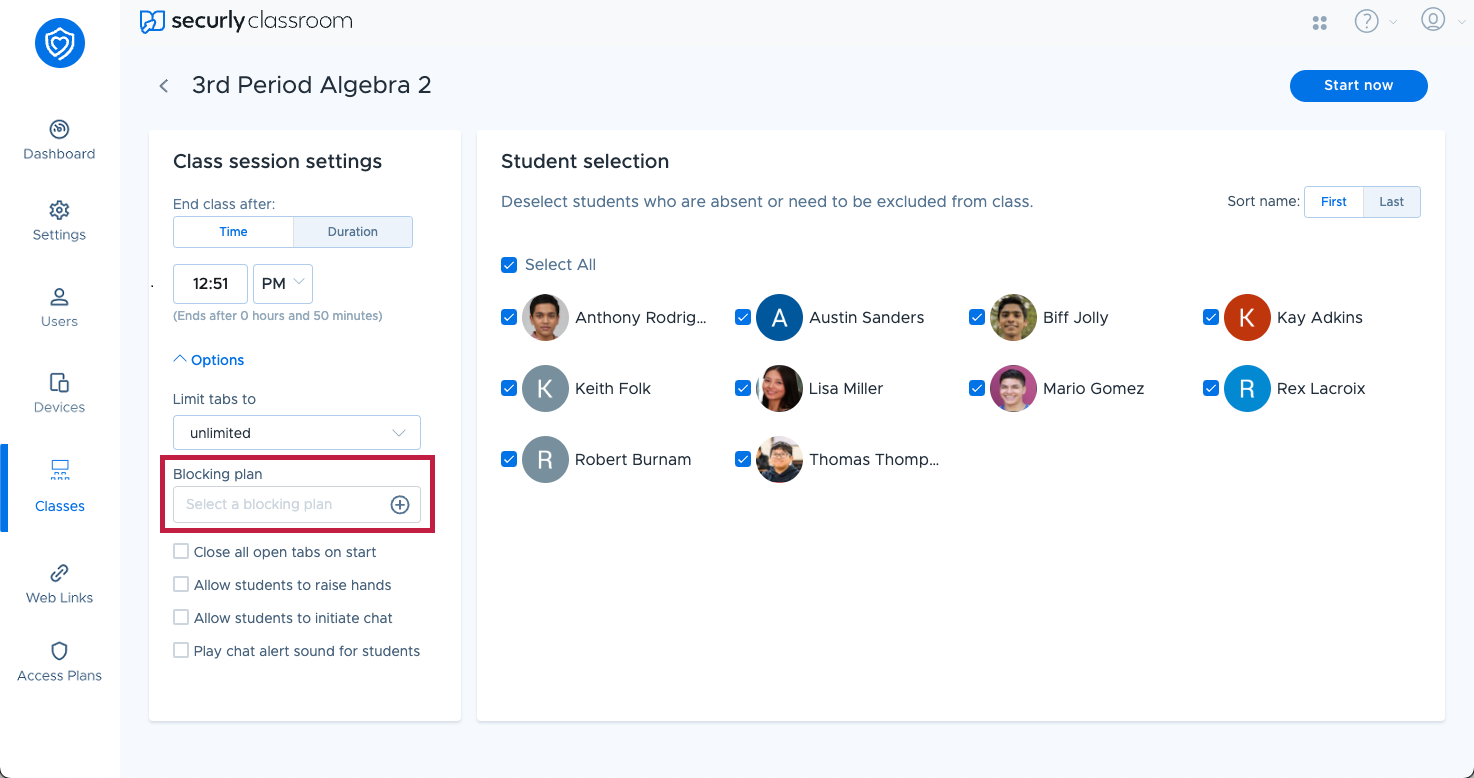
You can use an access plan when starting a class by expanding the Options menu, then clicking the plus button under the Default access plan field.
This will open the access plan selection window. You can search for an access plan or filter to just your plans using the controls at the top of the window.
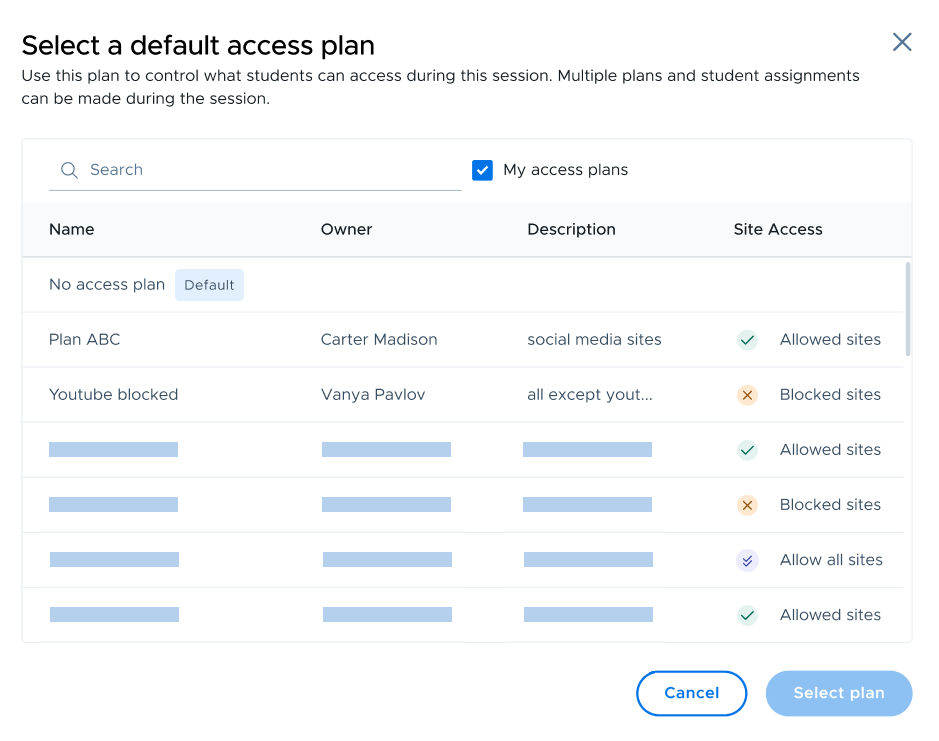
Once you have selected an access plan to use for this class, click Select to apply the plan for all students. You can also use multiple access plans for individual students or groups. Learn more about using access plans during an active class session
Clone an access plan
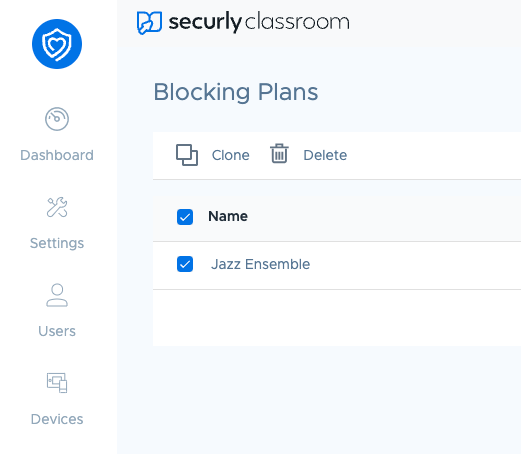
To clone an access plan, go to the Access Plans menu and select the access plan(s) you wish to clone. Click the Clone button that appears in the action bar.
Once you click Clone, new blocking plans will be created with the same name but with "copy" appended to them for each plan selected.
Delete an access plan
To delete an access plan, go to the Access Plans menu and select the access plan(s) you wish to delete. Click the Delete button that appears in the action bar.
Notes on access plans
- When a student navigates to a blocked URL, they will see a message that the site was blocked by a teacher, and the name of the blocking plan in use.
- When a student tries opening a blocked app, the app will be immediately closed.
- If a student has a blocked app open when the class starts, it will be hidden, except in the case of certain music and messaging apps, which will be immediately closed.