The Schools menu allows you to create or edit schools within your organization. A school refers to a site that manages sets of classes and device groups independently.
This menu and concept was referred to as "Locations" in previous versions of Classroom.
New accounts will have a default school called "Default School" already created. If you only have one school, you can use this default name. If you have multiple schools, you should edit the default school to become one of your school locations, then add the others.
To edit a school, click the name from the list.
To add a new school, use the Add School button at the top right corner.
.PNG)
When adding or editing schools, you'll see three tabs for managing your school settings.
School Details
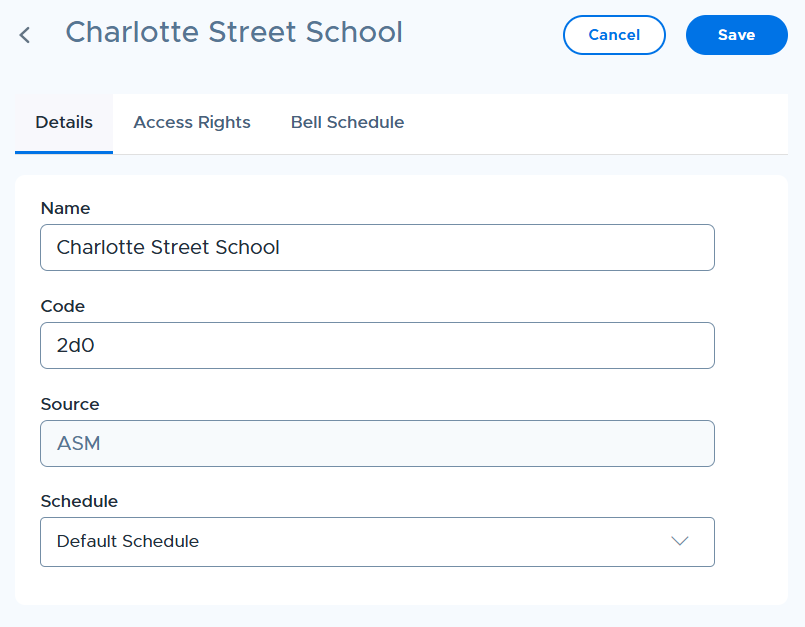
| Field | Description |
|---|---|
| Name | The name of the school |
| Code | A short code to uniquely identify this school. This might be the school initials or some other code that's already used throughout other systems in the district as the unique identifier for this site. Codes may be shown during data import/export functions such as CSV user import. |
| Schedule | What schedule the school uses. For more information, see the section on school schedules. |
Access Rights

From the Access Rights tab, you can find a list of users who have rights to use this school. By default, when a user is assigned to a school (when they are created or their account is edited) they will automatically be given rights to that school.
You can assign multiple users rights to a single school at once by doing it from this tab and clicking the Grant access rights button. When a user has access to a school, it will appear in their list in the Schools menu.
To revoke access rights, simply select the users by using the checkboxes and use the Revoke Access Rights that appears at the top.
School Calender
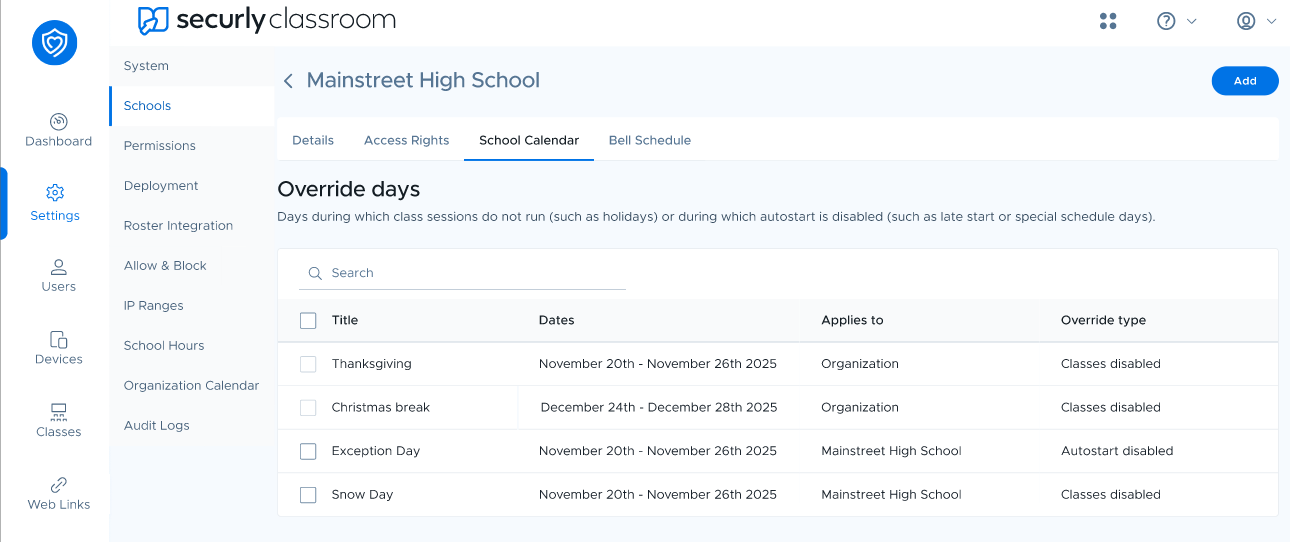
In the School Calendar tab, admins can create "override days" to adjust how classes run during special events. These days can be set up to stop classes completely (for holidays or scheduled breaks) or to disable automatic class starts for days with as a late start or early dismissal.
District admins can configure the override days for all schools in the district from Organization Calendar menu.
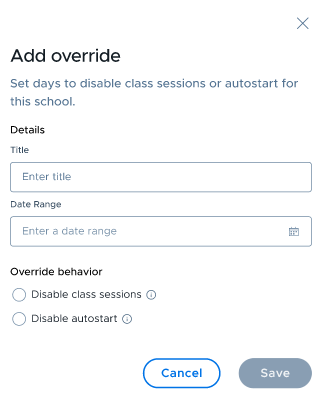
To set up override days, click the Add button. Then, enter a title, select a date range, and finally choose whether you want to disable classes completely or disable autostart.
Bell Schedule
From the Bell Schedules tab, admins can provide teachers with a faster, intuitive way to autostart classes. By selecting pre-defined periods or blocks, teachers don't have to manually enter start and stop times for every session. Learn more about auto-start scheduling from Class Settings.
By default, district admins can configure the schedule for any school, or delegate this responsibility to school admins to manage their own specific locations.
.png)
| Field | Description |
|---|---|
| Terminology | You can choose between Periods or Blocks. This selection only changes the UI label and does not affect the underlying functionality. |
| Period Names | Enter the names of your sessions here. Use the + Add Period button to add new period rows or the bin icon to delete them. |
| Schedule Type | You can choose whether the schedule is the same for the whole week or different for each day. For more information, continue reading below. |
Managing Bell Schedules
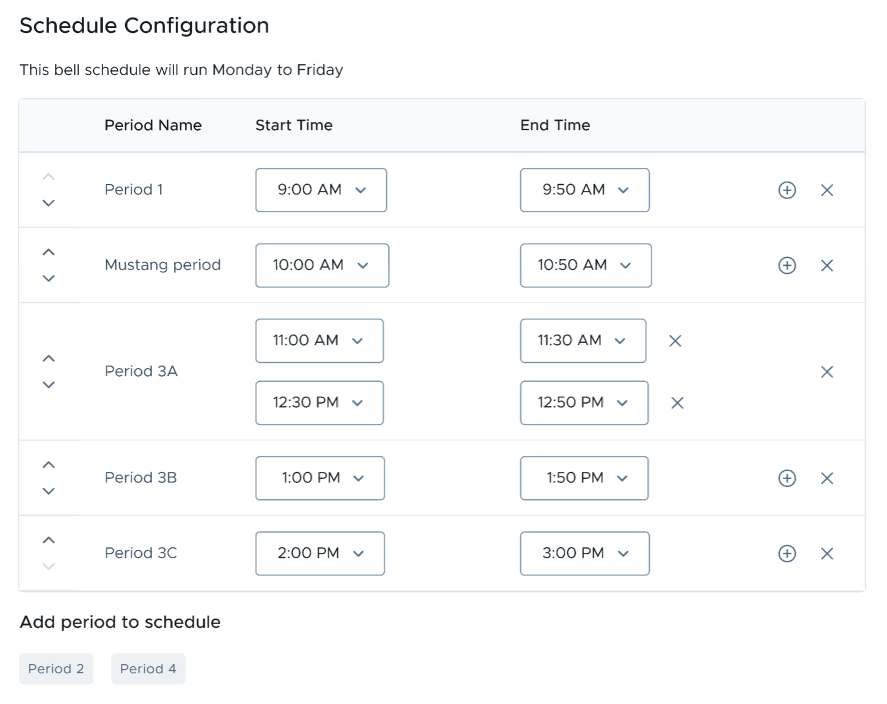
Once you confirm the Schedule Type (same schedule Monday to Friday or different schedule each day), you will find a blank schedule where you can add the periods or blocks you created by clicking on the chips at the bottom.
From this view, you can configure the start and end times. If a session requires a break or split time, you can set two sets of times by clicking the + icon.
Selecting the Different schedule each day option allows you to configure days individually using the day tabs. You can select multiple days to share the same schedule by using the checkboxes at the top.
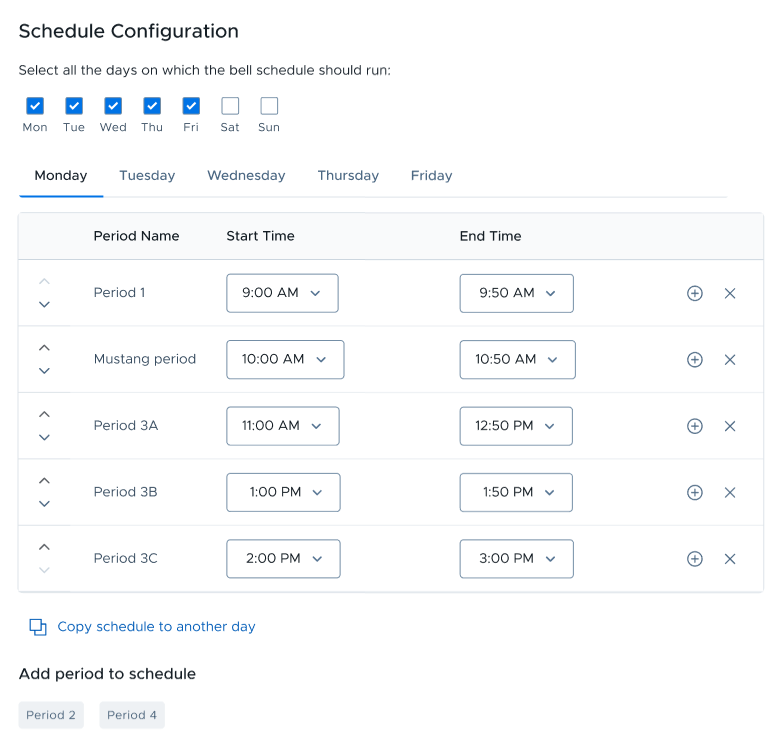
Clicking the Copy schedule to another day option copies the current day’s timing to your selected days. Once copied, each day remains independent and can be edited further.