The Schoology tab contains settings that enable syncing roster data from Schoology.
Setup
Follow these steps in Schoology to set up Schoology integration.
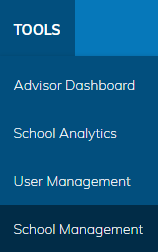
In Schoology, choose School Management from the Tools menu.
Select the API tab in the Integration section.
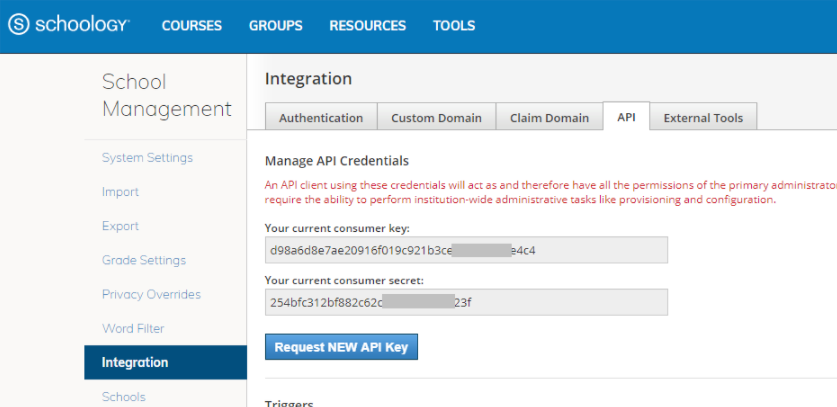
Use the Request NEW API Key button to generate a consumer key and consumer secret.
In Securly Classroom, go to the Settings menu, then select the Roster integration submenu. Click the Schoology tab and then check the Enabled checkbox.
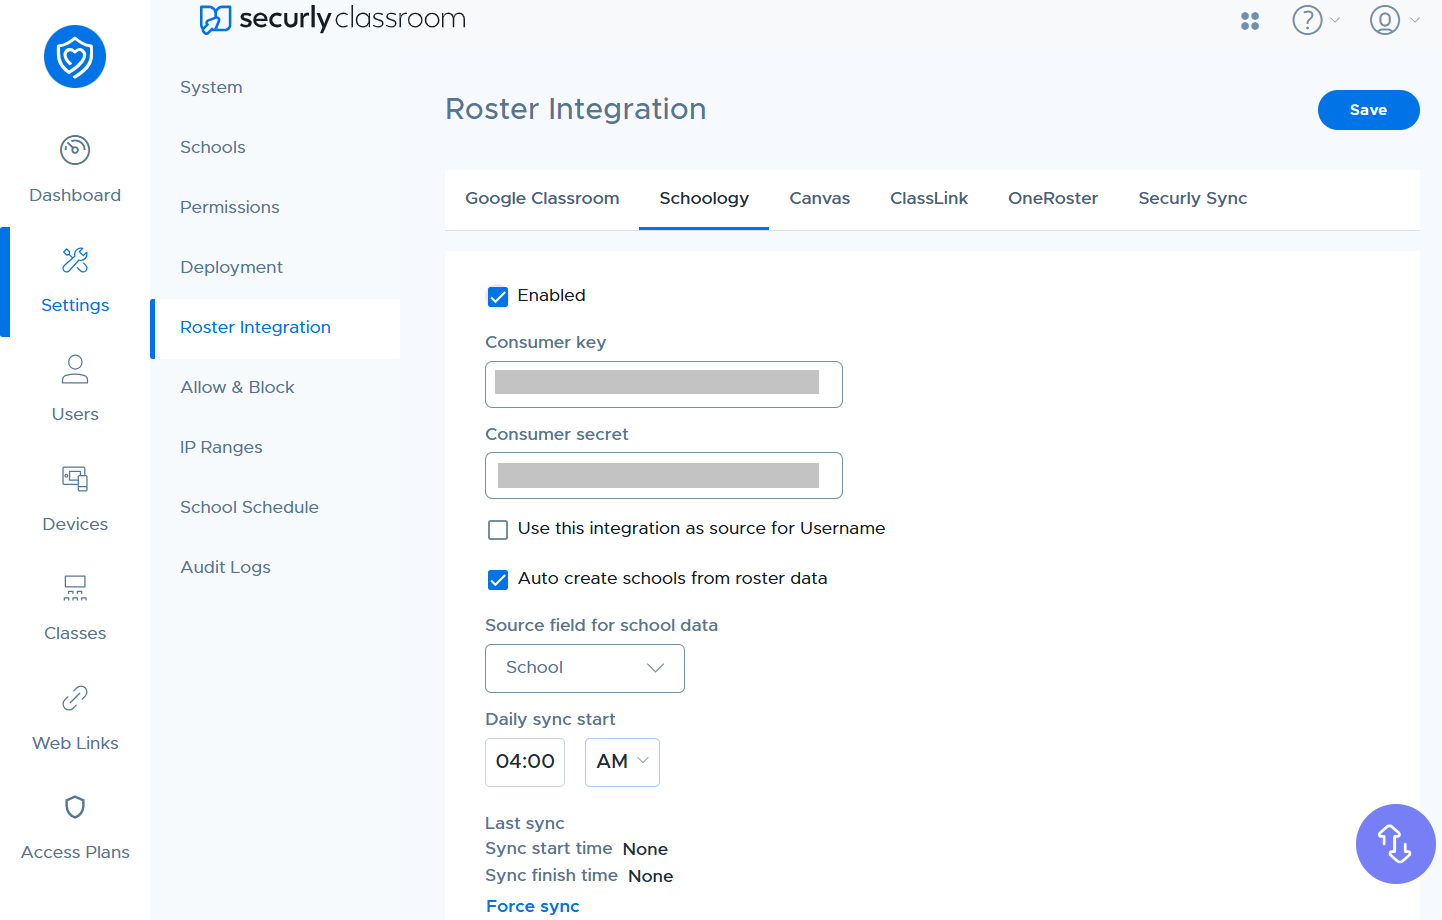
Copy and paste the Consumer key and secret from Schoology. Click Save.
You may choose to edit the following sync options:
| Option | Description |
|---|---|
| Use this integration as a source for Username | Enabling this will allow Securly Classroom to pull usernames from the Schoology roster automatically by default. Districts using Windows and Mac devices can also set rules to reformat usernames as it comes from the sync source to ensure they match their local device login requirements. This should be configured with the assistance of Securly Support. |
| Auto create locations from roster data | When enabled, the sync process will automatically create new locations in Securly Classroom based on data found on the roster import. If not selected, all classes from the sync will be created in the Main Location. |
| Source field | Lets you select the source field that location data should be pulled from, either School or Building. |
| Daily sync start | Set the time when the daily sync occurs. |