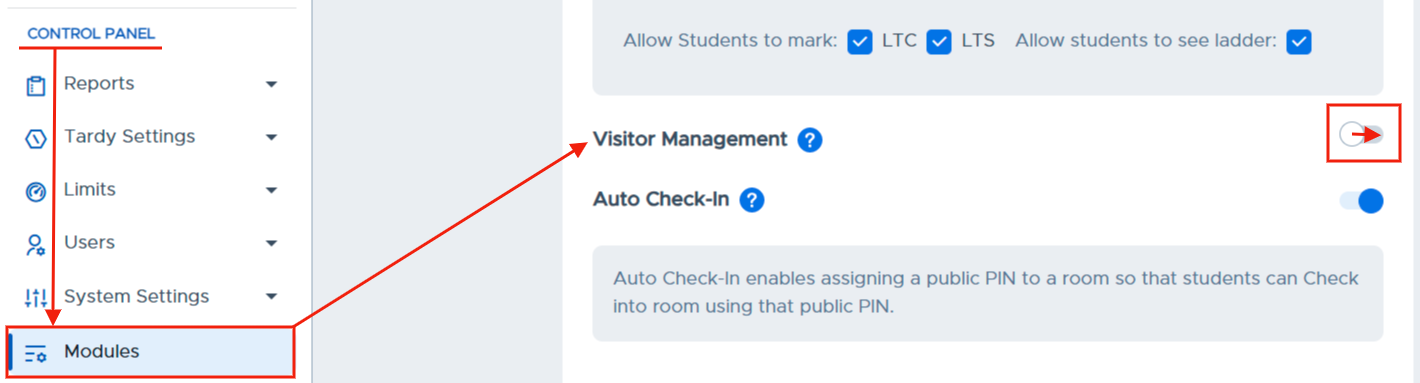
Once in your Pass system, you will need to make sure that your Visitor Module is activated. To do so, under the Control Panel, click Modules. On that page, scroll down to Visitor Module and slide the toggle to the right.
Front Desk Users - Visitor Adults
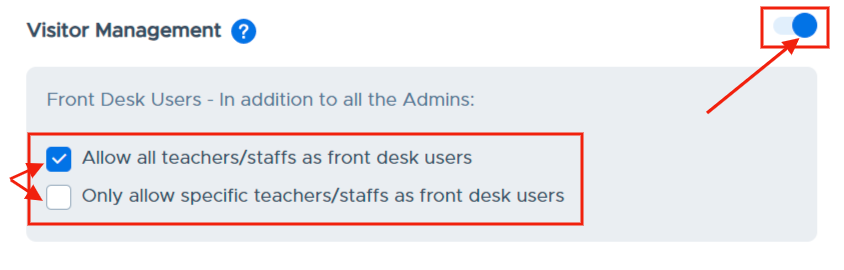
When activated, you can then choose which adults will have access to Visitor Management in your school. Choosing the first option will allow all adults access to Visitor Management. Choosing the second option will allow you to select which adults in your Pass system will have access to Visitor Management.
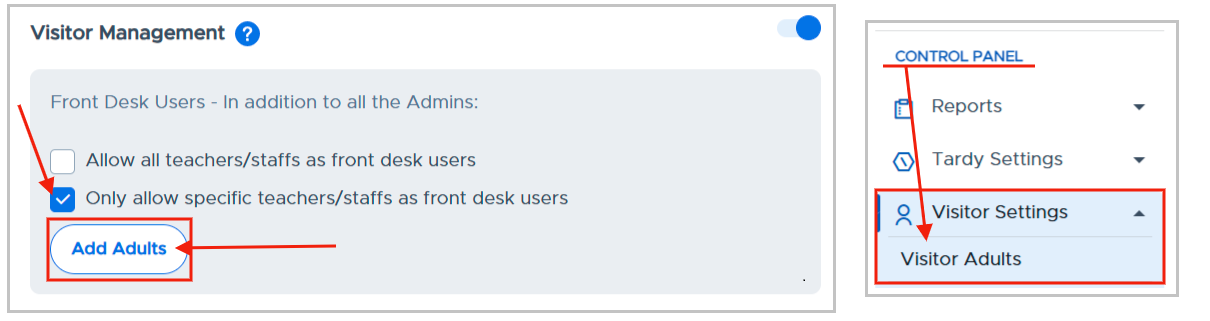
If you choose the second option, click Add Adults from the Modules page or click Visitor Settings on the Control Panel and click Visitor Adults.
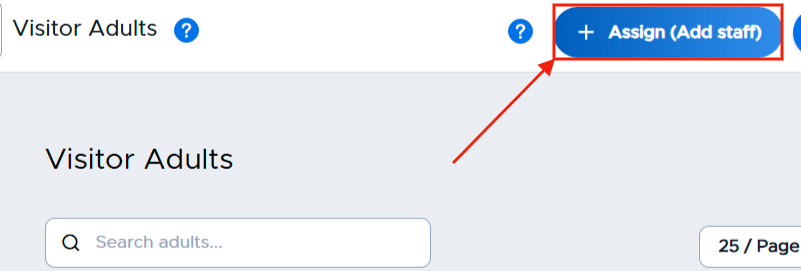
On the Visitor Adults page, click the blue + Assign (Add Staff) button in the top right corner. A white popup window will appear.
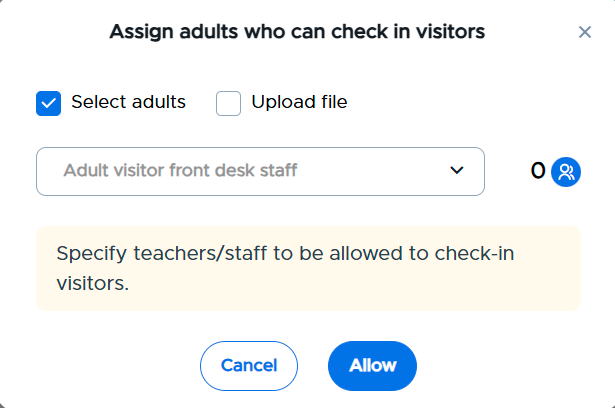
You have two options to assign adults who can check in visitors.
- Check the “Select adults” box and then select adults by typing their name in the “Adult visitor front desk staff” box or clicking in the box and clicking on the names of the individuals who should be allowed to check-in visitors. When finished selecting these adults, click the blue Allow button. If you added a person by mistake and need to delete that person from the list, click on the blue trash can to the right of their name.

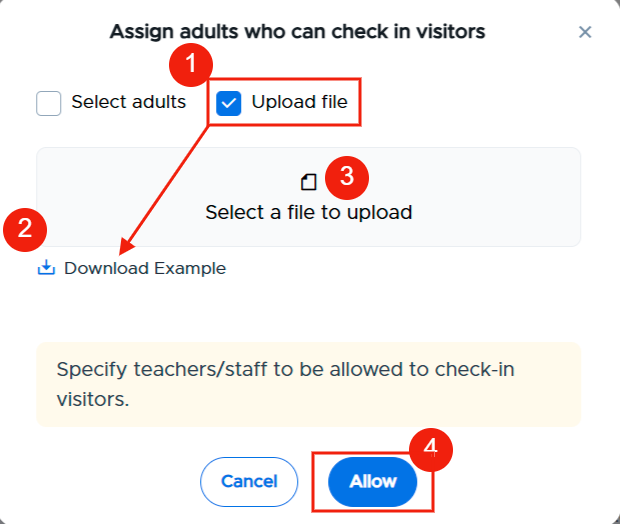
- Check the “Upload file” box, click Download Example file to see how the CSV file should be formatted, create your file, save it, click “Select a file to upload” and choose the correct file, and then Allow.

Your Visitor Adults will appear on the table.
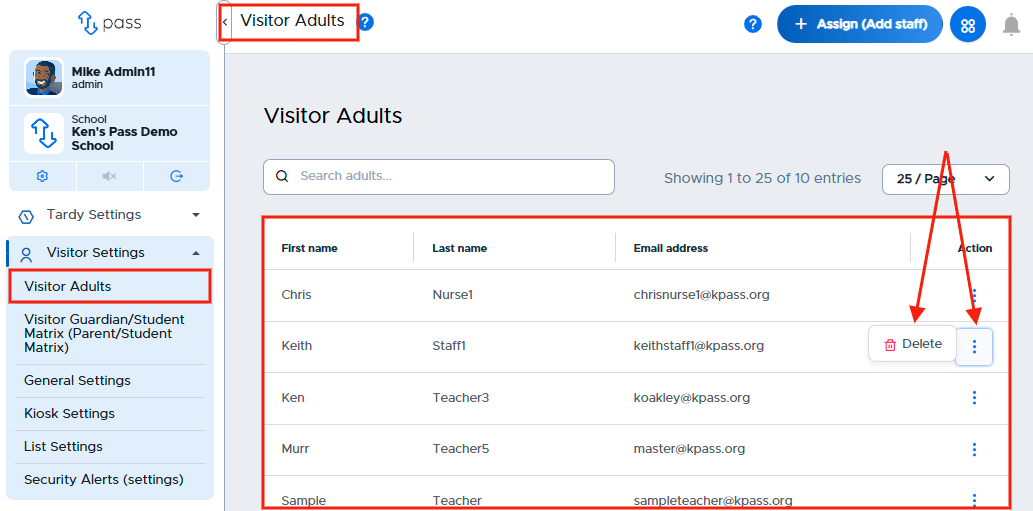
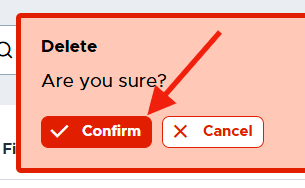
If you need to remove someone from the list, simply click on the three (3) dots to the right of that person’s name, click Delete, and then click the red Confirm button. That person will be removed from the list of Visitor Adults.
You can amend the list of Visitor Adults at any time.