Go to your Google Admin console. Choose Devices from the left hand menu. Under that menu, select Chrome > Apps & extensions, then Kiosks.

Select the Lost Devices OU that you created in the previous step. Click the + button in the lower right corner, then select the Add Chrome app or extension by ID button.

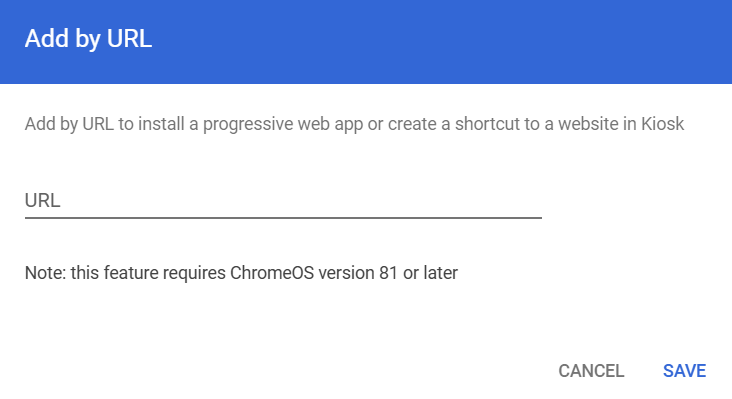
Copy and paste the Lost Mode URL from Securly Classroom. Click Save.
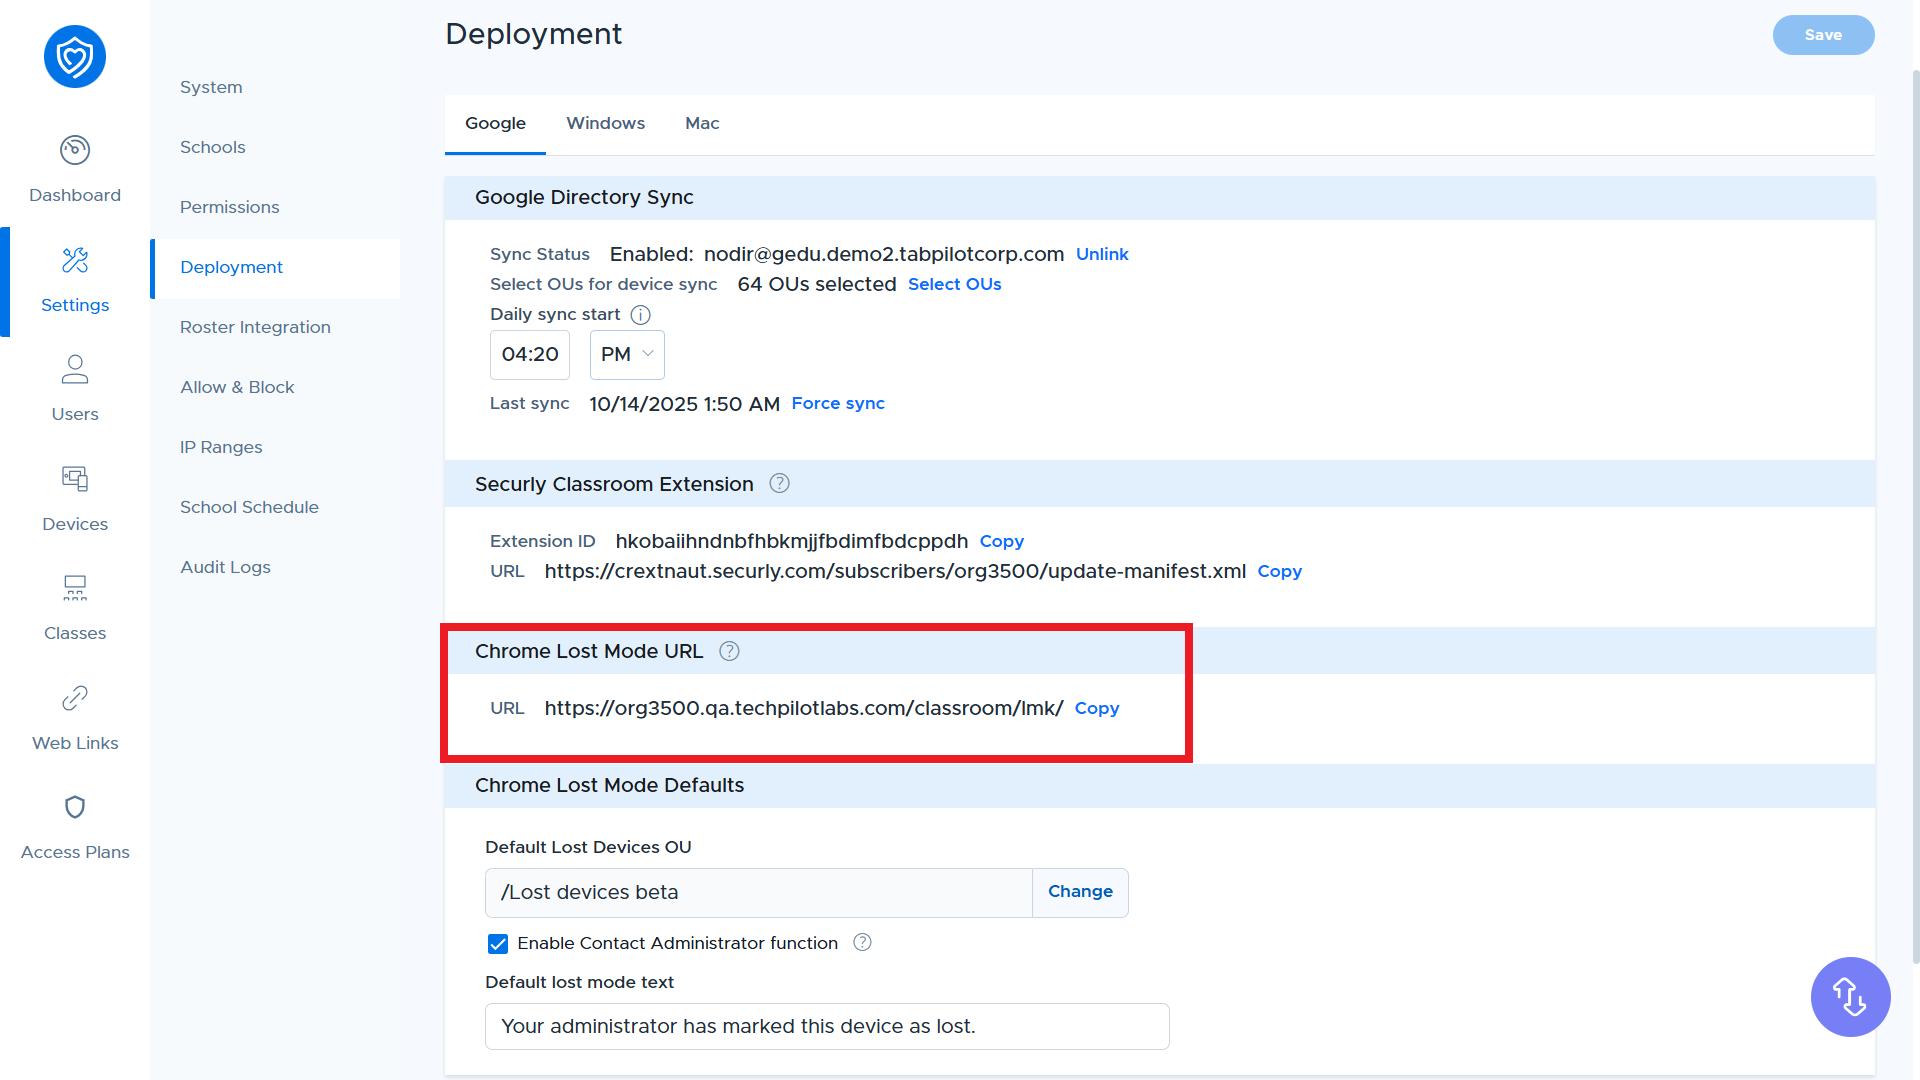
You'll find the values for the Lost Mode URL in Securly Classroom in the Google sub-menu of the Settings menu. Use the Copy button next to the value.
The Lost Mode Kiosk app should now be shown in your list with a default setting of "Installed."
Next we need to set the Kiosk to automatically launch. On the line for "Auto-Launch app" click the arrow next to "None" and choose "Lost Mode Kiosk"
You may notice that when a Chrome device boots, there is an option to press CTRL+S before the kiosk app loads. This might appear to be a way to bypass the system, but it's not, as long as you have properly configured the OU for "Do not allow any user to Sign-In" as recommended above. If a user presses CTRL+S to get to the login box, they will not be able to login or use the device due to this restriction.
Let's move to the next step, Preventing Guest Mode and User Login