Securly Classroom runs as a Chrome extension when students log in with their school-issued email. You will need to use Google Admin console to configure the extension to automatically install for all students.
ChromeOS 109 is the minimum required version in order for the Securly Classroom extension to load.
These instructions will walk you through the process of creating the extension entry just once, at the root of your domain. This will make it easy to choose multiple OUs later where you want to configure the extension to force install. This is useful if you need to set it to run on multiple OUs that are all sub-OUs under a single higher level OU. However, you may also choose to select a lower-level OU for setting up the extension initially.
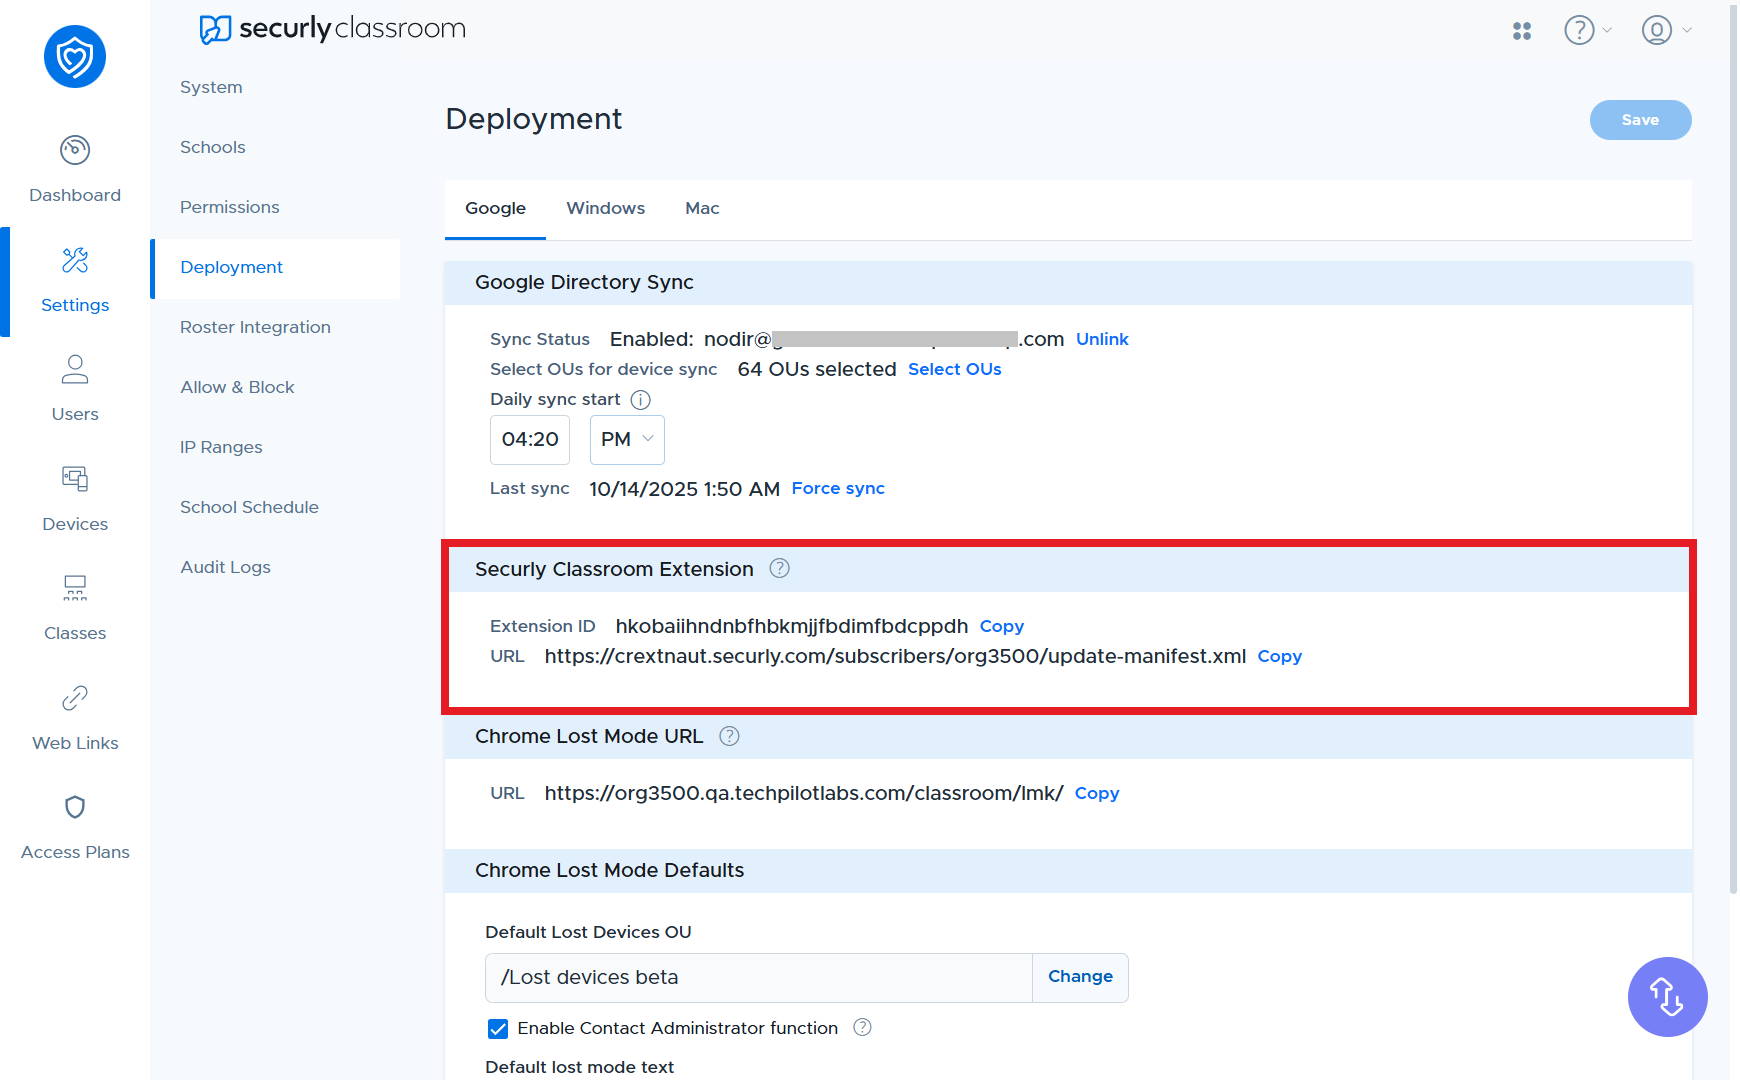
Go to the Settings menu and click on the Google sub-menu. The App ID and URL for the Chrome extension will be shown under the Securly Classroom Extension section. You can click the “Copy” links to easily copy these values to your clipboard.
In another tab or window, go to your Google Admin console. Go to your Google Admin console. Choose Devices from the left hand menu. Under that menu, select Chrome, Apps & extensions, then Users & browsers.
.png)
With your root OU selected, define the extension. In a later step we will choose which OUs we want to select for force-installation of the app. Alternately, you can choose the sub-OU now, but keep in mind that you may have to do this for multiple OUs if they are not all sub-OUs of a higher level one.
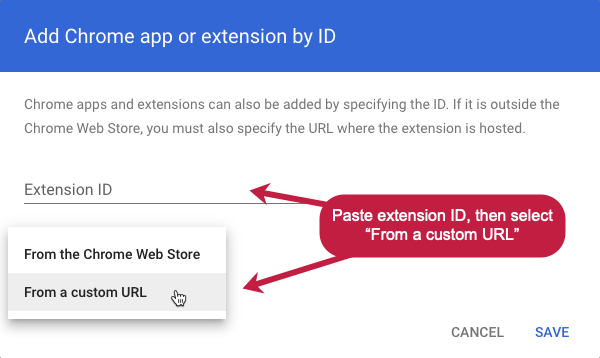
Click the + button in the lower right corner, then select the Add Chrome app or extension by ID button.

Copy and paste the Extension ID from Securly Classroom. Choose the option From a custom URL, then copy and paste the URL from the Classroom interface. Click Save.
The extension should now appear in the list with its installation policy set to "Allow install".
If configuring the extension at the root, do not change it to "Force install" at this level, otherwise it will load for all users, not just students.
Now that the extension is defined, we can choose each OU where we want it to run for students and simply change it to "Force install" for each one. Navigate your organization's OU structure on the left to find the OU where you want to force install the extension. Usually this will be the highest level OU that contains your student accounts.
There is no harm in force installing the extension for teacher accounts too, but it's not necessary and may lead to confusion, so we recommend installing only for student accounts if your OU structure allows this.
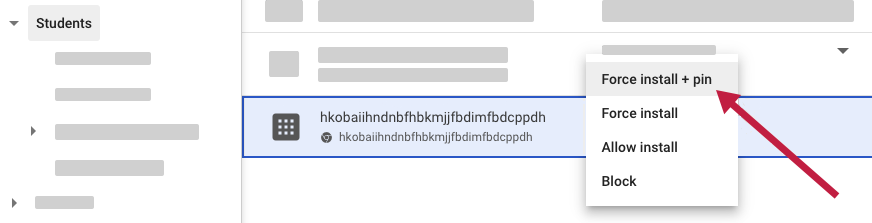
Now that you've selected the student OU, find the extension from the list and change the setting from "Allow install" to "Force install + pin".
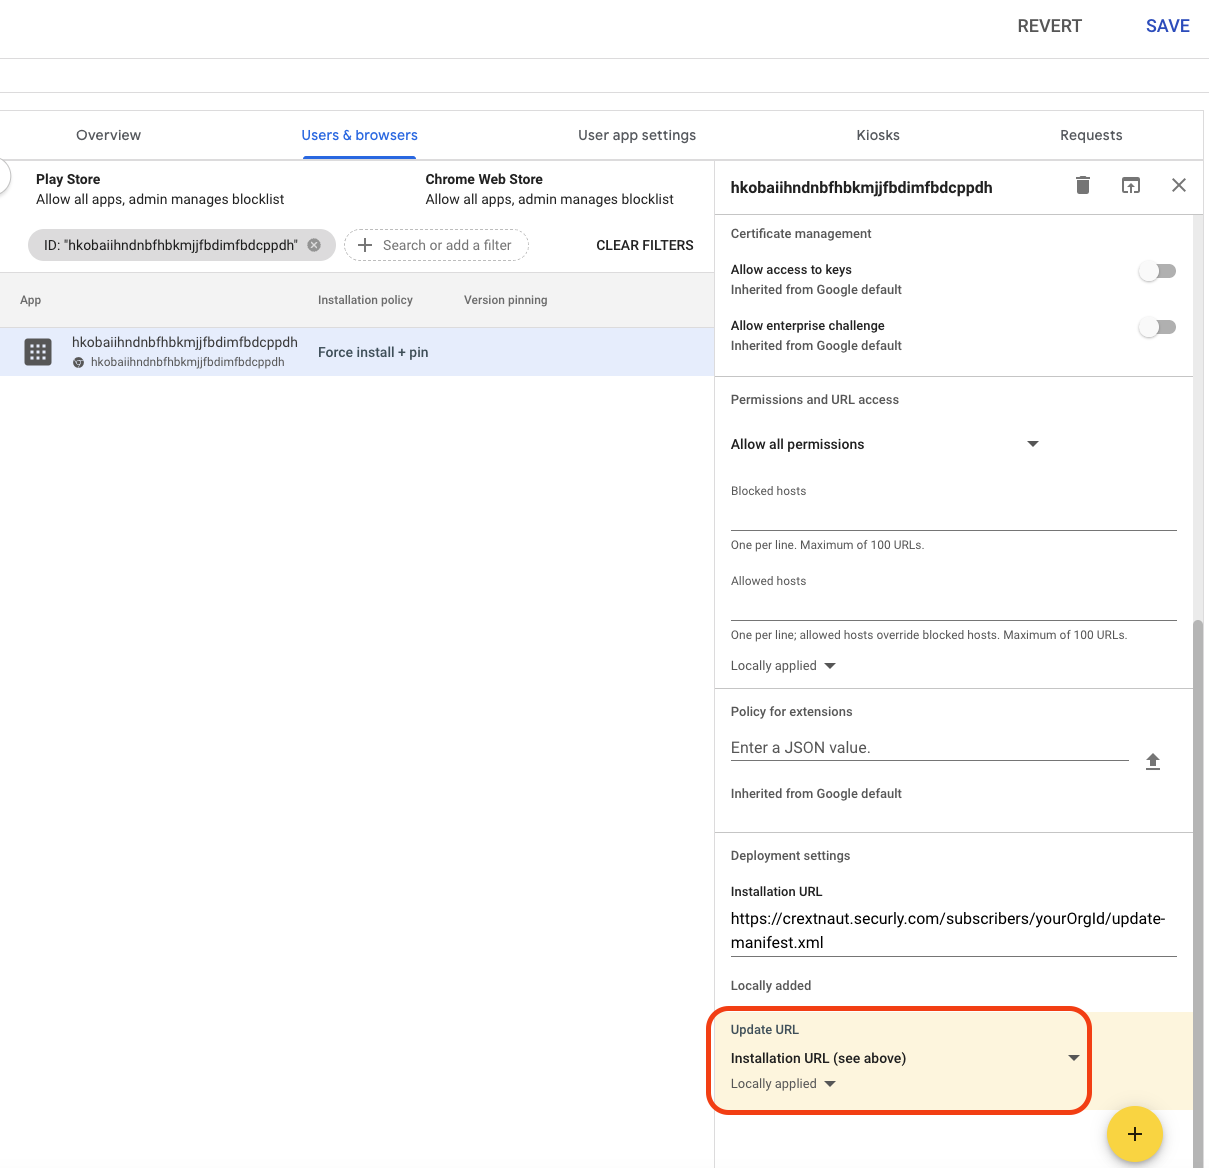
The last step is configure the extension's update URL. In the right-hand pane, scroll down to Deployment settings > Update URL and select “Installation URL”.
The OU is now configured to force load the extension for all users who login with IDs in the configured OU or lower.
Ensure Extension Syncing is enabled
In ChromeOS 140 and higher, Google has changed the way it enforces the Chrome Sync policy, resulting in the Securly extension lacking the necessary permissions to function properly. If extension syncing is not enabled from the Google Admin Console and a student disables sync for extensions from their browser settings, the extension doesn't function properly. To ensure extension syncing is active, follow the below steps:
-
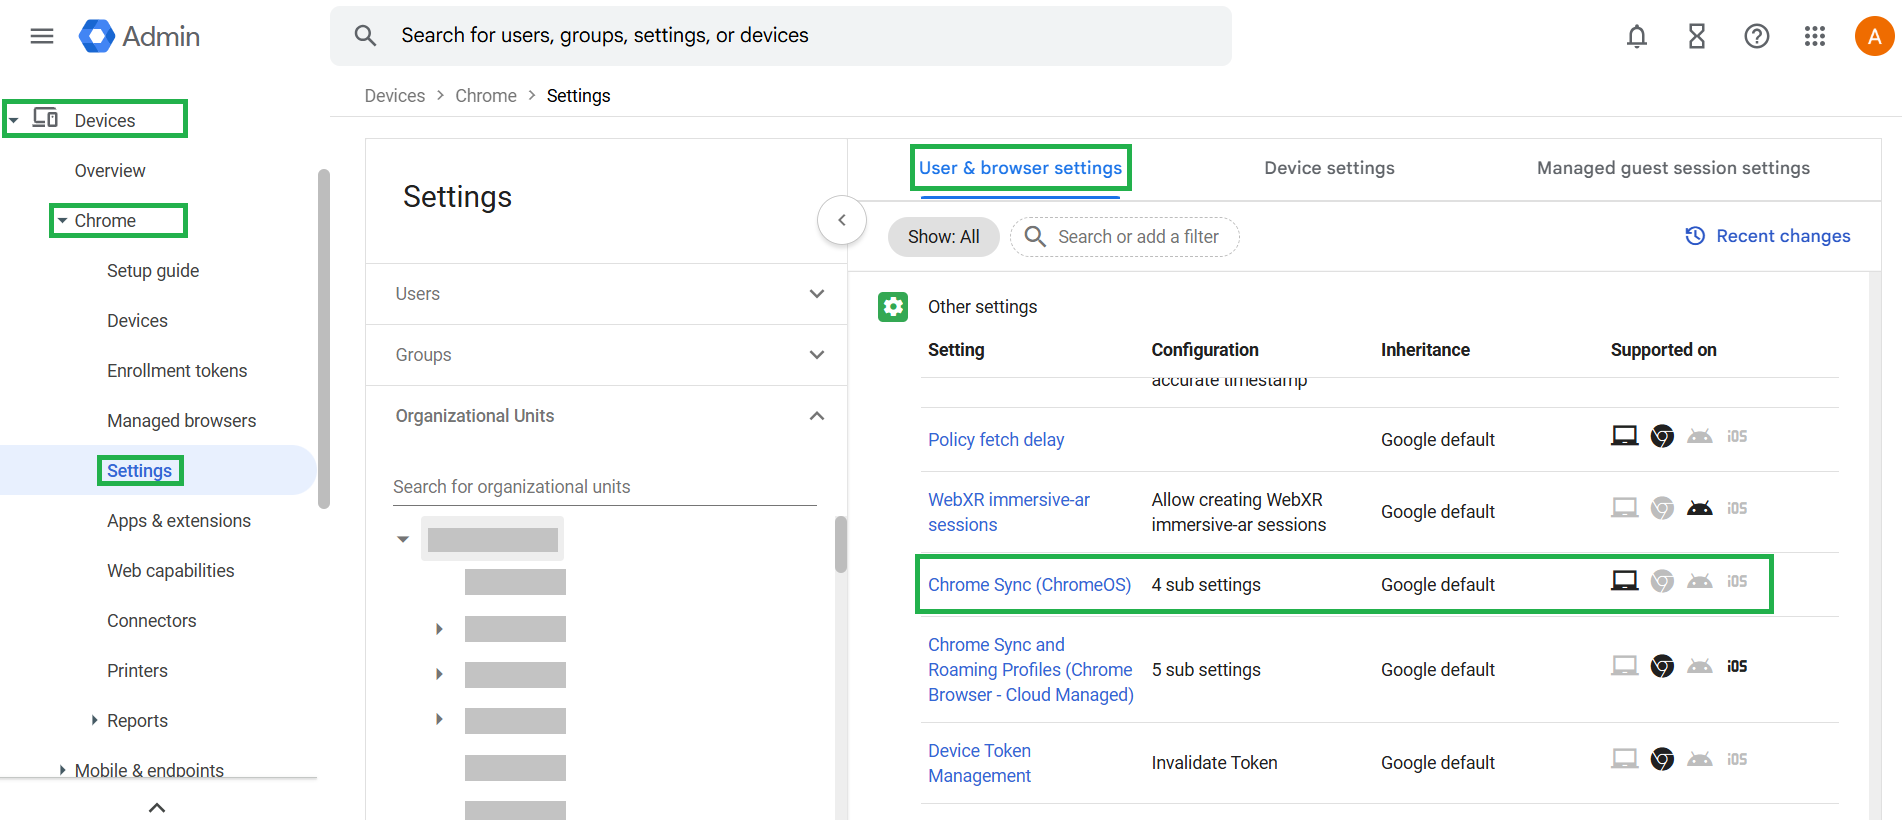
In Google admin console, navigate to Devices > Chrome > Settings > Users & browsers > Other settings > Chrome Sync (ChromeOS).
-
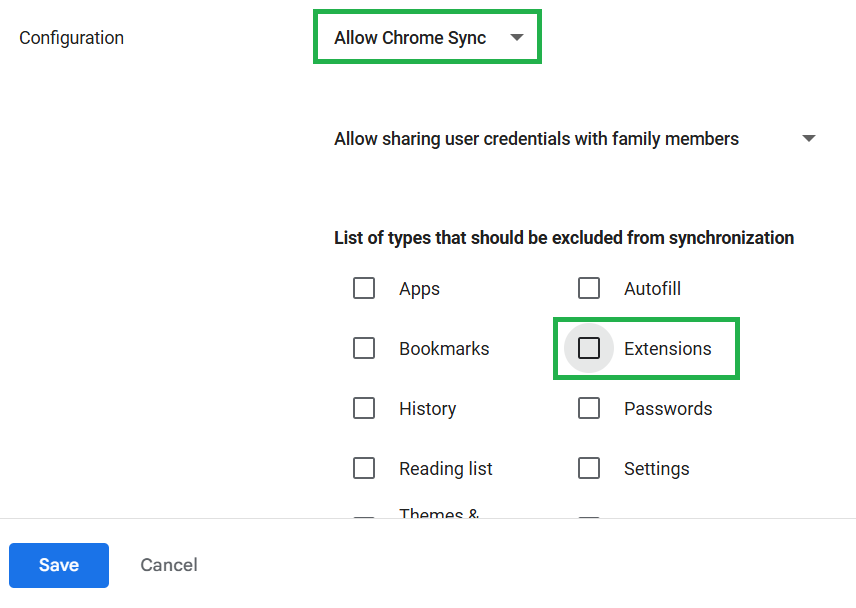
Ensure the ‘Allow Chrome Sync’ configuration is selected.
-
Uncheck ‘Extensions’ from the section for excluded sync types to ensure extensions are included in sync, and save your changes.