Whenever an admin creates a new custom policy, it is automatically assigned Priority 1 and the other policies move down the order accordingly. The alphanumeric indicator for each policy lets you know what the priority of a specific policy is. For example, P1 is Priority 1, P3 is Priority 3, P10 would be Priority 10, so on and so forth. The smaller the numerical value, the higher the priority of the policy.
If you have multiple custom groups and time-based policies configured for your school, it is important to understand that the policy prioritization logic will determine which policy is applied to your students at a particular time. For instance, when a user belongs to two groups/OUs, one indicating P3 and the other P10. In that case, the policy marked P3 will take precedence over P10, irrespective of whether it is a time-based policy or a policy assigned to a custom group.
To make the most out of the time-based policies, make sure you assign them a higher priority than policies assigned to custom groups or other OUs.
You can assign different priorities to the various policies in few easy steps:
-
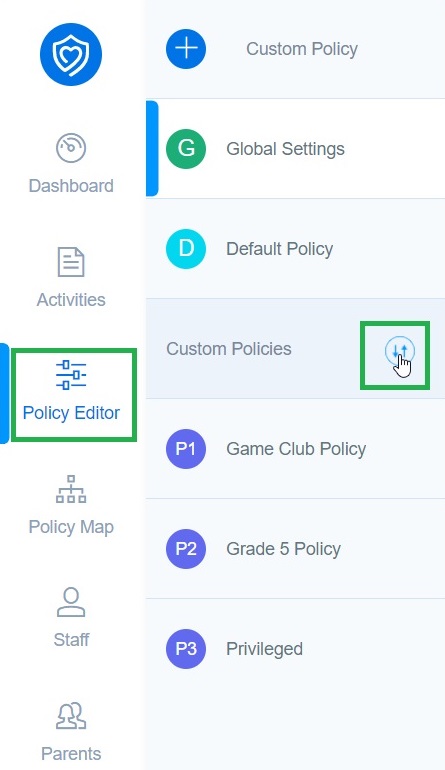
Navigate to the Policy Editor.
-
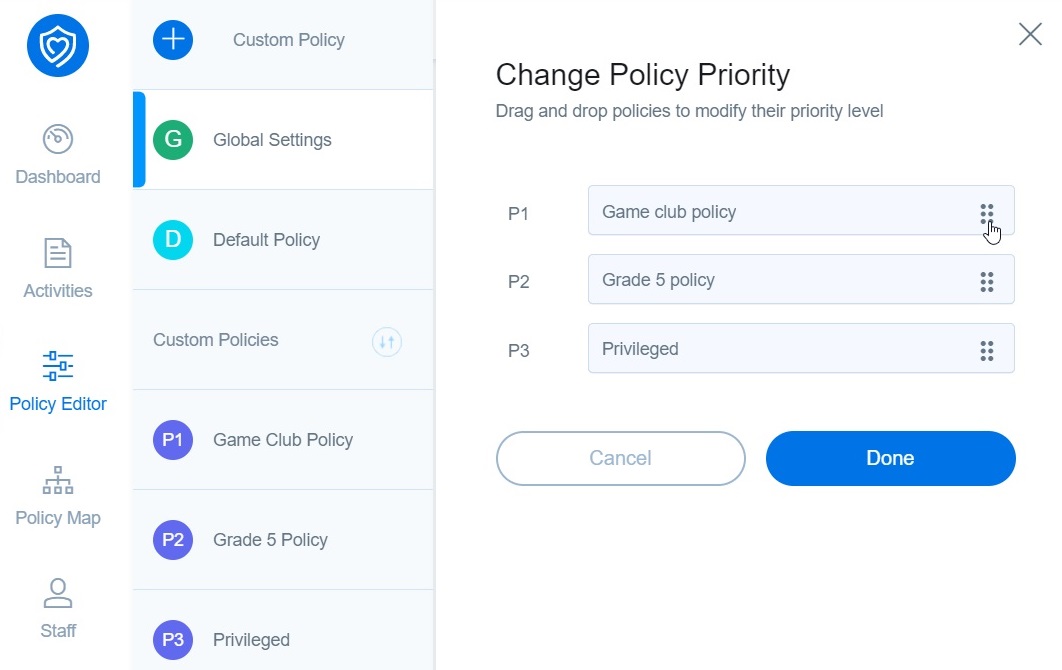
Click the change priority icon to open the Change Policy Priority dialog box.
-
Simply drag and drop the policies to change their sequence and click Done to apply the changes.