Deploying SmartDNS on iOS devices
Deploying Securly SmartDNS to multiple iOS devices in a school environment primarily involves using a MDM solution.
- MDM Setup: Ensure your iOS devices are enrolled in an MDM (like Jamf, Mosyle, or Meraki).
- Obtain the Securly SmartDNS IP addresses from Securly Support. For off-campus filtering, it is recommended to use the SmartPAC deployment.
- Create MDM Profiles
- Install the Securly SSL certificate to your iOS devices via an MDM.
- You can then add Securly DNS in the DNS settings of the MDM.
- Assign profiles to the appropriate groups of iOS devices.
- Network Configuration: Ensure your network firewall blocks other DNS servers to prevent bypasses.
Deploying SmartDNS on a single iOS device
To setup Securly DNS on an iOS device, follow the steps below:
-
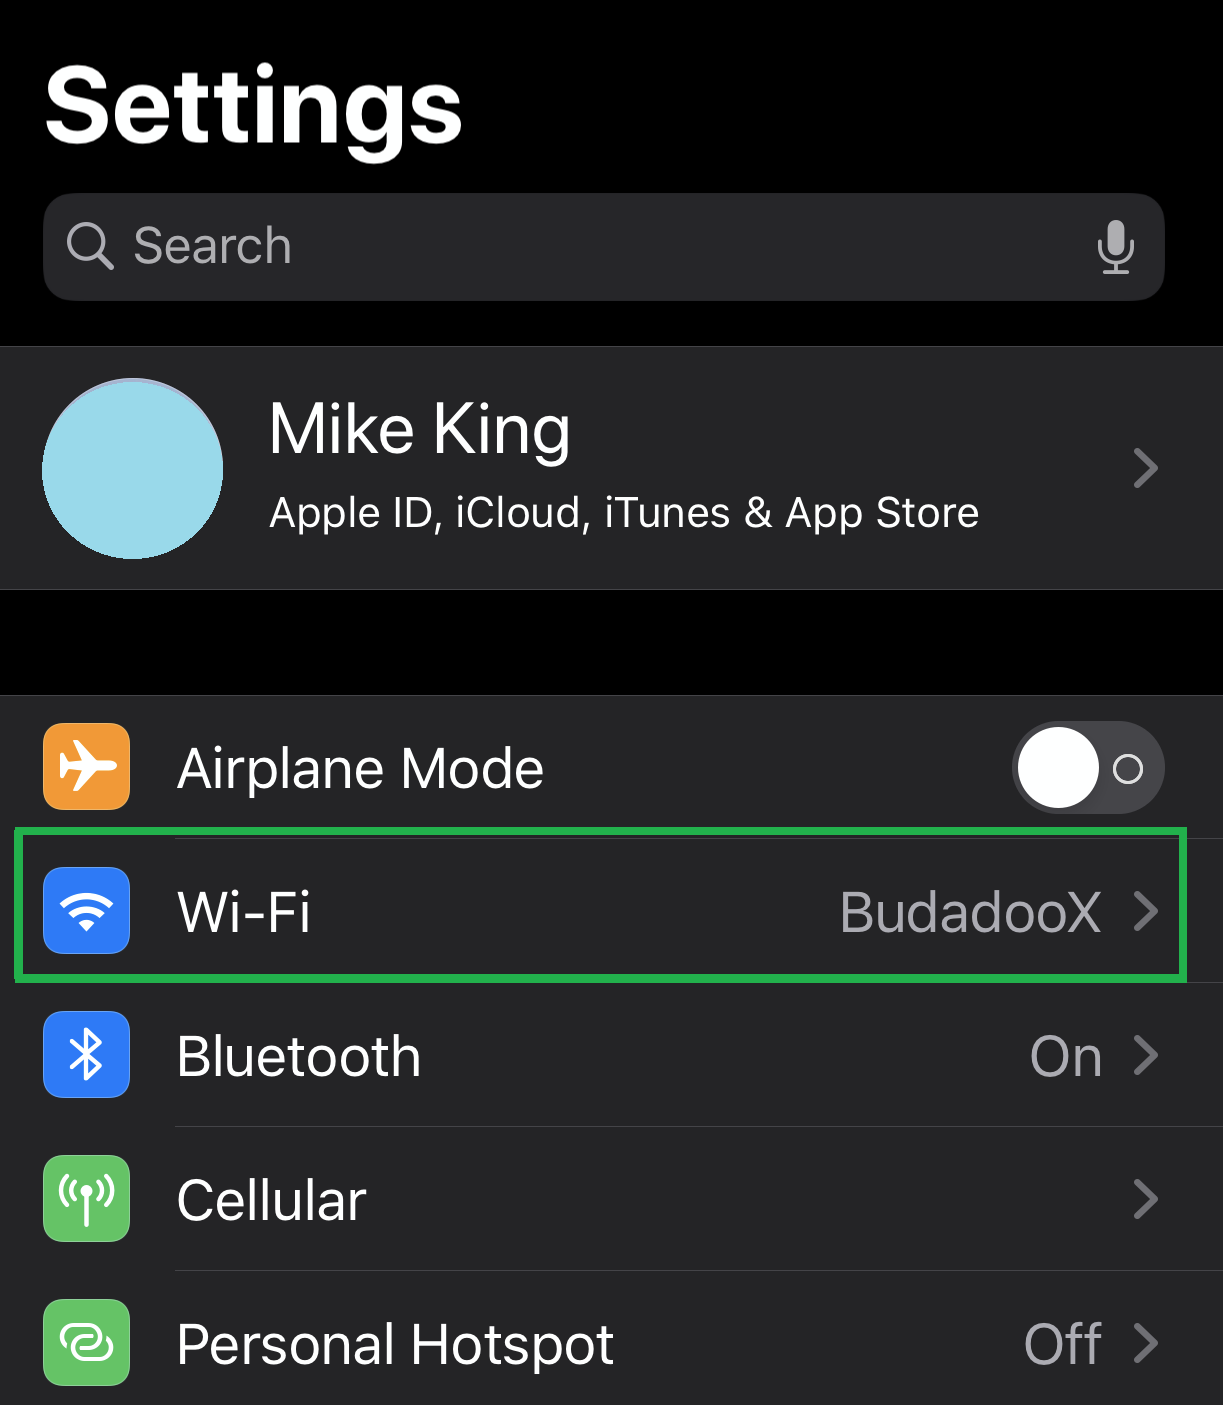
Open the Settings app and choose 'Wi-Fi'.
-
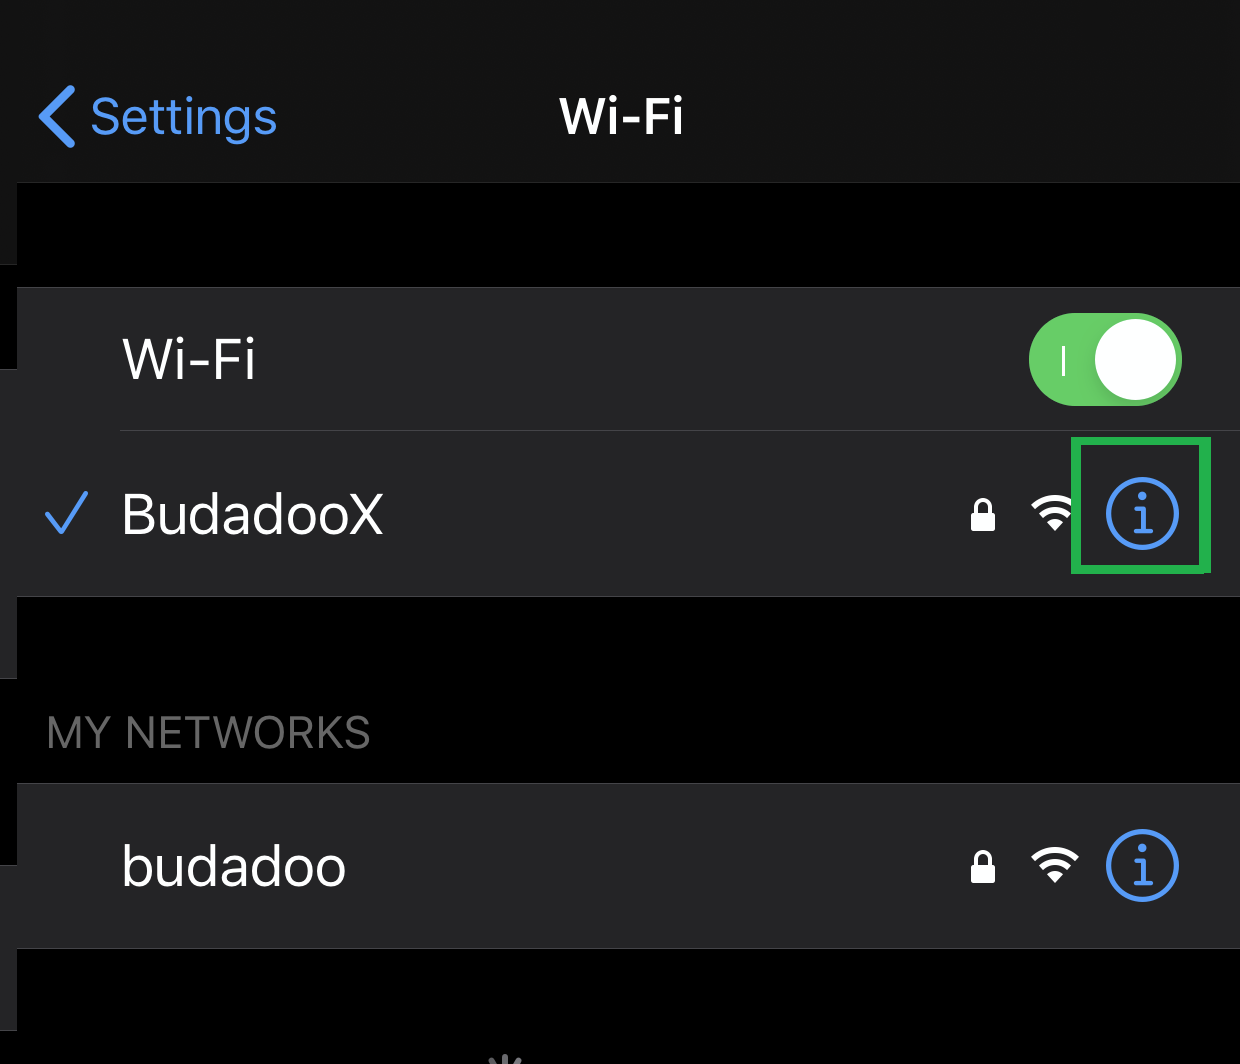
Select the connected Wi-Fi SSID by clicking on the “i” symbol.
-
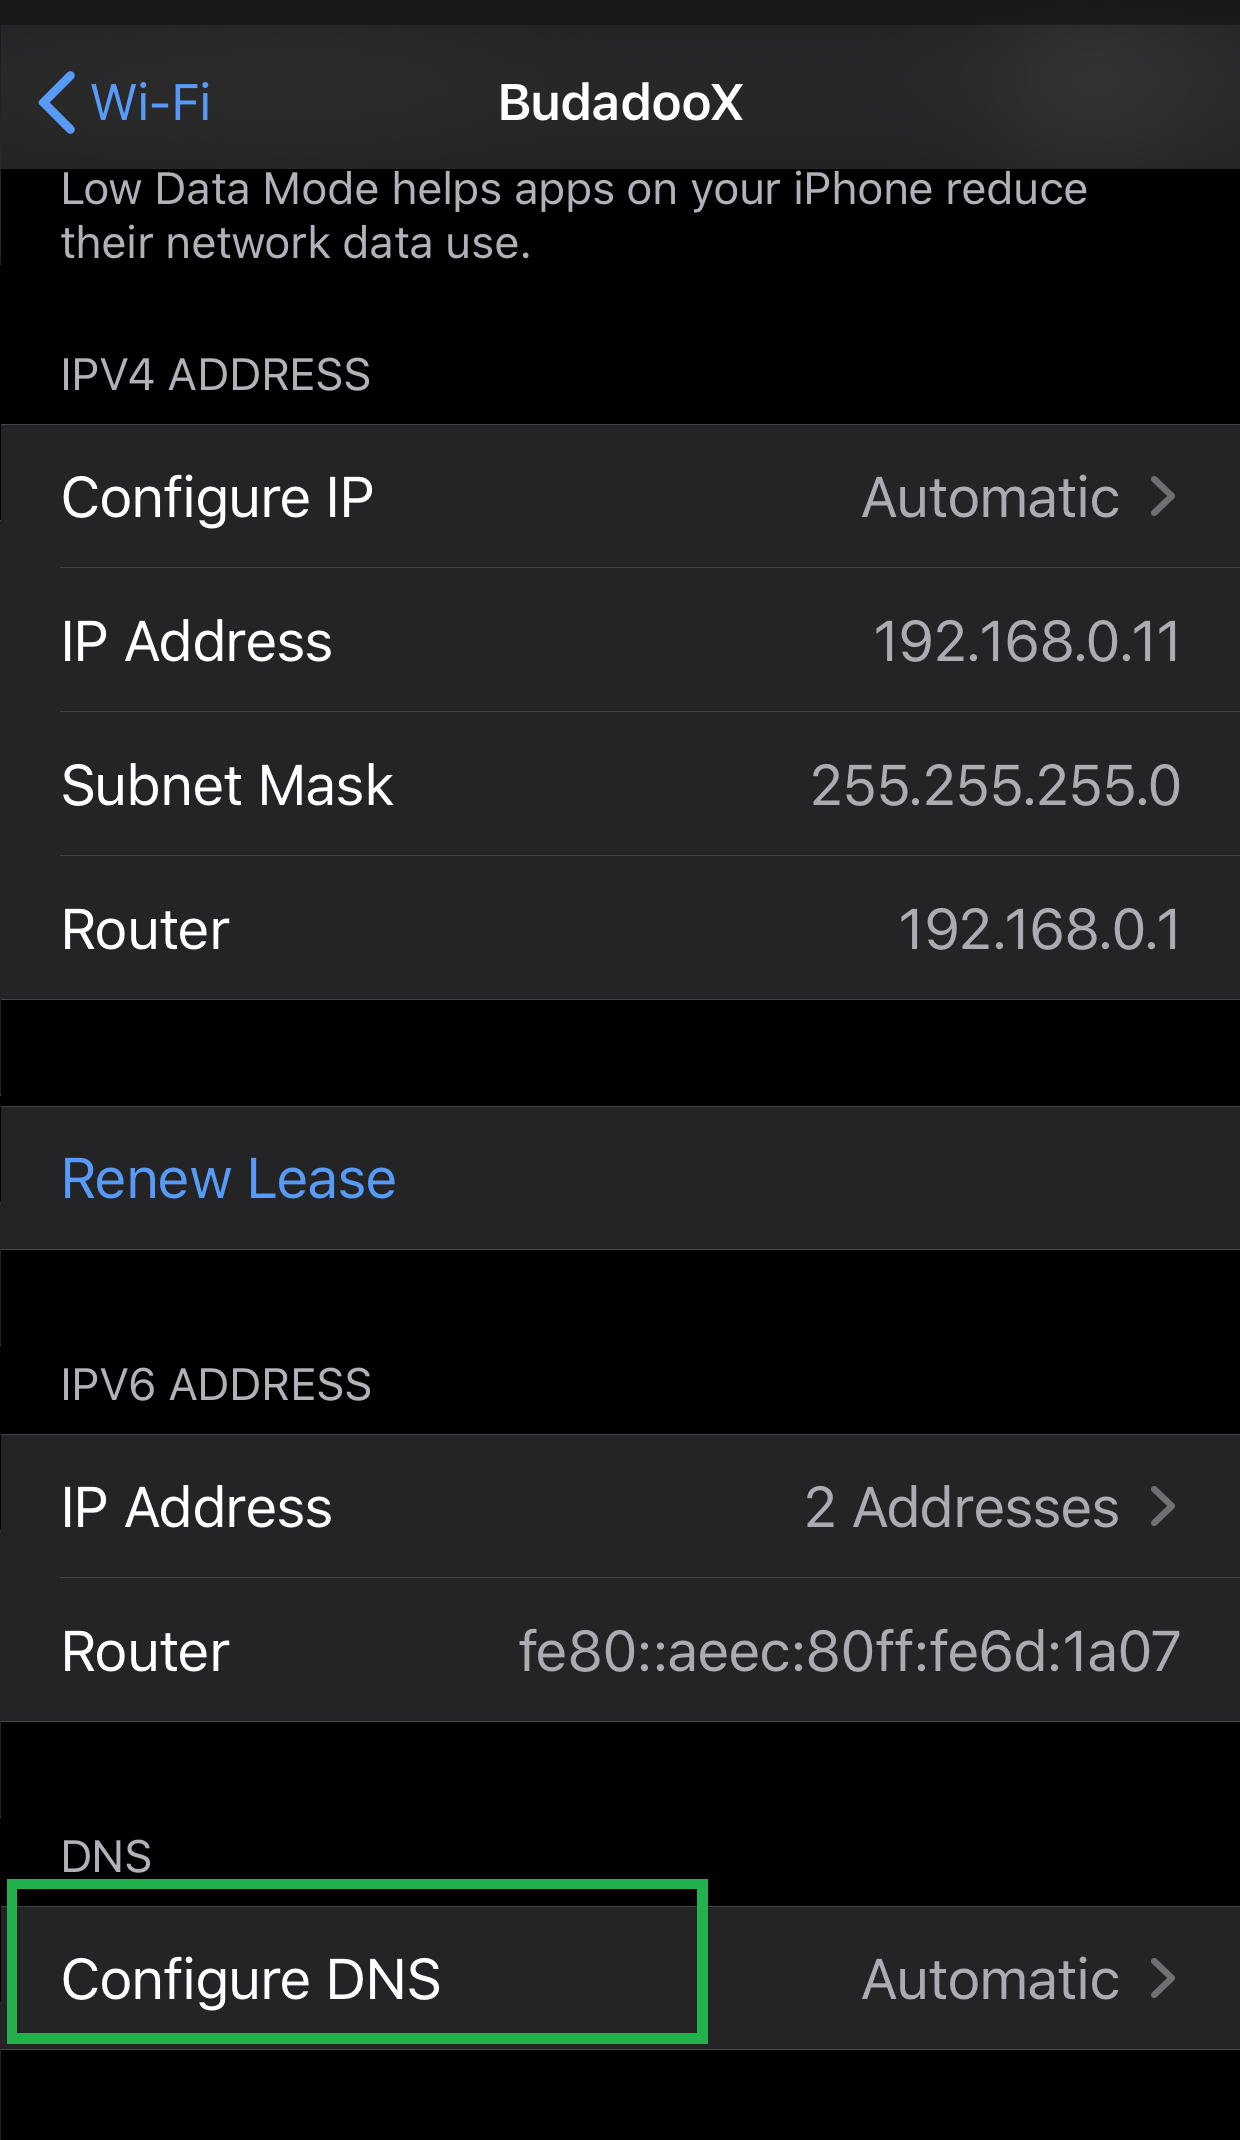
Scroll to the bottom of the options and select 'Configure DNS'.
-
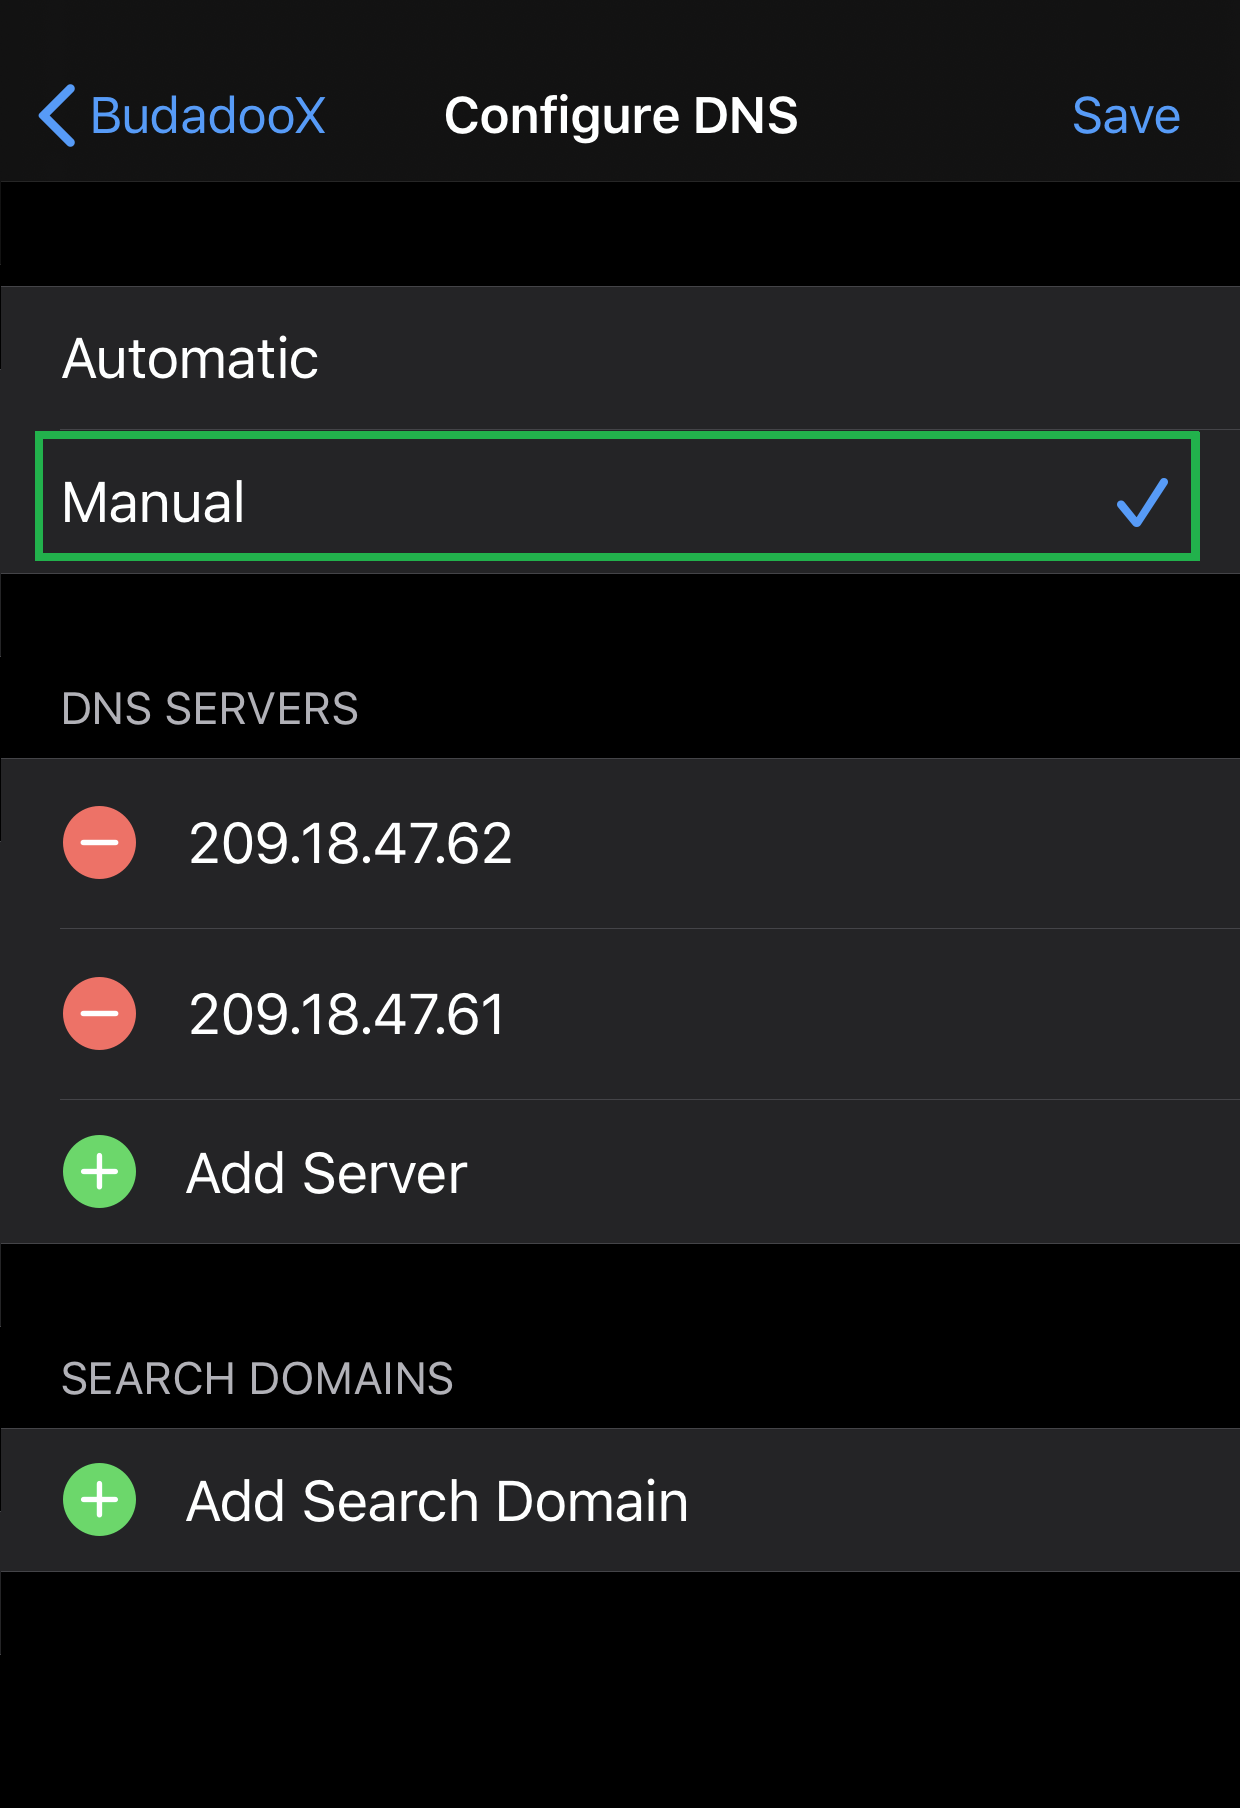
Select Manual.
-
Remove the current DNS servers. Enter the new DNS server IPs and click on 'Save'.