Deploying SmartDNS on a group of Mac devices
Deploying Securly SmartDNS to a group of macOS devices requires a different approach than Windows Group Policy. macOS environments rely heavily on Mobile Device Management (MDM) solutions and Configuration Profiles.
Using a Network DHCP for On-Campus filtering
The most robust way is to configure your school's DHCP server to hand out your internal DNS server's IP addresses, and those internal DNS servers should then forward all requests to Securly. This is the default and most secure method for on-campus filtering.
If you force all network traffic to go through your internal DNS servers, and those forward to Securly, it's very difficult for a user to bypass filtering by changing their device's DNS.
No specific MDM profile needed for DNS if your network DNS is properly configured.
Direct DNS Configuration via MDM
In your MDM:
- Create a new 'Network' or 'DNS' configuration profile.
- Configure DNS Settings: Enter Securly's primary and secondary DNS IP addresses that you recieve from the Securly Sales/Support team.
- Consider Per-Interface vs. Global: Some MDMs allow you to configure DNS per network interface (Wi-Fi, Ethernet) or globally.
Deploying SmartDNS on a standalone Mac device
To set up Securly DNS on your macOS, follow the steps below:
-
Navigate to System Preferences.
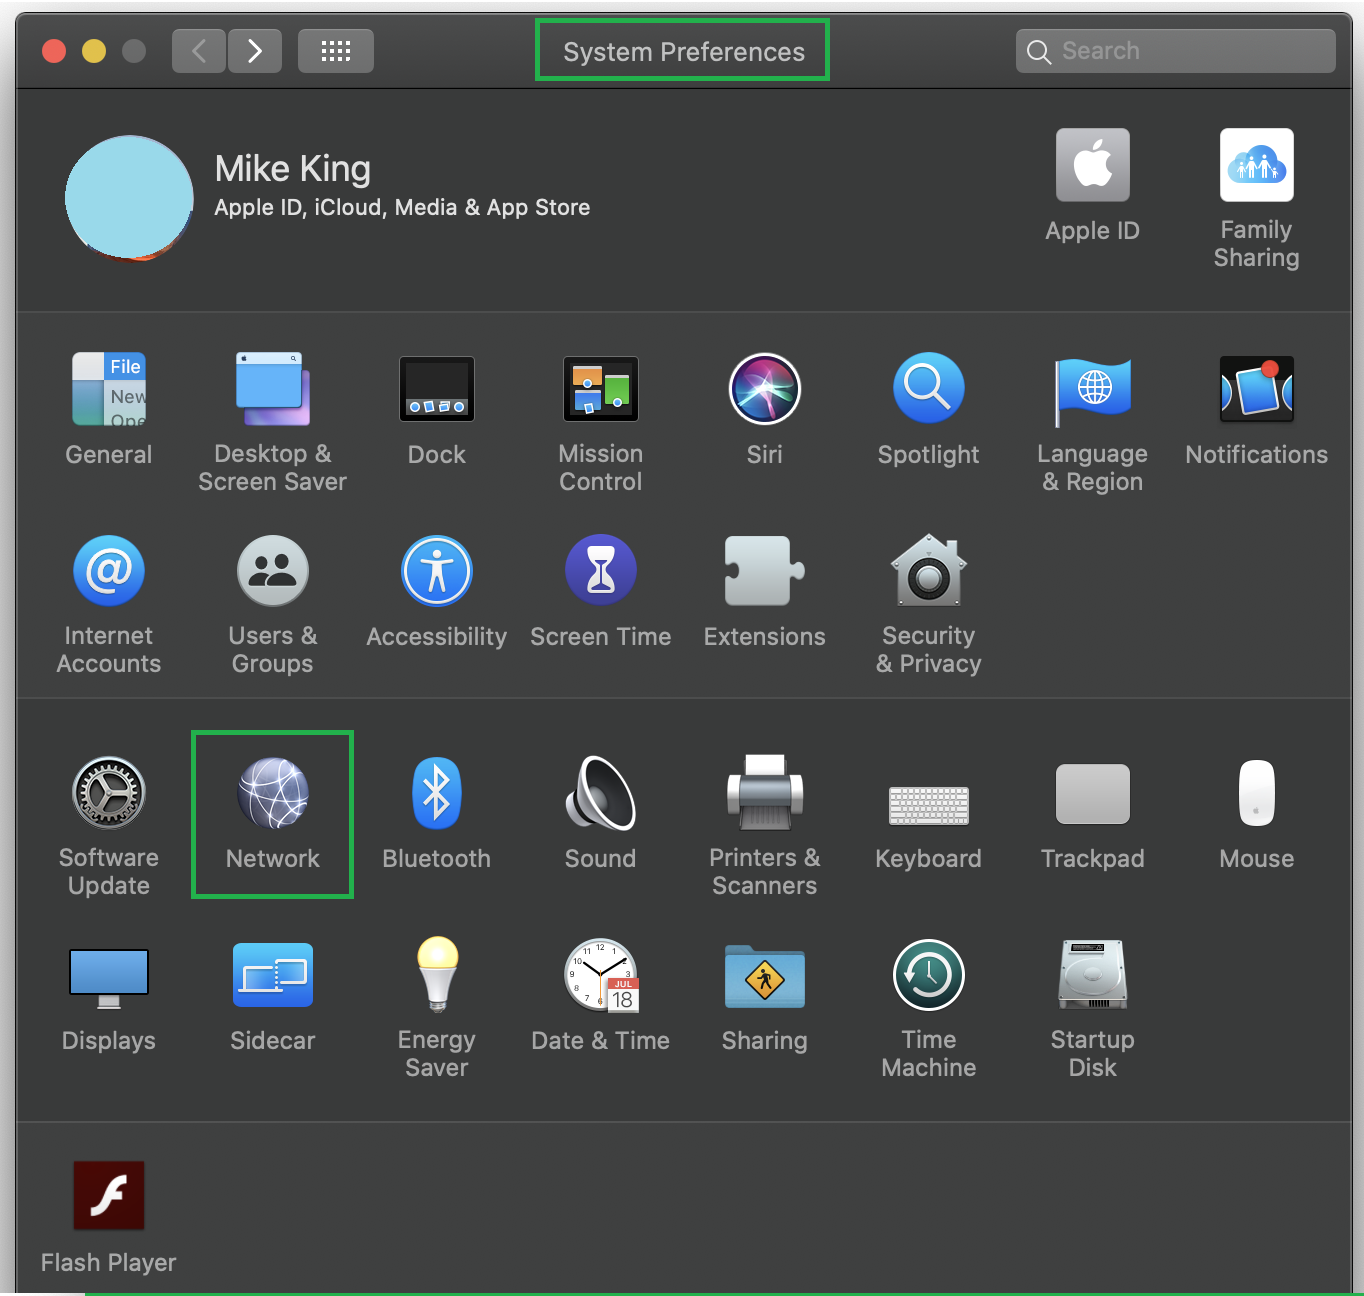
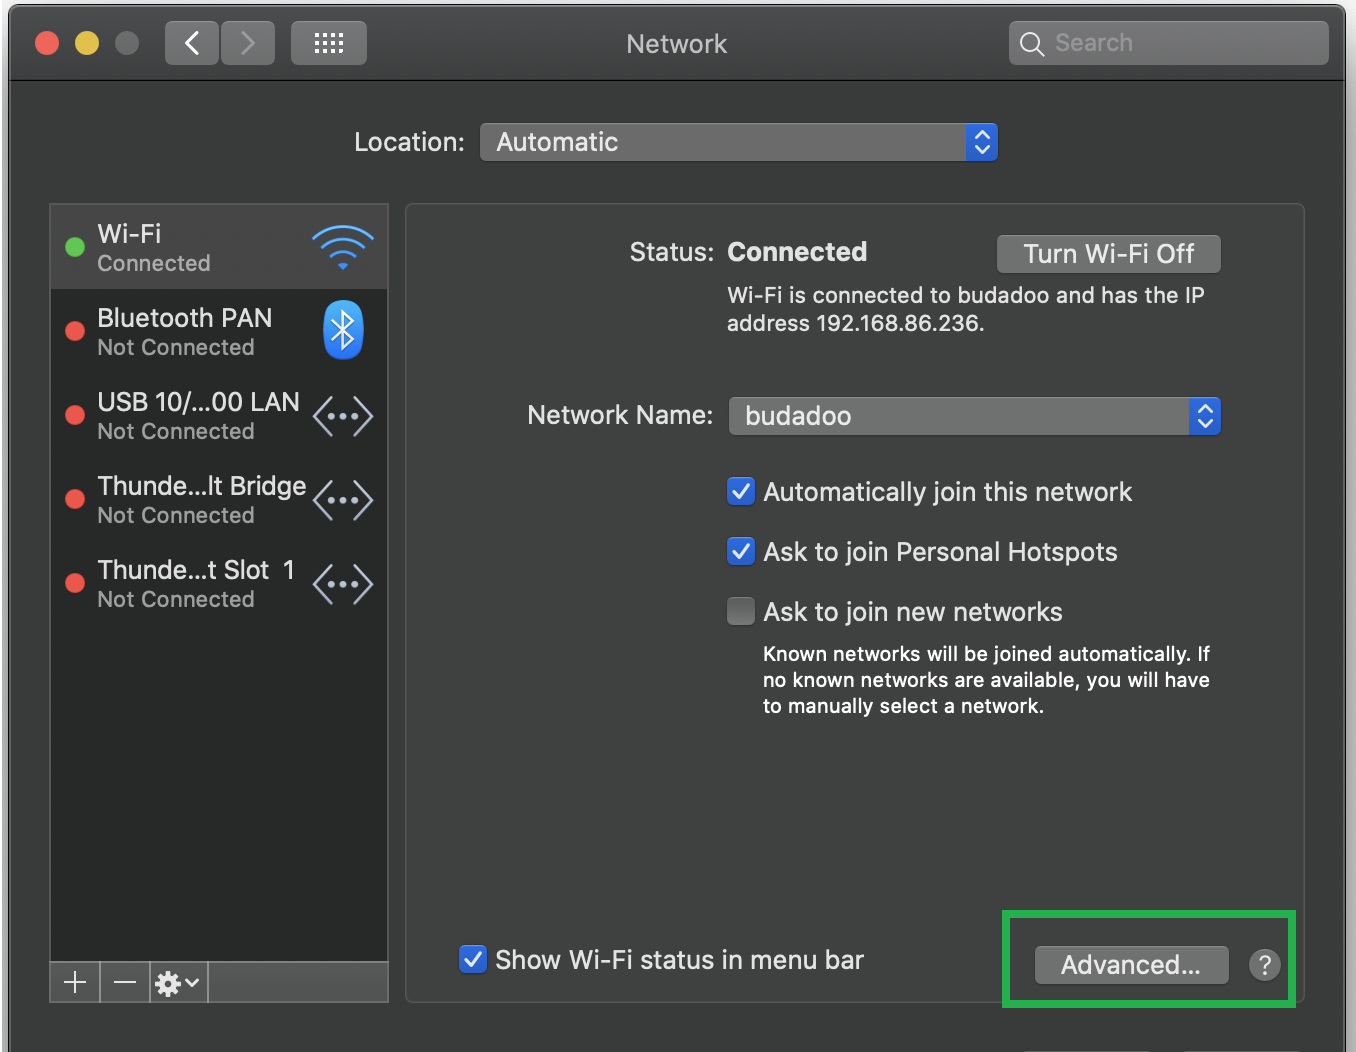
-
Open the Network and click on Advanced.
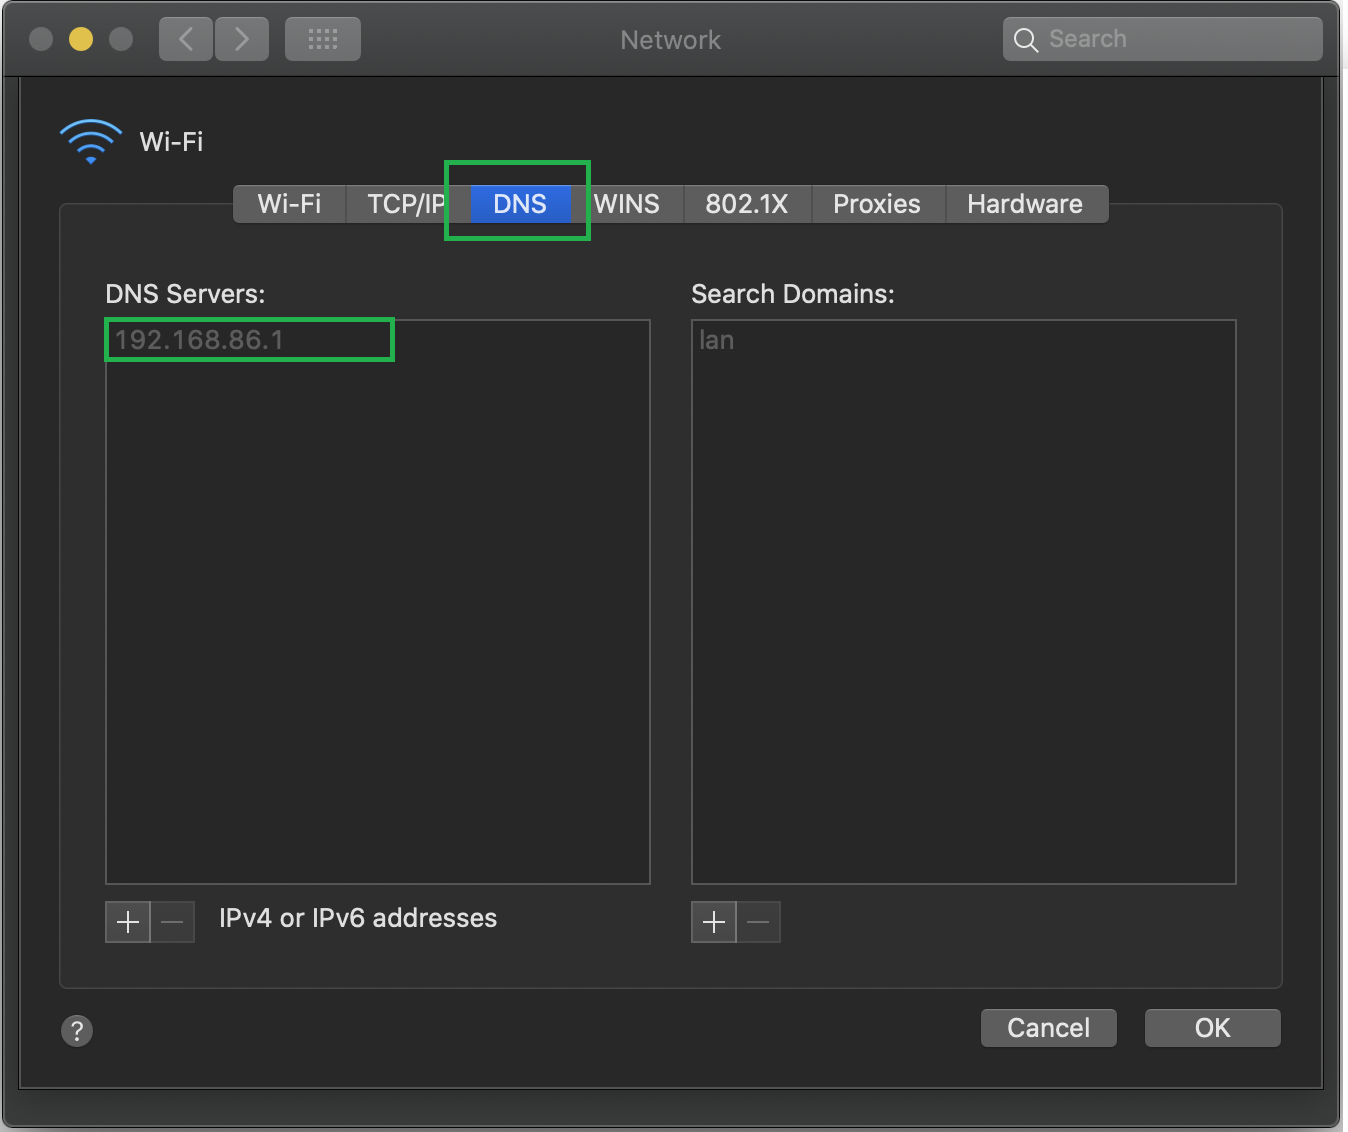
-
Select DNS and enter the DNS server IPs provided by your Securly Support representative. The DNS servers shown in the screenshot are only examples.