Securly Flex is a browser-based system for managing flexible activity periods. This guide covers how to create, manage, and schedule your choice and mandatory activities. Please see the “Typical Day in Flex” video for more details.
Logging into Securly Flex
Access Securly Flex by going to https://flex.securly.com/login. Select the login option that applies to your school and enter your credentials.
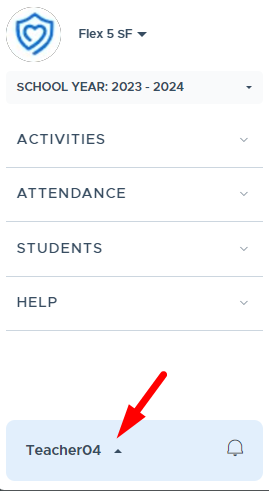
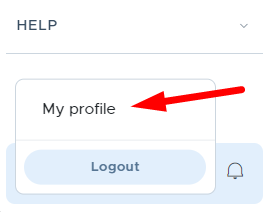
When you first log into Flex, be sure to update your profile to include your default room and your title. Navigate to this option by clicking on your name in the bottom left, clicking My Profile, then add to or edit the information, and click Update to save the change.

You can return to your Profile screen to update information as needed.
Flex Process Overview (The Basic Activity Steps)
- Consider what students you will need
- Create the Activity
- Schedule the Activity
- Student registers for an Activity or is assigned to a mandatory Activity
- Take Attendance
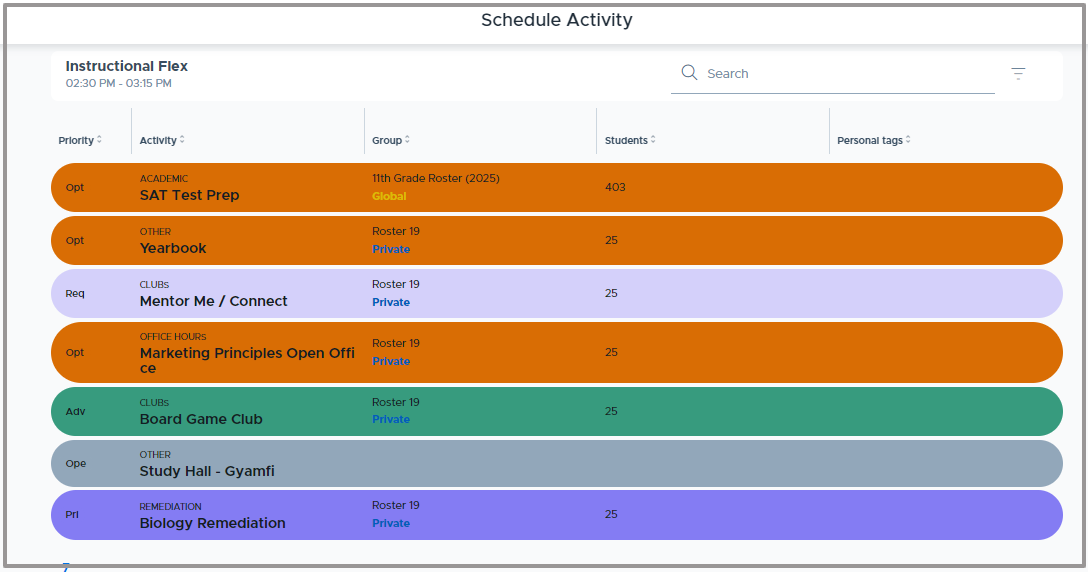
Please follow any school guidelines when creating an activity and setting the priority level. Schools can hide or rename priority levels, so the options available may vary but the color and functionality will remain the same. The screenshot below shows the standard color legend located at the bottom of the My Schedule screen. For more details please refer to the “Priority Level Guide” - also available in the Help section of Flex.

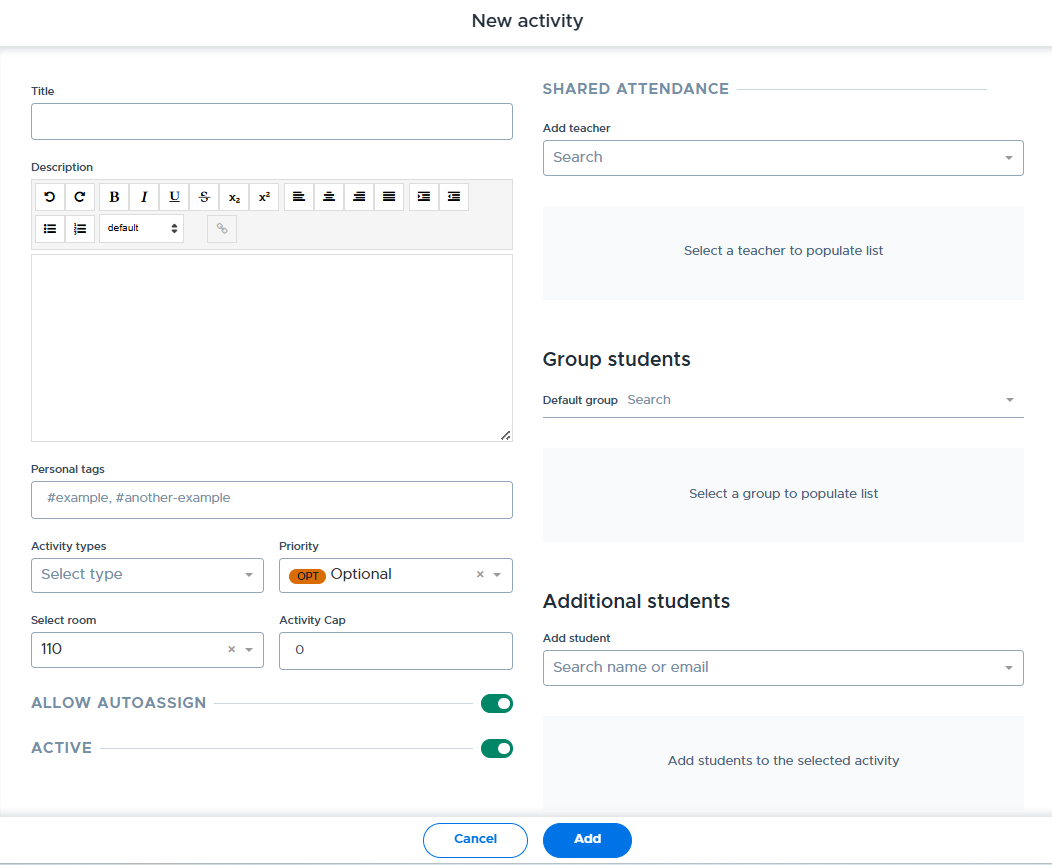
- Navigate to Activities > Activities List > New Activity.
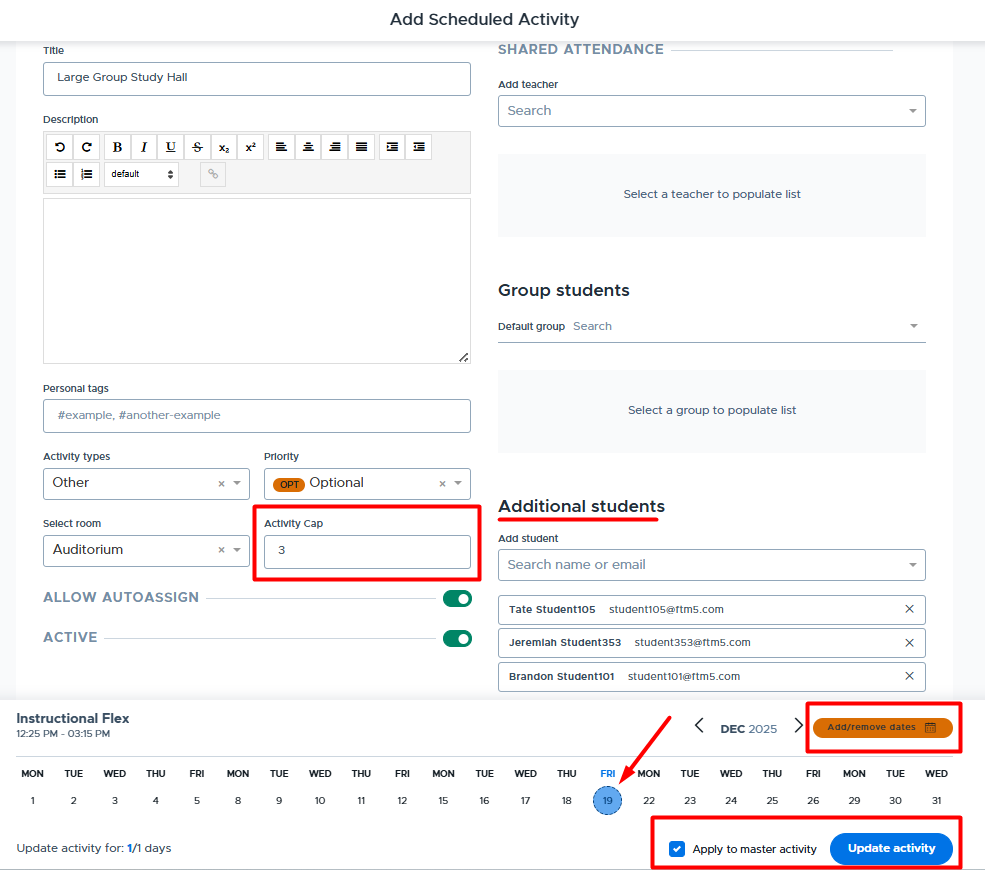
- Complete the screen shown below. Enter the details about the activity you wish to offer, then click Addto add this to your Activities List.
- Attaching a Group to an activity is optional.
- Students can be added via a Group or Additional Students - when creating the activity, when scheduling the activity, or by updating an activity that is already scheduled.
How to Create & Manage Groups
A Group is a list or roster of students that can be created and attached to an Activity. All priority levels, other than Open and Plus Add, can use a Group to push the activity out to the students’ calendars. Groups are advantageous when an adult is working with the same group of students repeatedly or when the students needed in an activity don't change frequently.
- If students will change frequently, use the Additional Students section of the Activity screen. Do this when scheduling the activity or by updating the scheduled activity before the cutoff time.
There are a few ways to create a Group in Flex:
A Group can be created from the “New Activity” screen, shown below. Please see the How to Create an Activity video for details.
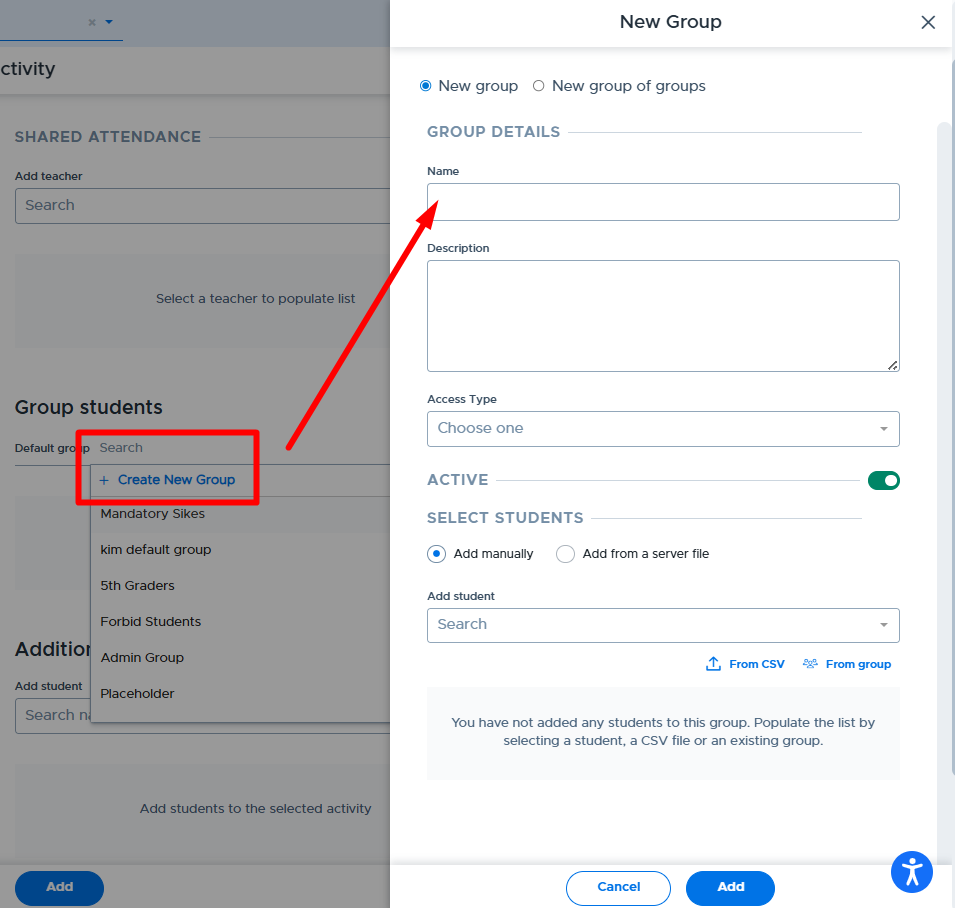
- Navigate to Students > Groups > Add - New group.
- Add a Name and Description.
- Select if this group will be Private, Global, or Shared.
- Start typing in the names of the students you wish to add to the Group and click on the name(s). When finished click Add.
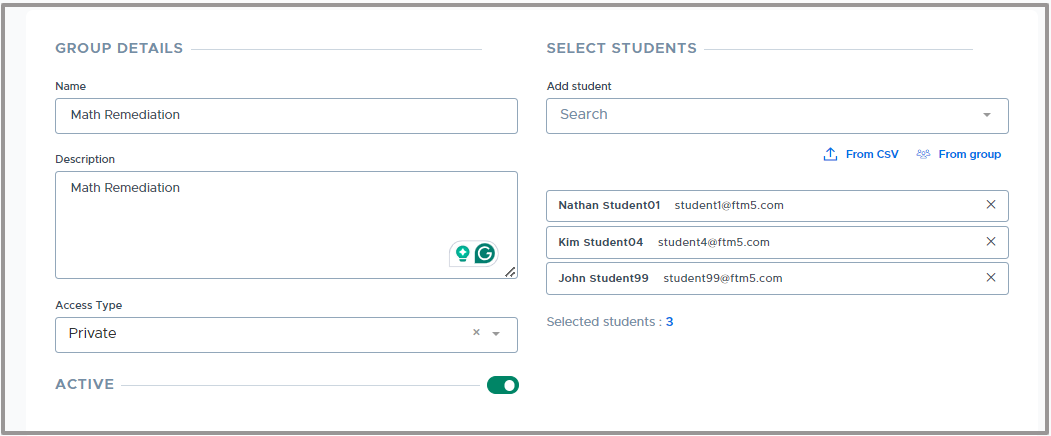
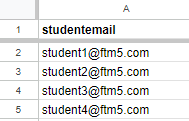
- If there are a large number of students to add to the Group, you can upload a CSV file of students with the student email addresses or ID numbers. See the linked instructional video and the example format shown below.
- To learn more about Groups in Flex, please see the following videos:
- Navigate to Activities > My Schedule and find the flex period and date you wish to schedule an activity.
- Click the Schedule Activity button.

- Your list of activities will appear. Click the one you wish to schedule.
- After selecting the activity, you can click Update activity to schedule the activity for the single date selected.
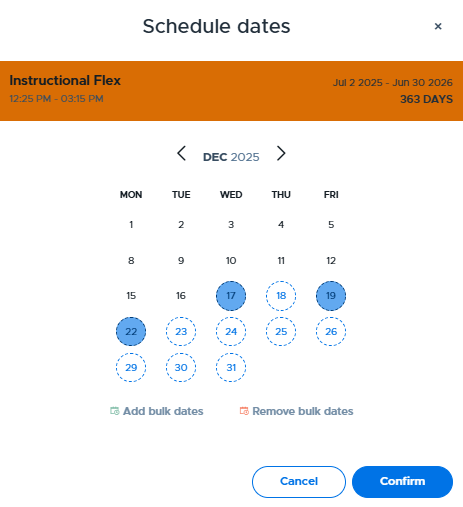
- To schedule the activity for multiple dates, select the Add/Remove Dates button and select additional dates. (There is also an Add bulk dates option in this window.)
- Edits can be made to the activity details from this screen during the scheduling process. If you don’t wish for those changes to apply to the master activity, deselect the Apply to master activity checkbox.
- This is when you might need to add Additional Students to your activity and be sure to update the Activity Cap field if needed.
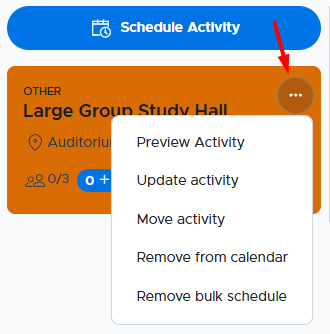
- Once scheduled, the activity appears on your calendar. Click the three dots to see details and access additional functionality.
- To schedule more than one activity on the same date and flex period, simply click on the Schedule Activity button again and select the desired activity. Multiple activities can be scheduled during the same flex period.
- When multiple activities are scheduled in the same room during the same flex period, the system will prompt for a “Room Cap” to be set. Please see this Room Cap video for more details.
- Please see the following videos for information about Editing an Activity and Editing Groups.
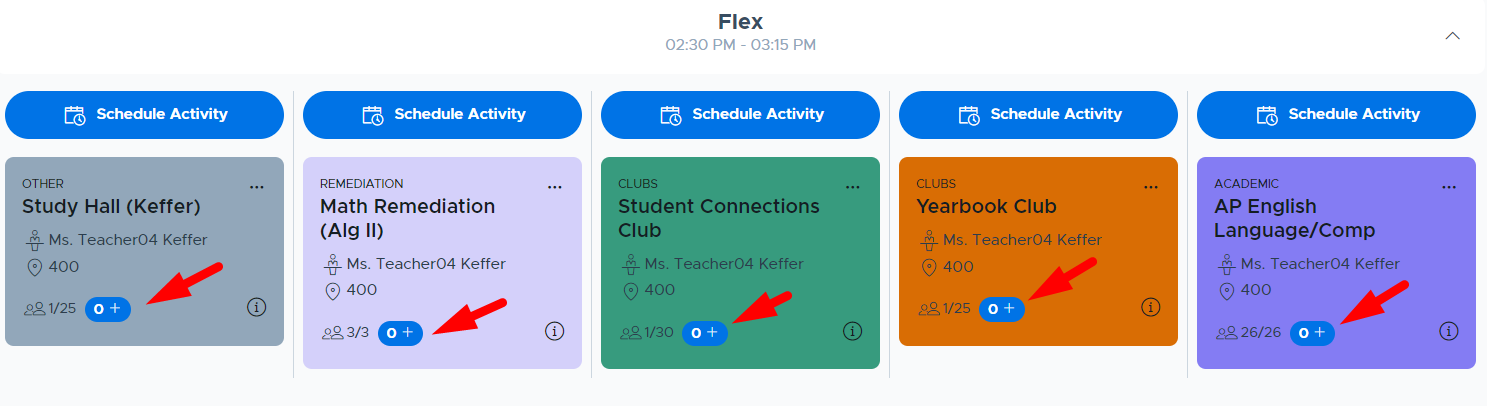
The Plus Add feature can be used to add “available” students to scheduled activities. Students are “available” if they are not scheduled in a higher priority activity or “plus added” by another teacher. The plus add feature is often used to have students make up work or join an activity at the last minute.
Teachers access the plus add function by clicking the + button on the scheduled activity (shown below) or from the Student Attendance screen. When a student is “plus added” to an activity, it shows at the blue “Plus Add” priority level on the student’s schedule. Teachers can plus add available students before and after the school’s cutoff time. (This Plus Adding Students video below explains more details.)
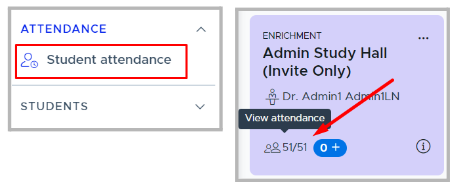
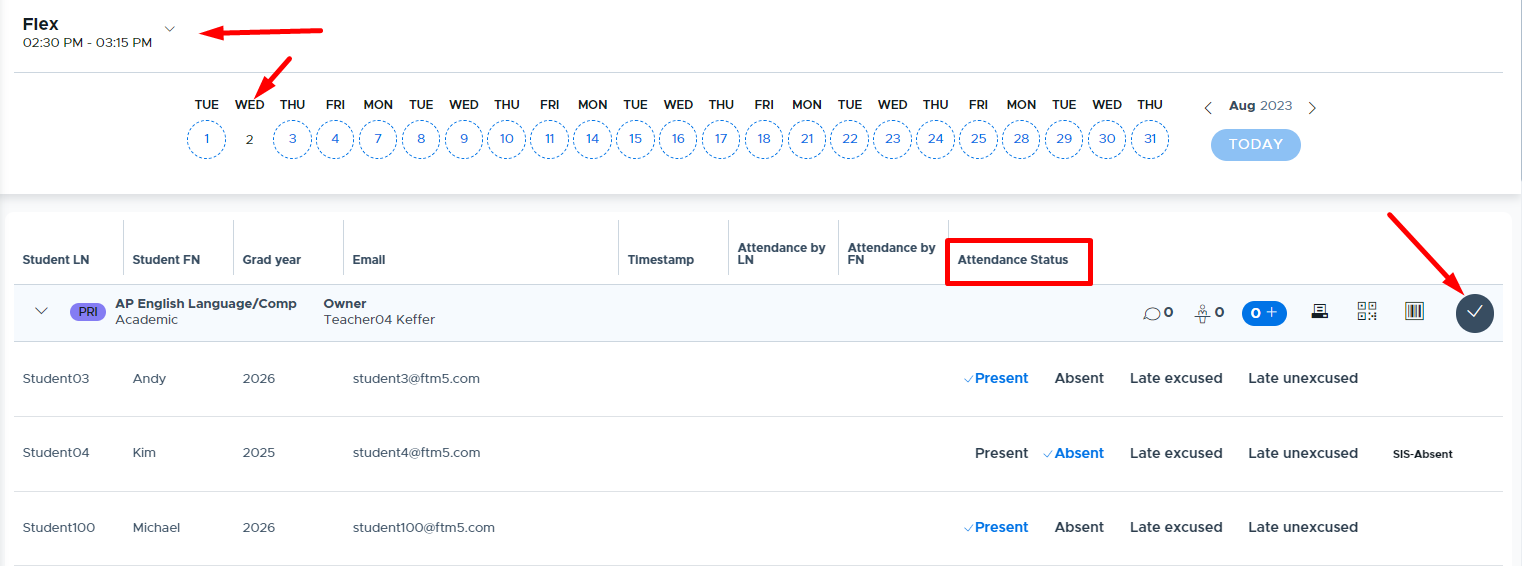
- Click on the Student Attendance menu option and select the correct date to access the attendance list(s). Or click on the View Attendance link from the scheduled activity. Both are shown below:
- From the attendance screen, make the appropriate selection in the Attendance Statuscolumn for each student, then click the gray “Submit for Activity" button at the top. You can also submit the attendance individually for each student by clicking the blue circle instead.
- If you navigate to this screen from the side menu, you may need to select the correct flex period from the top dropdown list if your school has more than one flex period.
- If necessary, you can come back to this screen multiple times, to update the attendance status and resubmit your attendance.
- You can submit attendance for past dates if necessary, but new students cannot be added and attendance cannot be submitted for future dates.
- You may receive same-day or next-day email reminders to take attendance if your administration has decided to utilize these features.
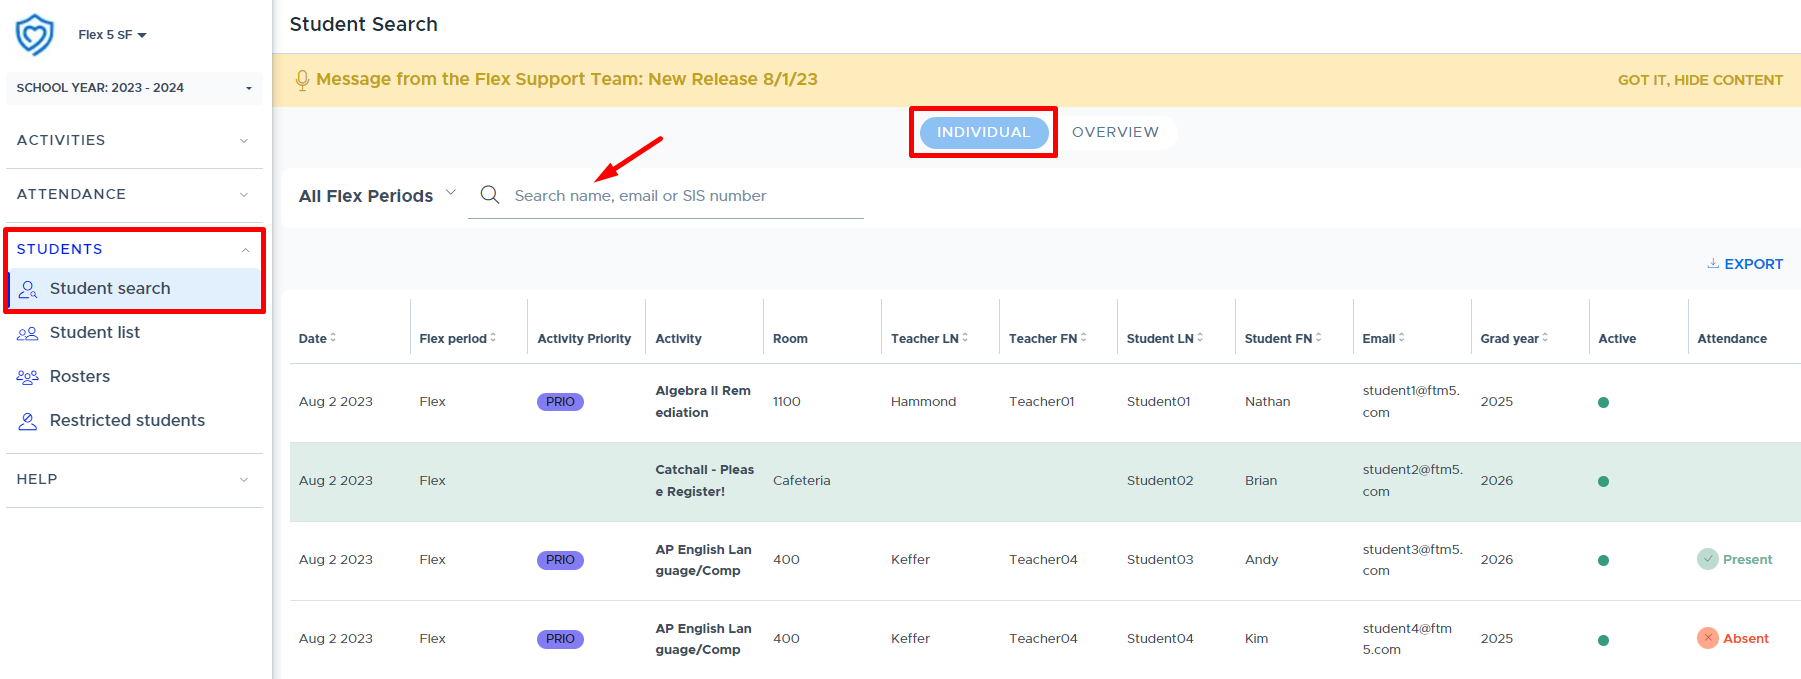
Student Search / Overview Search
The Students > Student Search menu provides a way to search students’ past, present, or future registrations in Flex.
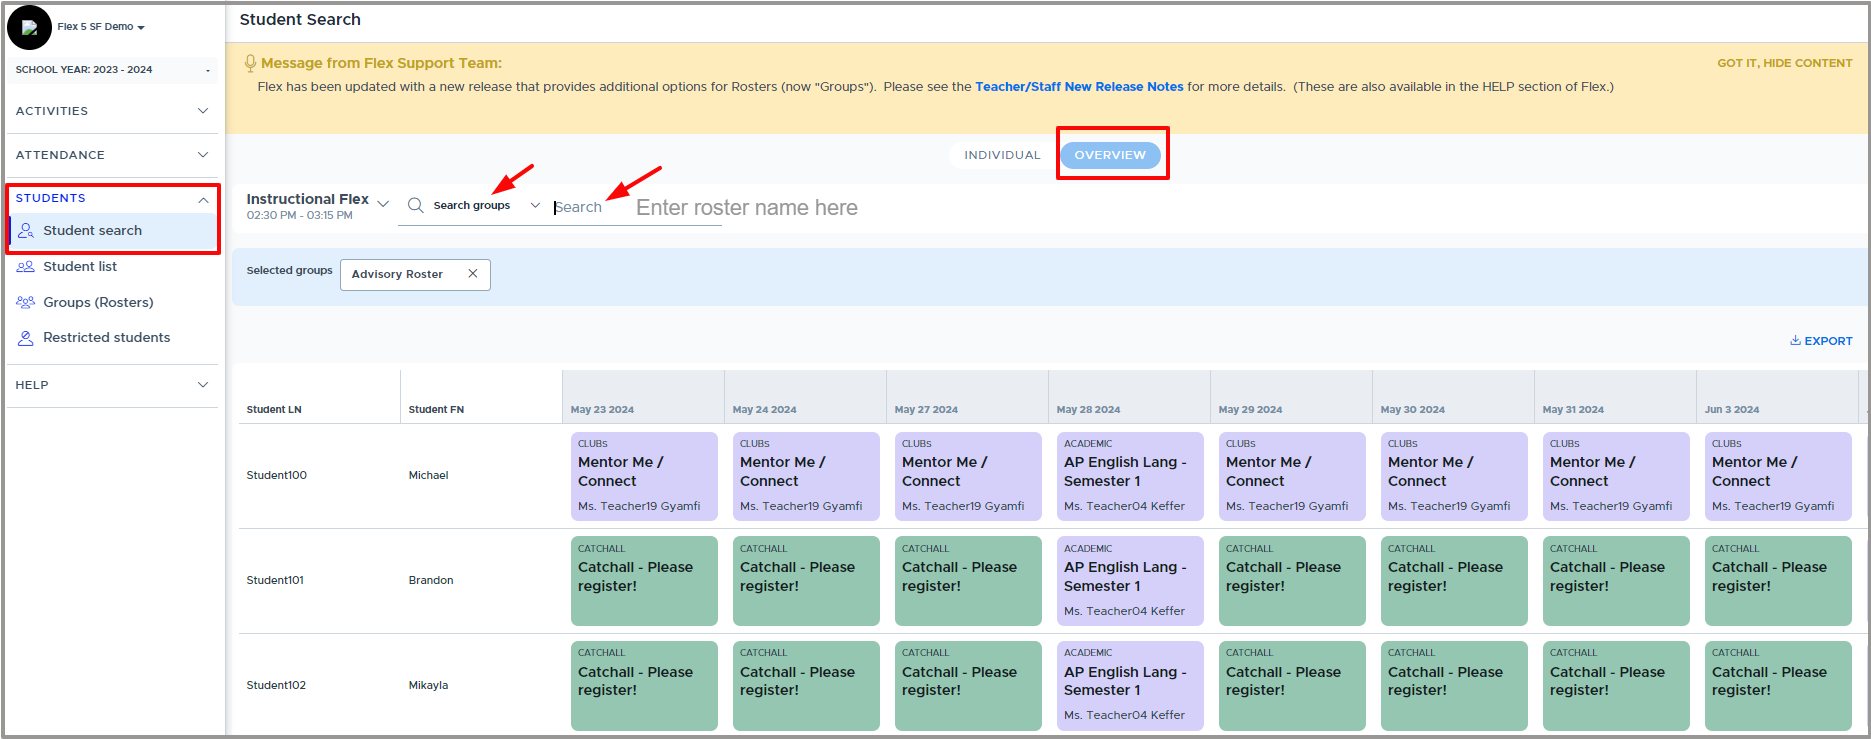
Use the Overview Search option to select a group or individual students to view the students’ schedules for the past and future 10 days. You can create new groups for this purpose or use one of your existing groups.
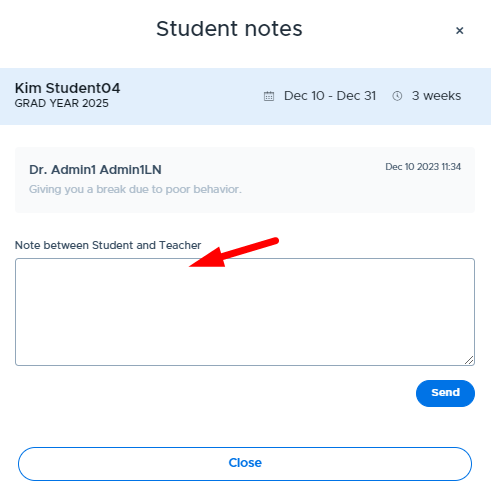
Student Restrictions allow you to temporarily restrict a student from attending your “choice” flex activities. Depending on your school’s admin settings, there may be a requirement for student(s) to have attended your activity and been marked present in the last 3 days before you can restrict them. Restrictions can be set for 1-4 weeks. The teacher has the opportunity to send a message to the student regarding this restriction.
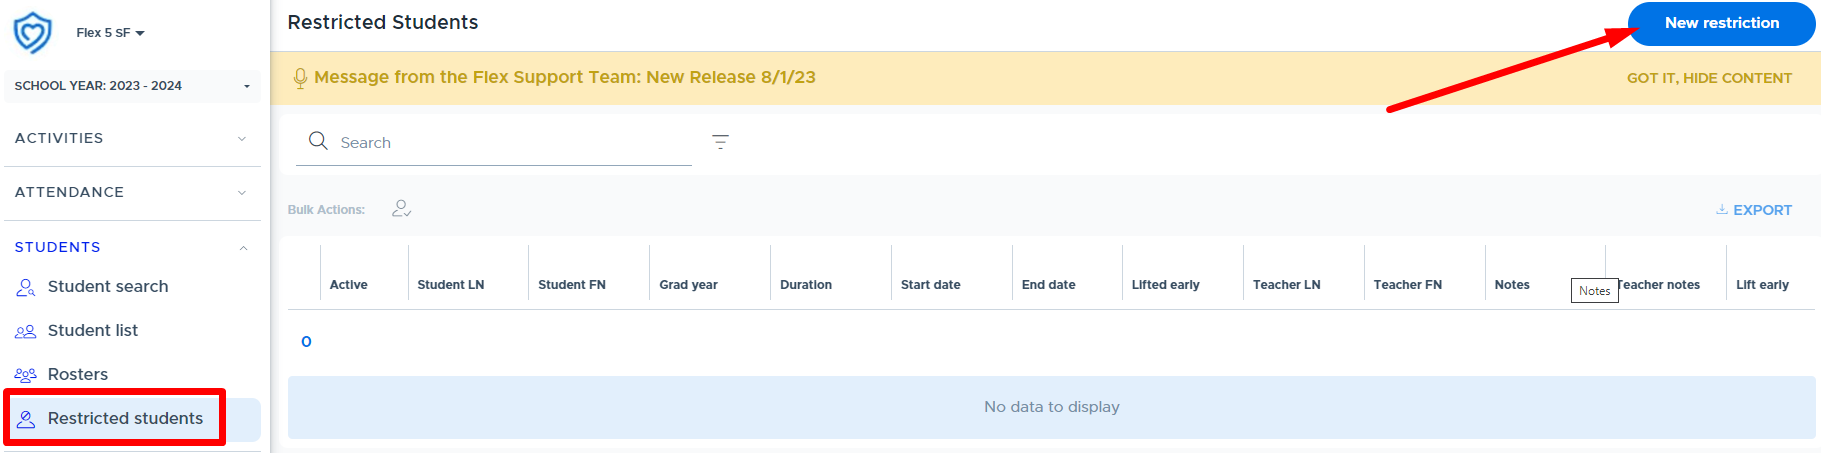
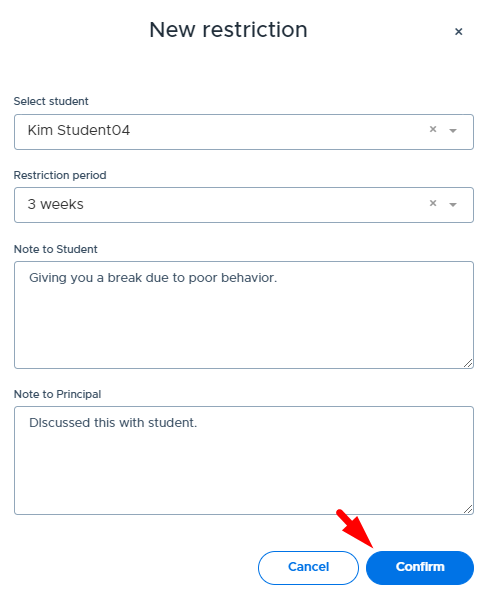
The student will receive an in-app notification about the restriction and can see (and respond to) the adult’s restriction message from their Flex Profile.
Please see the “HELP” section in Flex for more resources and the Teacher Video Index for all available videos.