Observation Groups allow educators, such as special education teachers or administrators, to monitor specific groups of students, even while those students are in their regular classroom sessions. This monitoring is done without interfering with the control or visibility of the regular classroom teacher.
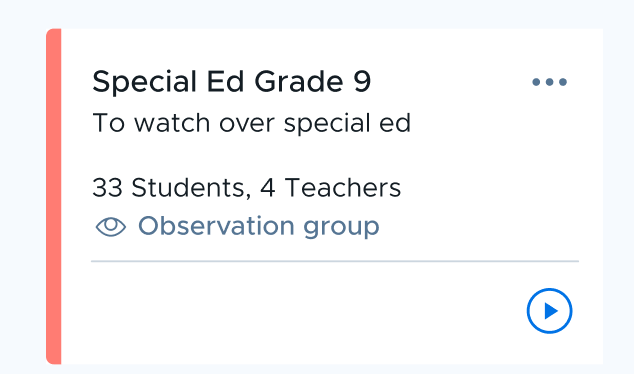
Observation groups are signified by an eye icon in the card view of the Classes menu.
Managing Observation Groups
Admins can determine who can create or run Observation Groups in the Permissions menu.
Creating a New Observation Group
- Navigate to the Classes menu.
- Click on the Add button and select Add new observation group from the drop-down menu.

- Select the school location, and enter a name and description, and click on the Add button.

Configuring an Observation Group
- Go to the Observation Group settings from the three-dot menu in the card view.
- Modify the name and description if required.
- On the right hand side, add students using the “+” icon. Note: An Observation Group can include up to 150 students.
- Add teachers responsible for supervising the group using “+” icon.
- Click on the Save button.

Running an Observation Group Session
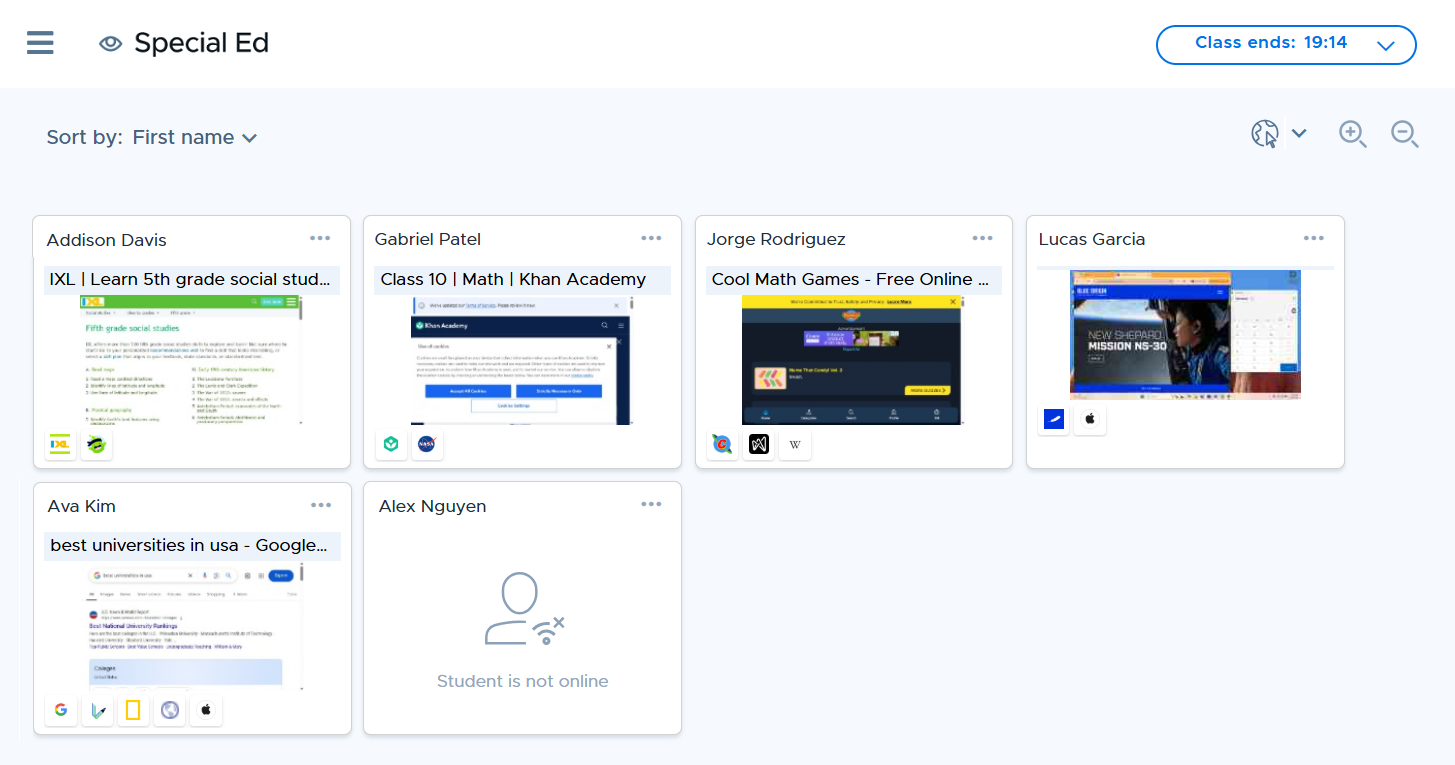
After setting up your Observation Group, you can start a session by selecting the group and clicking the "Play" button, as you would for a class. Then choose the session duration and students, and click the "Start Now" button. Other settings, such as applying an access plan and limiting tabs before class begins, are reserved for regular classroom teachers.
Once the session begins, you can view student screens, including the open tabs, just like in a regular class session.
During observation, the usual classroom management tools and settings are not available. The session is solely for monitoring purposes.
Managing Students During an Observation Session
During an observation session, additional actions can be taken by clicking the three-dot icon on the student thumbnail.

- Pin: Focus on specific students.
- History: Review the browsing history of the student.
- Report: Generate a report on the student's activity.
- Exclude: Remove students from the session as needed. An excluded student can be added back to class by clicking the “Add to session” link in the student thumbnail.
In the detailed view of a student, teachers tools like Push URL, Site Lock, and Announcement, as well as the ability to close, block or make a tab the active tab by dragging it to the top, is not present like in a regular class. Observers only have the option to save, print, and expand the student screen.

Notes on Observation Groups
- Observation Group sessions do not impact statistics recorded by any overlapping classes.
- Observation classes are subject to the same school hours and holidays as regular classes, but cannot be scheduled.
- Browsing history for students will be saved in both the regular classroom and the observation session.
- Students receive notifications when Observation Group sessions start and stop, just as they would for regular classes, depending on whether class notifications are enabled or disabled in System settings.
- Students can see when they are being monitored through the extension, which will display both their observation group and active class.