On the Queue Settings page, admins can set up automatic Queue Clearing Times (not required for queues to function in the school) and select Queue Locations for which queues will function.
Add Auto Queue Clear Time
Adding Clear Times will clear all queues at the times selected for the specified locations included in Queue Management. (You can choose to clear the Queues manually, if you choose not to set any Auto Queue Clearing Times.)
Important Note:
● At the Clear Times listed in Queue Settings, the queues for your specified locations will be cleared automatically.
● Click the Clear Queue button, if you need to clear the Queue prior to the clear times listed in Queue Settings, and Confirm your action.
To add a queue time, follow these steps:
- Under the Control Panel, click Queue Settings.
- Click Enter label for selected time and type the label for this Clear Time (Period 1 End Time, End of Block 3, etc.).
- Click Enter Clear Time. In the dropdown, select the desired Clear Time.
- Under Recurrence, select the day(s) on which to clear the queue at this time.
- Click Add to List. (The Clear Time will be displayed on the right side of the screen.)
Repeat these steps to add the Clear Times that are needed for your school (i.e. - regular bell schedule, A/B block schedules, 2-hour delay schedule, flex period schedule, etc.).
.png)
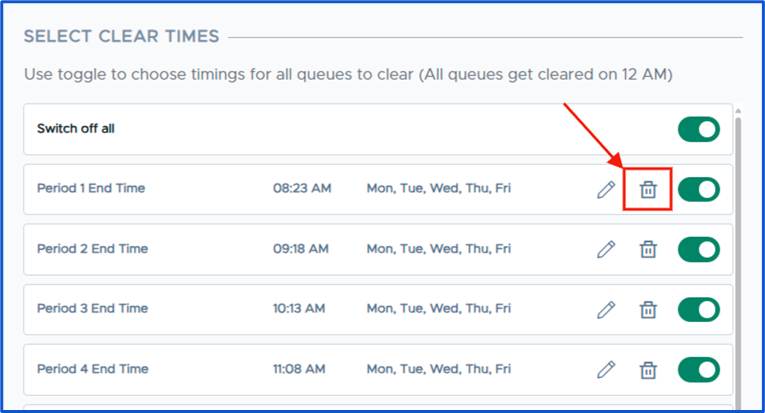
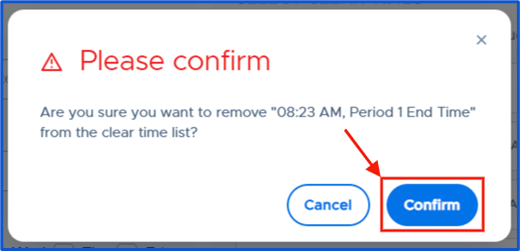
To delete a Clear Time, click on the Trash icon to the right of that Clear Time.
Click Confirm on the popup. The Clear Time will disappear from the list of Clear Times.
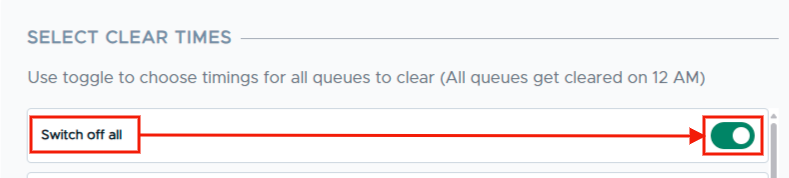
To turn off all Clear Times, click on the toggle to the right of “Switch off all”. To make them all active again, click on the toggle to the right of “Switch on all”.
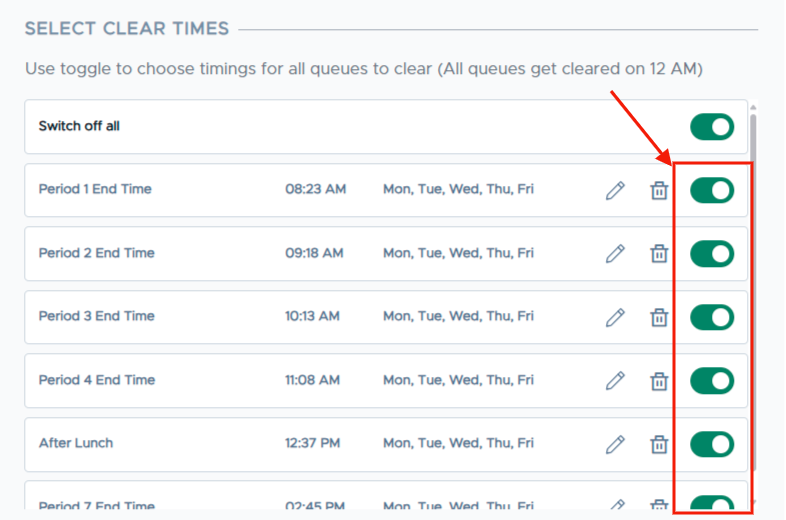
To turn off specific Clear Times, click the toggle(s) to the right of those specific Clear Times. To turn those specific Clear Times back on, click on the appropriate toggle(s) again.
Enable Queue for Locations
All of the locations listed in your Pass system are eligible for Queue Management; however, you will need to select the locations that will allow students to “wait in line” for a pass AND set limits for those queue locations.
To select locations, on the Queue Settings page, scroll to ENABLE QUEUE FOR LOCATIONS. You can enable all locations (click on the toggle for Switch on all), or you can click on the toggle of individual locations (click on the toggle for each location desired). Use the Search box to quickly find a location.
.png)
Set Queue Location Limits
Using the list of Queue Locations:
-
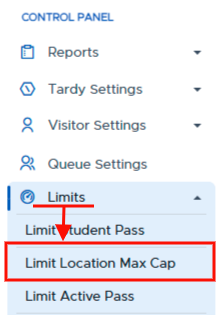
Click Limits → Limit Location Max Cap.
-
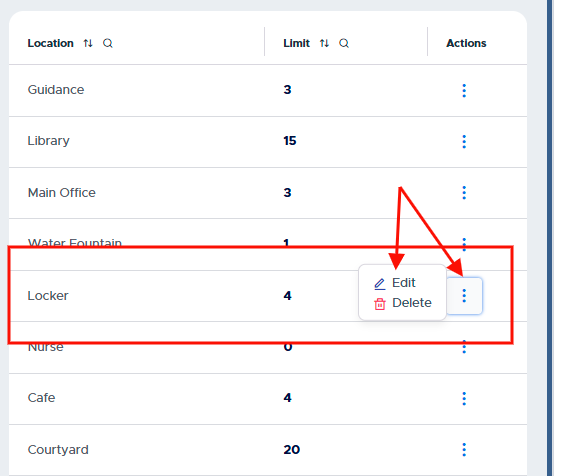
If the location is already listed with a limit, check the limit to make sure that is the desired student limit. If a change is necessary, click on the three (3) dots and adjust the limit.
-
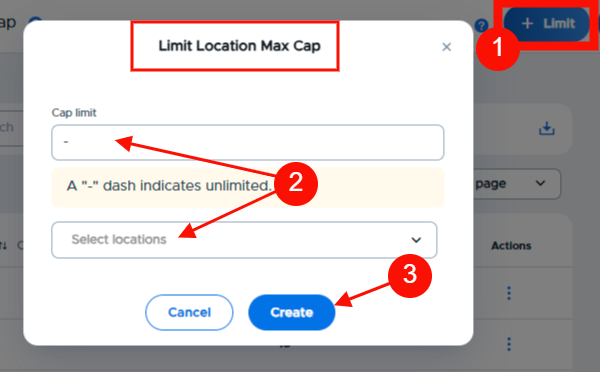
If the location is not listed, click + Limit.
- Add a Cap Limit.
- Either type/select the location or click Select Locations and click on that location.
-
Click Create.