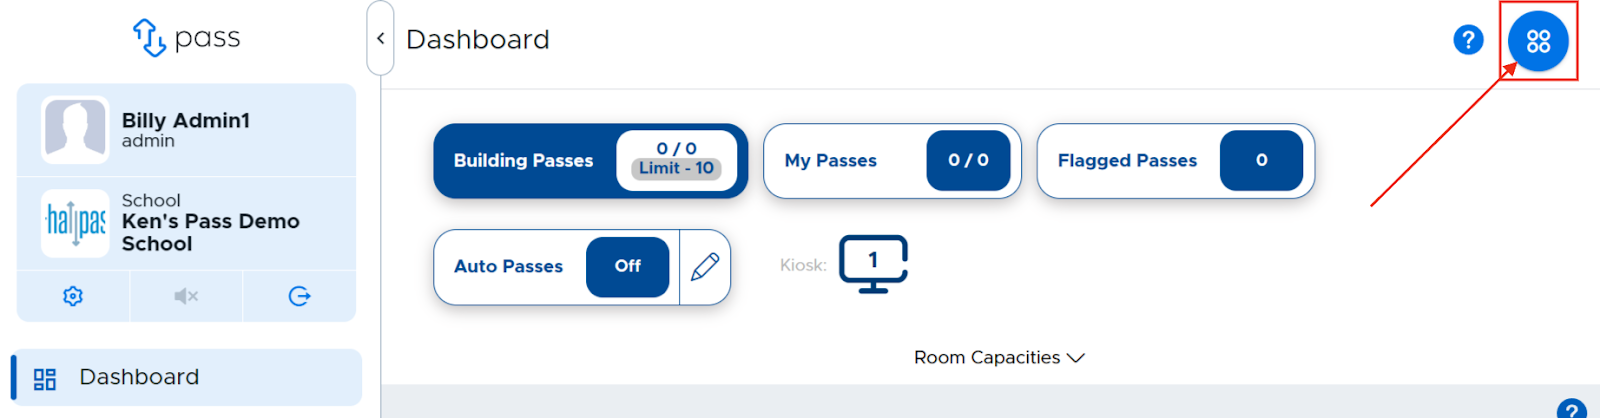
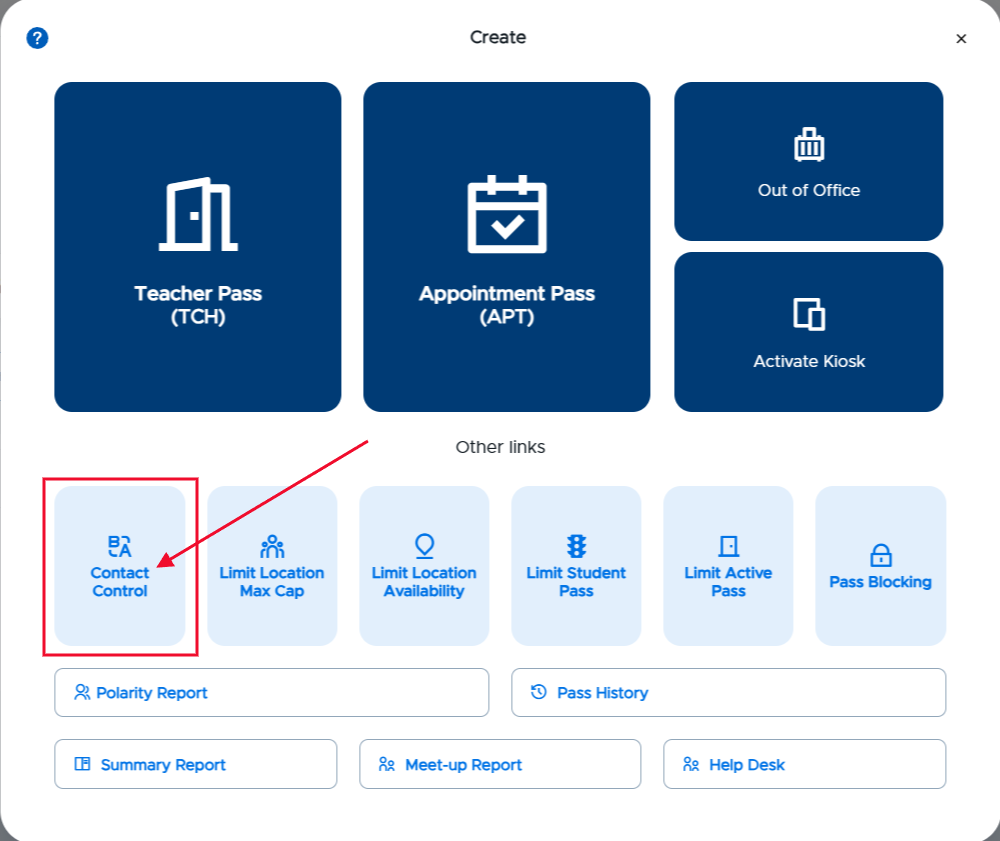
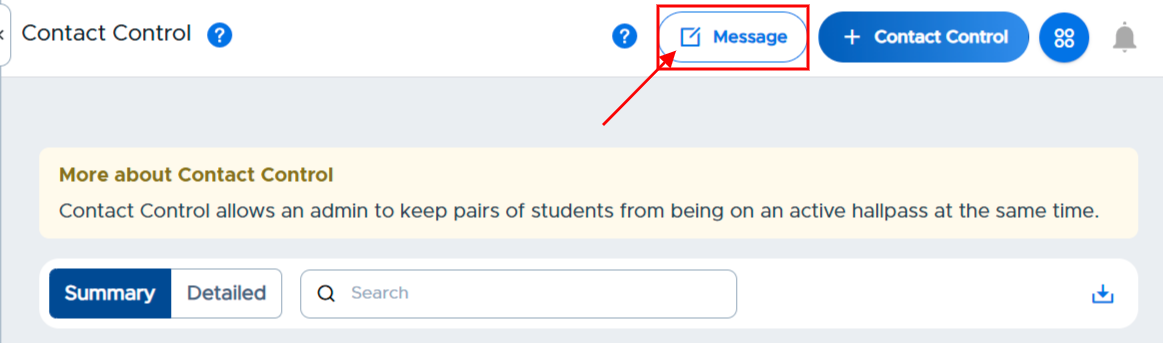
Contact Control allows an Admin to keep pairs of students from being out of the classroom on an active pass at the same time. An Admin can access the settings screen from the blue Create button in the upper right corner and selecting the Contact Control option.
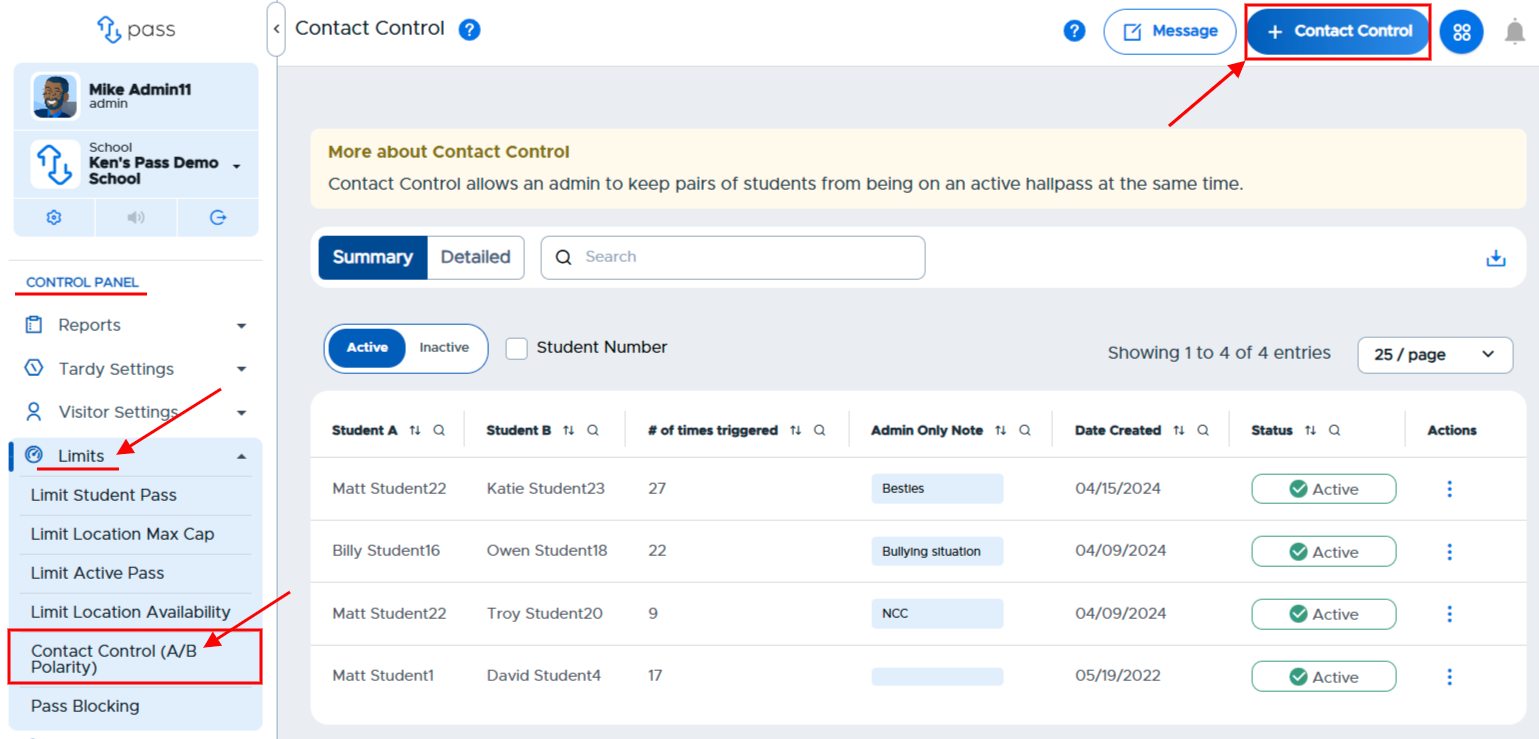
Admins can also get to the settings from under the Control Panel menu → Limits → Contact Control (A/B Polarity).
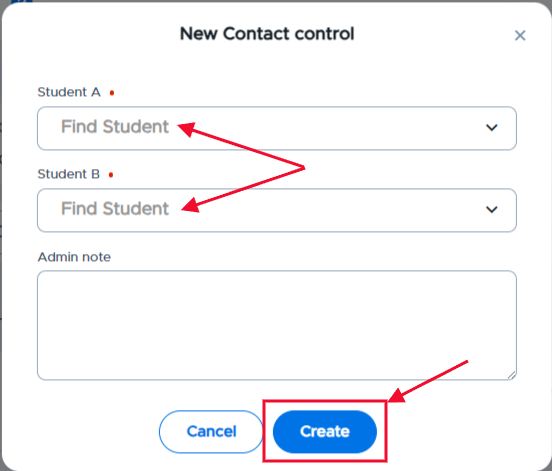
On the popup window, click in the Find Student fields for Student A and Student B and scroll through the list of student names to select the pair of students. If an Admin note is added (optional), it will only be visible to other admins on the Contact Control page. (Consider describing in this field why the Contact Control was set up for this set of students.) Then click Create.
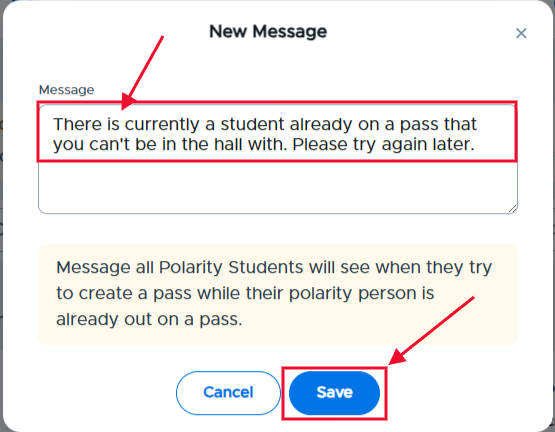
Admins can also customize the message that students will see if they are set up for Contact Control and the limit is triggered. To edit the default message, click on the white Message button in the upper right corner. On the popup screen, write the desired message. When finished, click Save.
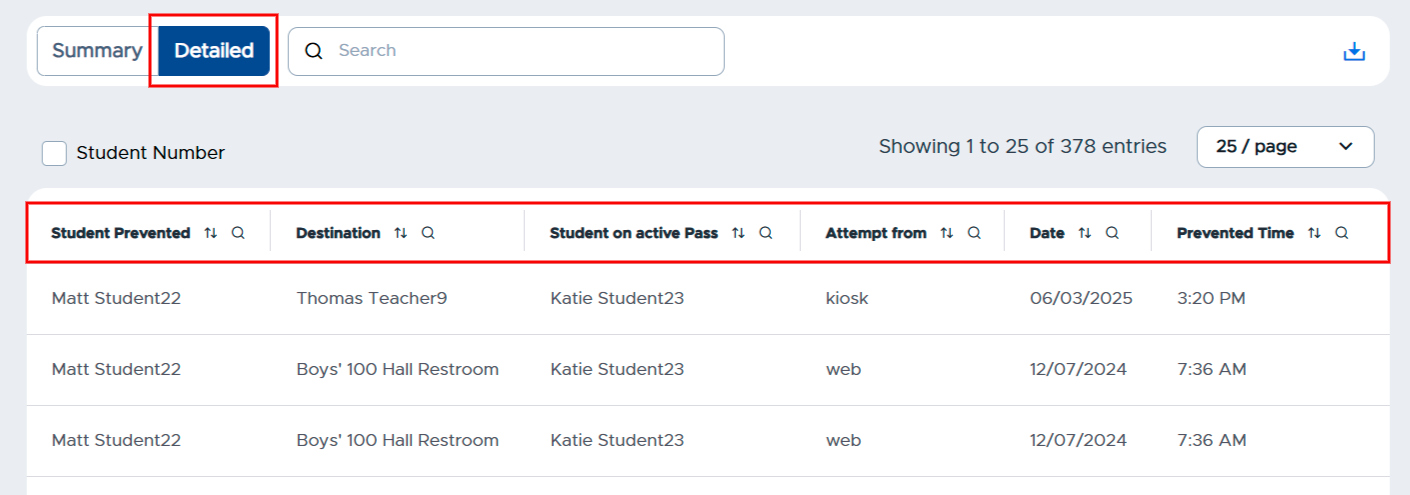
Once the pair of students has been added, an Admin can see how many times this restriction is triggered by looking at the Summary report on the screen (shown below). An Admin can also click on the Detailed report, which provides additional information, such as which student was on an active pass, what their destination was, and which student was prevented. It also includes the attempted from (web vs. app), date, and time details.

The Admin can also inactivate the limitation by clicking on the green Active button. To make that limitation active again, simply click on the red Inactive button. To delete the limitation completely, click on the three(3) dots to the right of that entry and click on Delete.

If more than two (2) students are not allowed in the hallway at the same time, multiple “pairings” for these students will need to be entered. (For example: Student 1 and Student 2, Student 1 and Student 3, Student 2 and Student 3, etc.)
Additional items that Admins may want to consider before activating Contact Control:
- Consider informing the students that have been set up for a Contact Control restriction so that they know what to expect.
- Consider what information needs to be shared with Teachers and Staff regarding this functionality and/or specific restrictions that have been set. Teachers should be made aware of how this works with Teacher Passes, if your school utilizes these. (Please see more details below.)
Student Screen with Contact Control:
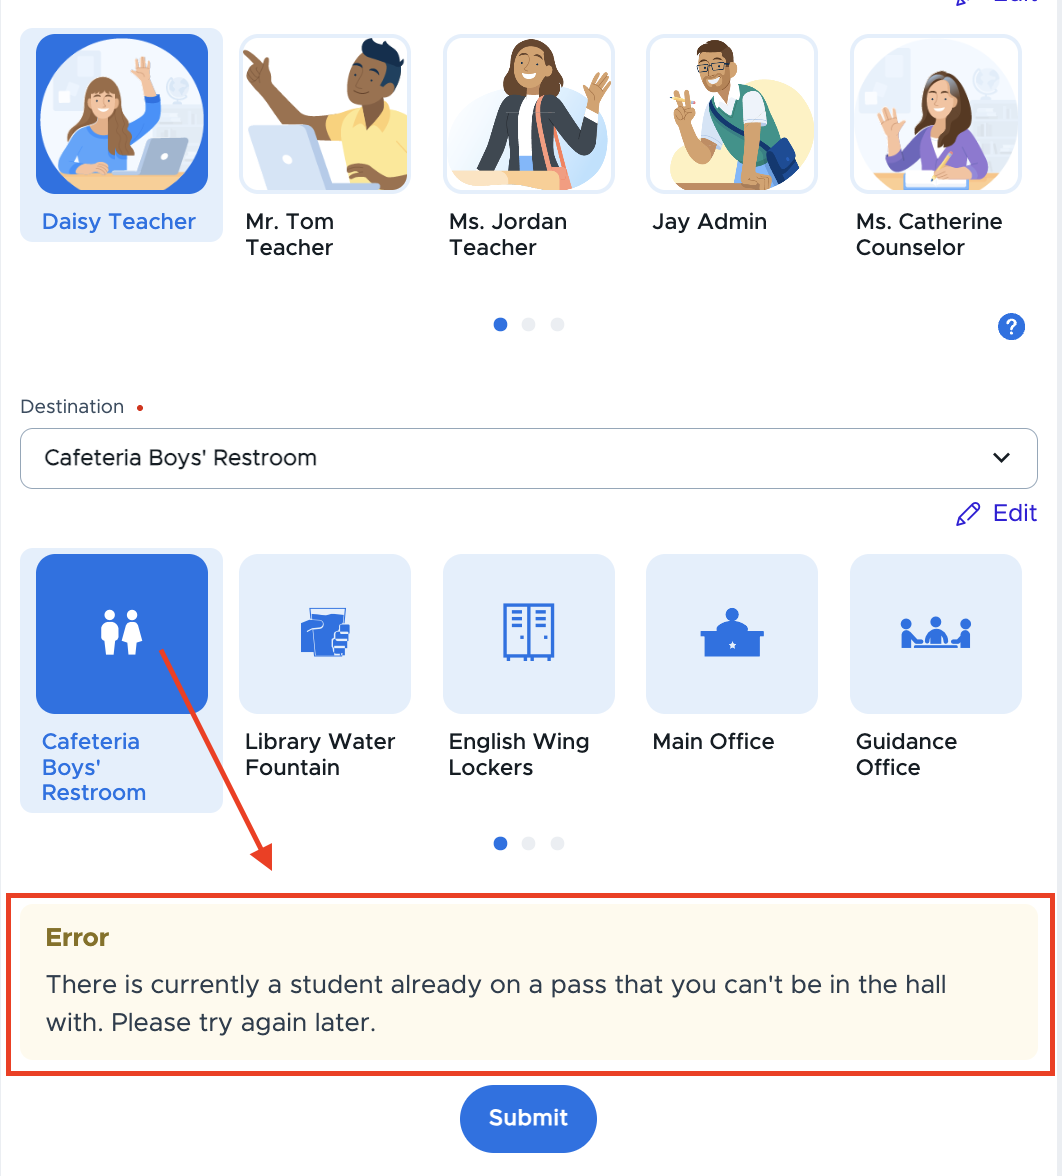
Below is what the second student will see in Pass when their “partner” is out on an active pass.
This message appears when the student clicks the “Submit” button.
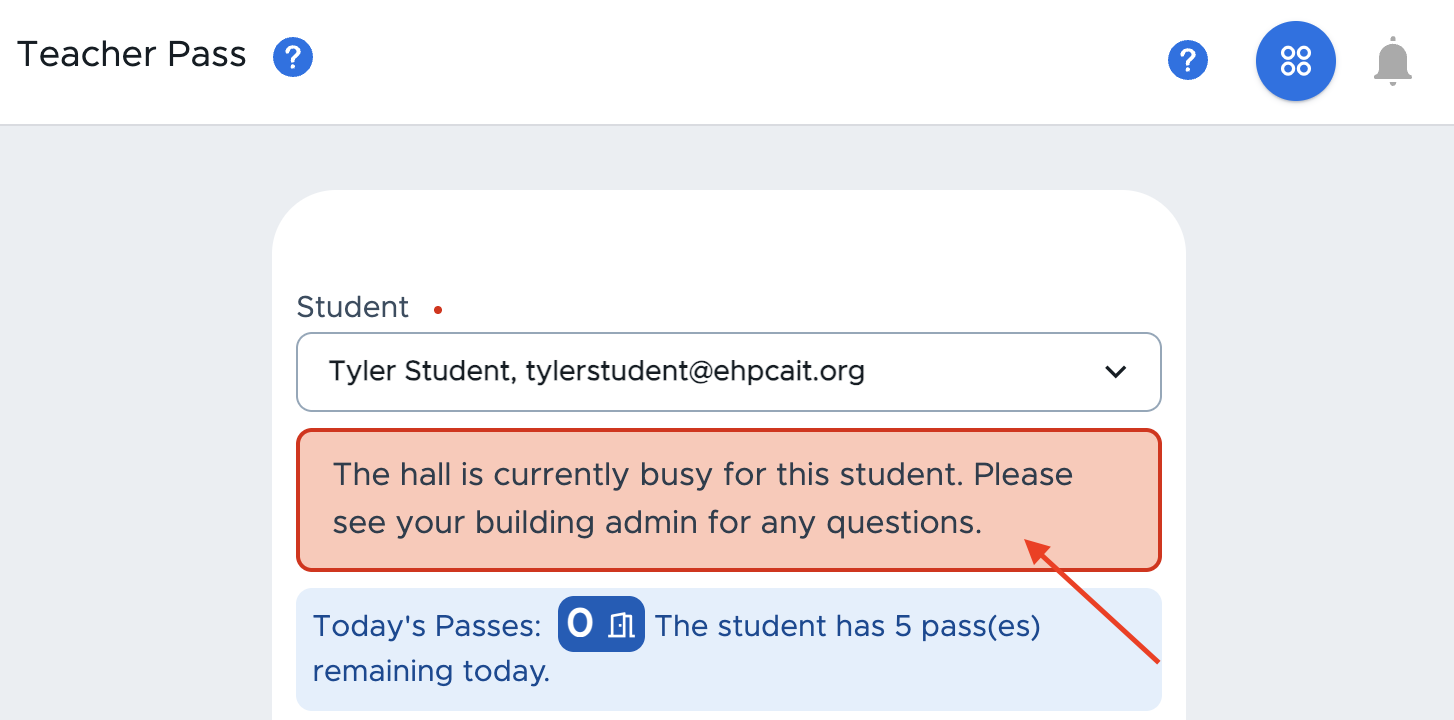
Teacher Pass Message:
The red message below appears for Admins, Teachers, and Staff members when creating a Teacher Pass for a student whose partner already has an active pass. The system will allow the Teacher or Staff member to create the pass, if desired.
In the reverse scenario, if student A is on a Teacher Pass and their partner (student B) attempts to create a pass, student B will not be able to create the pass and will receive the designated student message.
Contact Control and Appointment Pass:
If one student is out on an active Appointment (APT) Pass or is awaiting approval for an APT pass, the partner will not be able to create a pass. If a student is out on a student-initiated pass, a Teacher, Admin, or Staff member will be able to create an immediate APT pass for the partner.
For more information, watch the "Contact Control (A/B) Polarity" video.