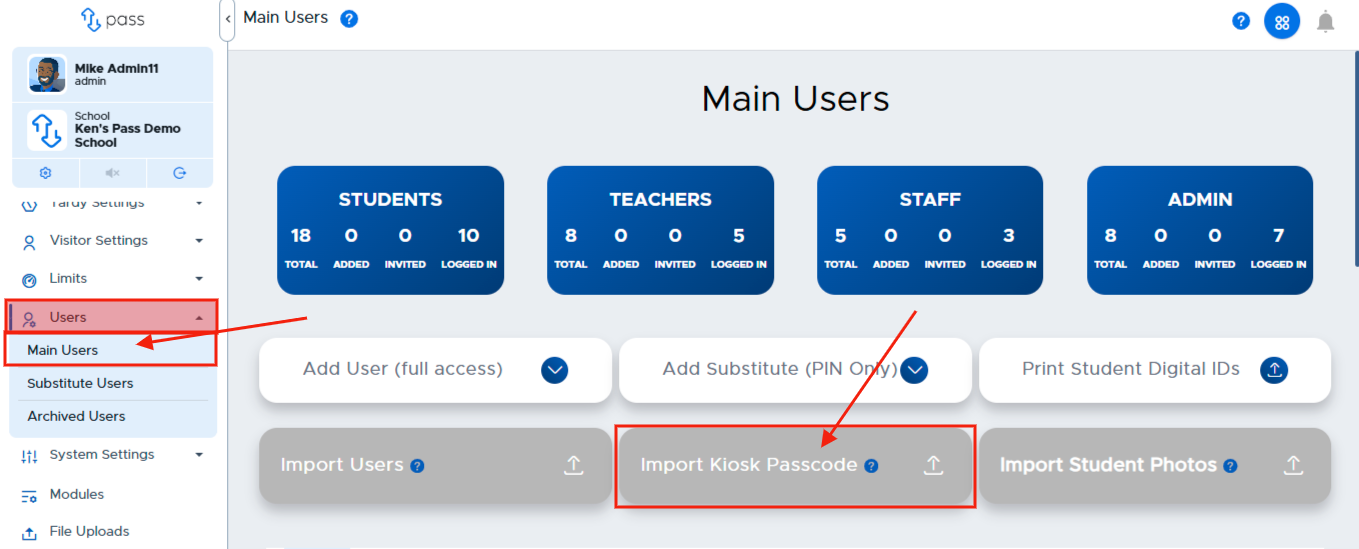
Assign students their Kiosk passcode by importing a CSV file in the Pass Users interface.
-
Click on the Import Kiosk Passcode button on the Main Users screen.
-
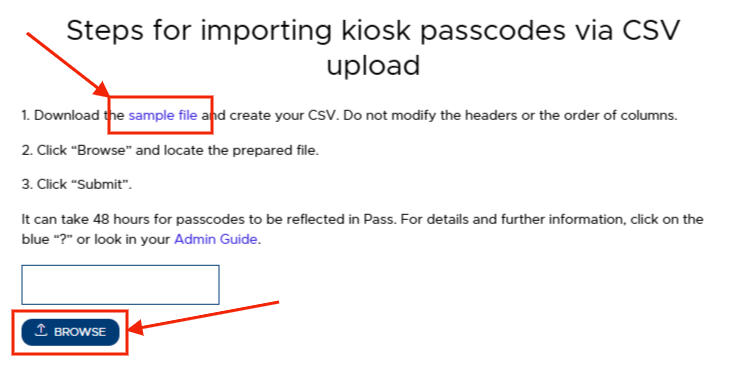
Click Sample file to see what information is required for the CSV file (studentemail and passcode). Then, create your CSV Kiosk Passcode file and save it.
-
Click Browse, locate your file, and click Submit.
-
The Kiosk passcode should be something the student is already familiar with. Some schools use the student ID, lunch pin, or birthdate. If you choose this option, be sure to select the “Hide Student Kiosk Pass Field” option on the Admin setup screen to remove the student’s ability to change their Kiosk passcode.
-
Change their Kiosk passcode.
If the Import Kiosk Passcode button is missing on the Main Users page, click Modules, scroll down to Kiosk, and de-select Set Kiosk Passcode to be Student Number.
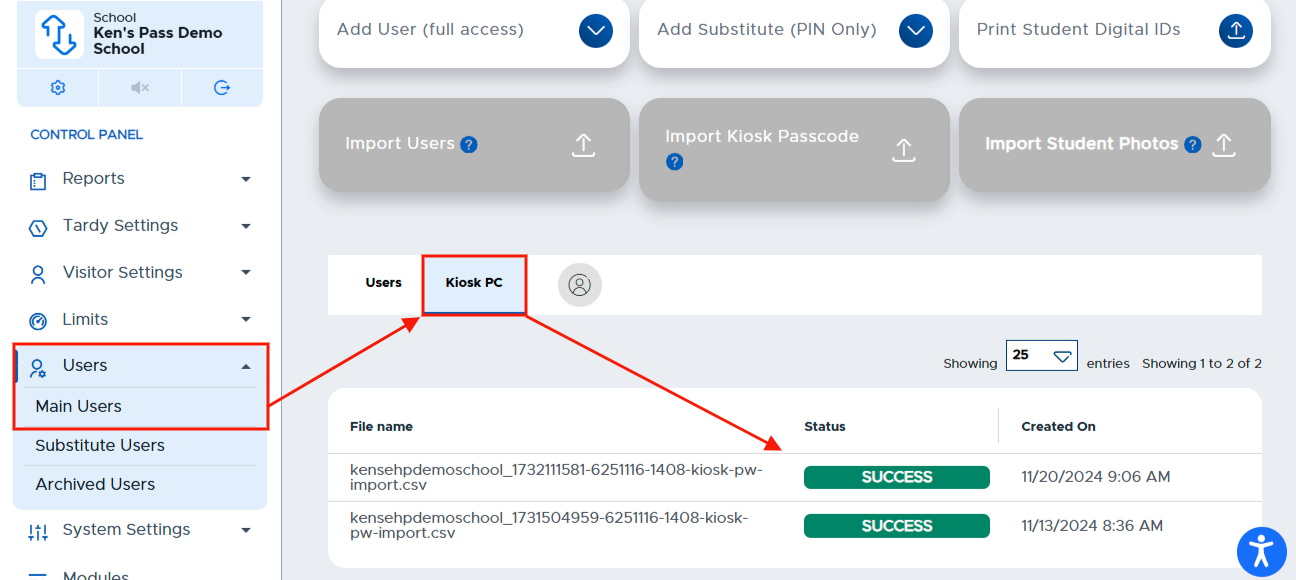
To track the status of the Kiosk Passcode CSV file, click Users → Main Users. On this page, under the Import Users box, click Kiosk PC. The file name and status will be displayed on the screen.
- PROCESSED - The data on the file was processed successfully, and the Kiosk Passcodes should now be recorded in your system.
- FAILED - There was a problem with the data in the file. Please review the data, make the necessary corrections, and re-upload the file.