Follow the steps below to deploy the Chrome extension using Intune :
-
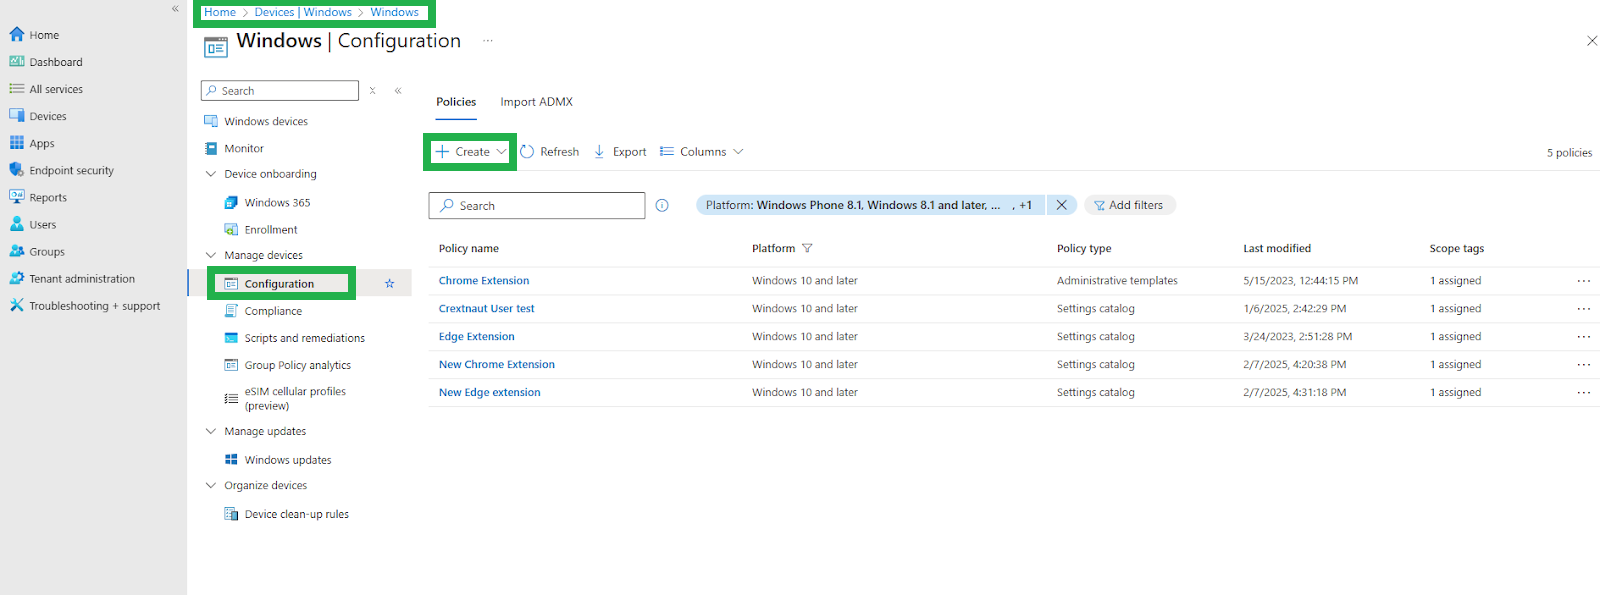
Sign in to Microsoft Endpoint Manager admin center.
-
Select Devices > Windows > Configuration > Create New Policy.
-
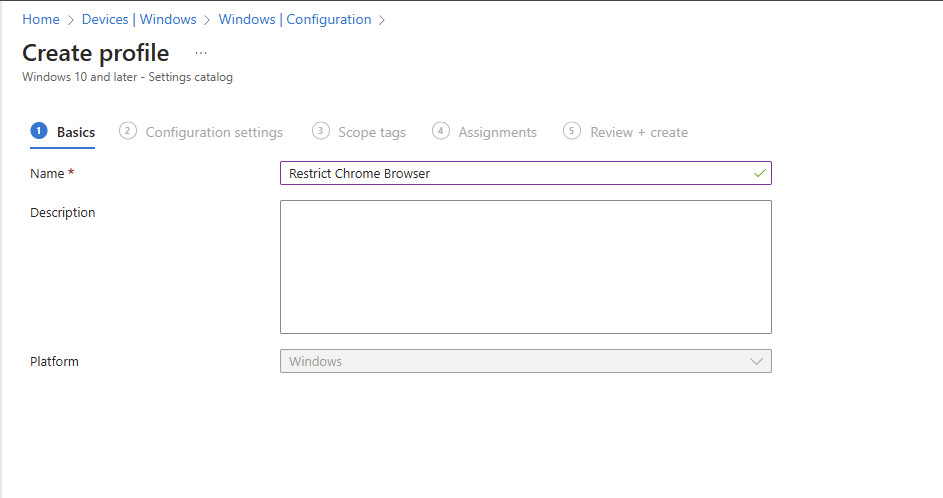
Select Platform and choose Windows 10 and later. Then, select Profile type > Settings catalog and click on the Create button.
-
On the Basics tab, enter a descriptive name, such as Manage Chrome Extension, then select Next. This will manage all extensions for Chrome.
-
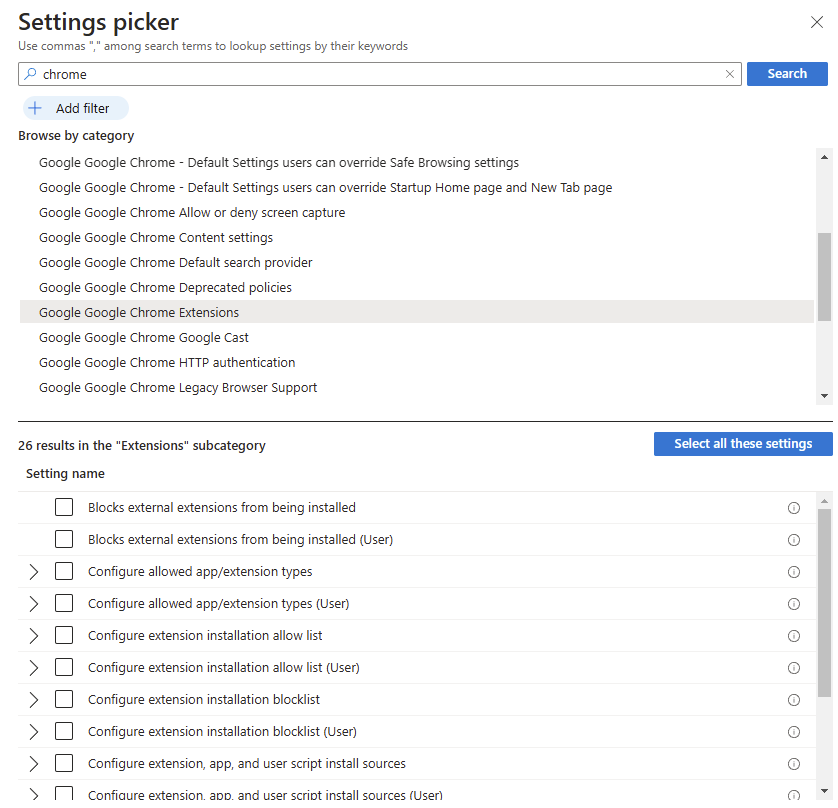
In Configuration settings, select '+ Add settings'.
-
Search for 'Chrome' and select 'Google Google Chrome Extensions' to see all the settings in this category.
-
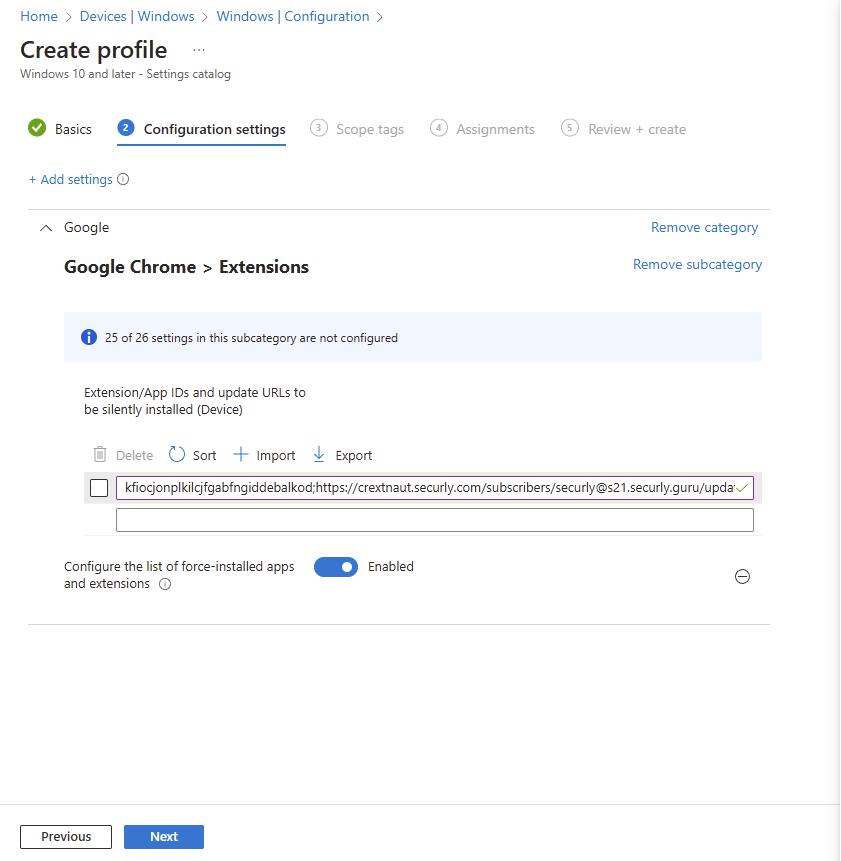
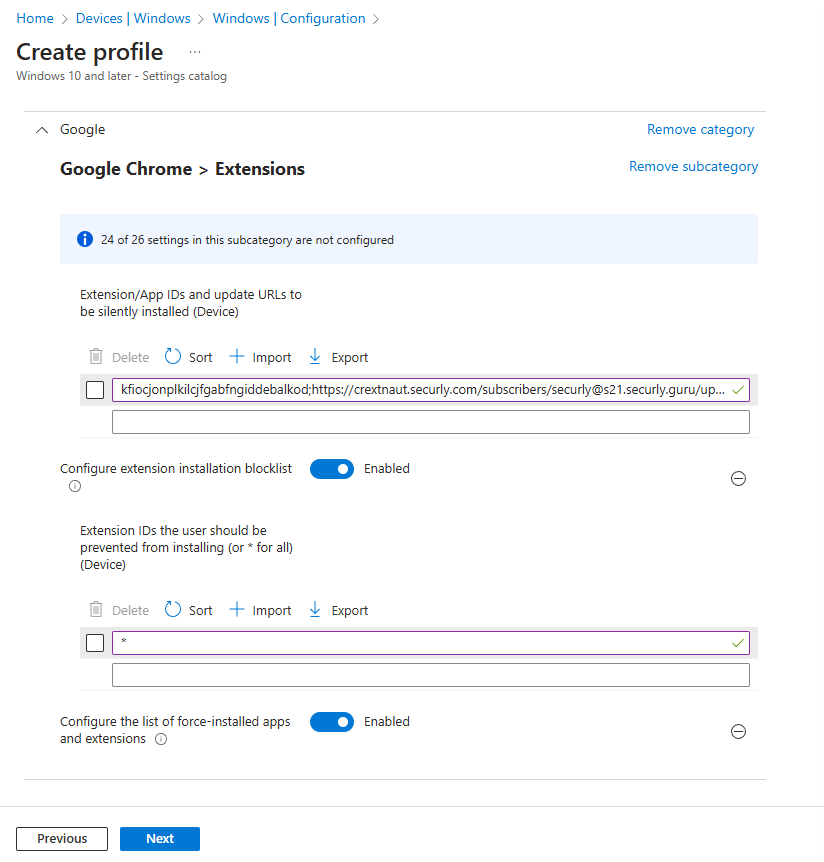
Select ‘Configure the list of force-installed apps and extensions’. This can be done by user, or by device. After enabling this feature, a blank box will appear.
-
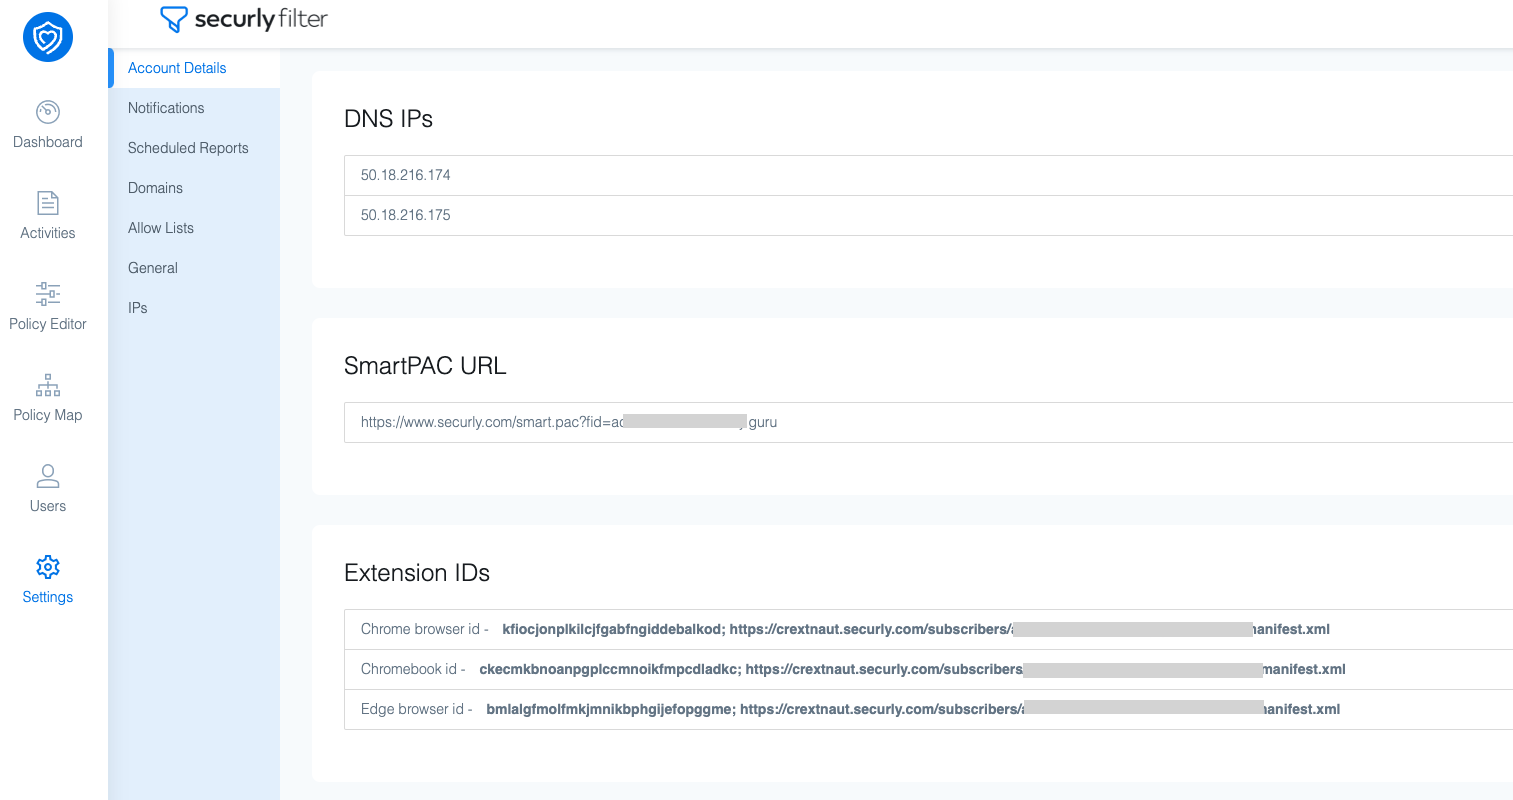
Now, you'll have to enter the Filter extension ID followed by a semicolon and the custom URL designated for your account. This can be found by navigating to Filter Settings page > Account Details > Extension IDs.
-
Navigate back to ‘Settings picker’, select ‘Configure extension installation blocklist' enable this setting and add “*”. This will prevent other extensions from installing in the Chrome browser.
-
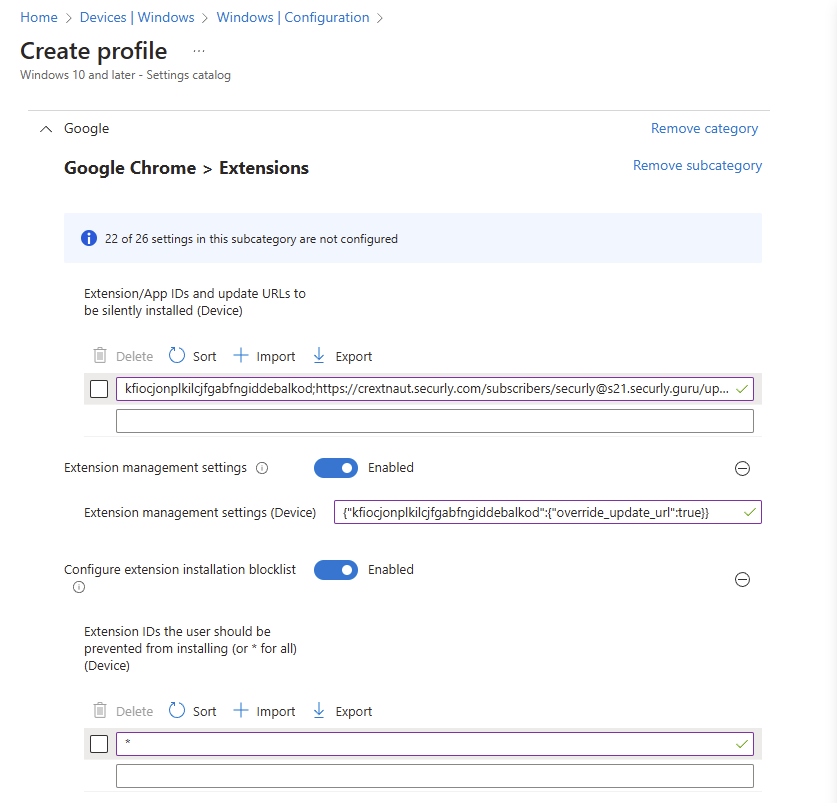
In the ‘Settings picker’ select “Extension management settings” for device or user depending on where you are deploying this and enable it on the left. Then add the following string containing the extension ID to the box: {"kfiocjonplkilcjfgabfngiddebalkod":{"override_update_url":true}}
-
In the ‘Settings picker’ select "Control Manifest v2 extension availability. Select enabled and 'Manifest v2 is enabled'.
-
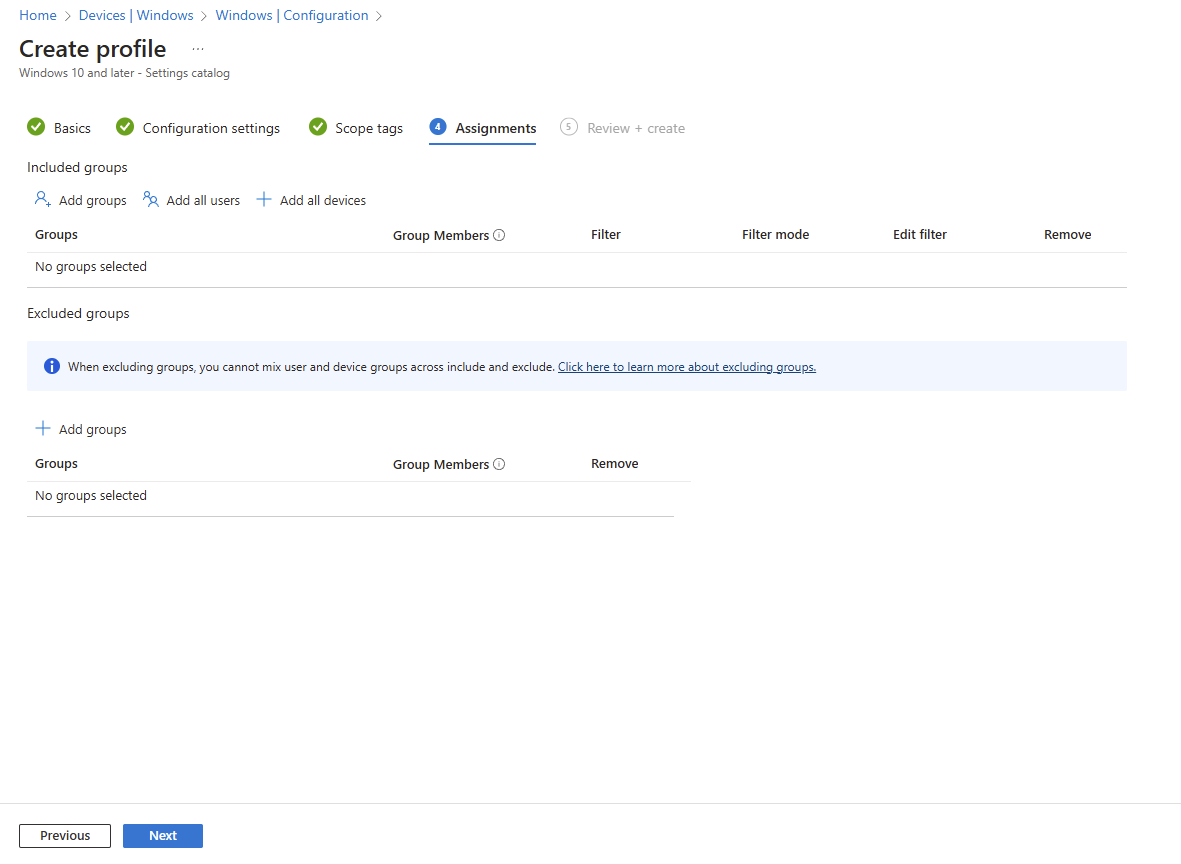
In the ‘Assignments’ section select the device/user groups you want to target.
When the configuration profile is complete, it will take time for the extension to push out for the users. It will depend on the sync frequency between the Windows device and Intune.
If you have a testing device handy, you can find the device and force the sync. Learn more about force syncing in this Microsoft article.
Troubleshooting
Extension is missing or not functioning as expected
If the extension isn't showing up, isn't enabled, or isn't functioning as expected, it is likely you have not enabled extended MV2 support. Your other MV2 extensions likely work because they are grandfathered in.
How do I enable MV2 extensions in the Google Admin Console?
- Log into the Google Admin Console (admin.google.com).
- Navigate to Devices > Chrome > Settings.
- Select Organizational Units (Use either the root OU or specific OUs where Securly extensions are deployed).
- Under Users & Browsers, go to the Apps & Extensions section.
- Find the setting for Manifest V2 extension availability
- Change to Enable manifest v2 extensions
- Save your changes to ensure the setting is applied.
Extension is not working in ChromeOS 140+
In ChromeOS 140 and higher, Google has changed the way it enforces the Chrome Sync policy, resulting in the Securly extension lacking the necessary permissions to function properly. If extension syncing is not enabled from the Google Admin Console and a student disables sync for extensions from their browser settings, the extension doesn't function properly. To ensure extension syncing is active, follow the below steps:
-
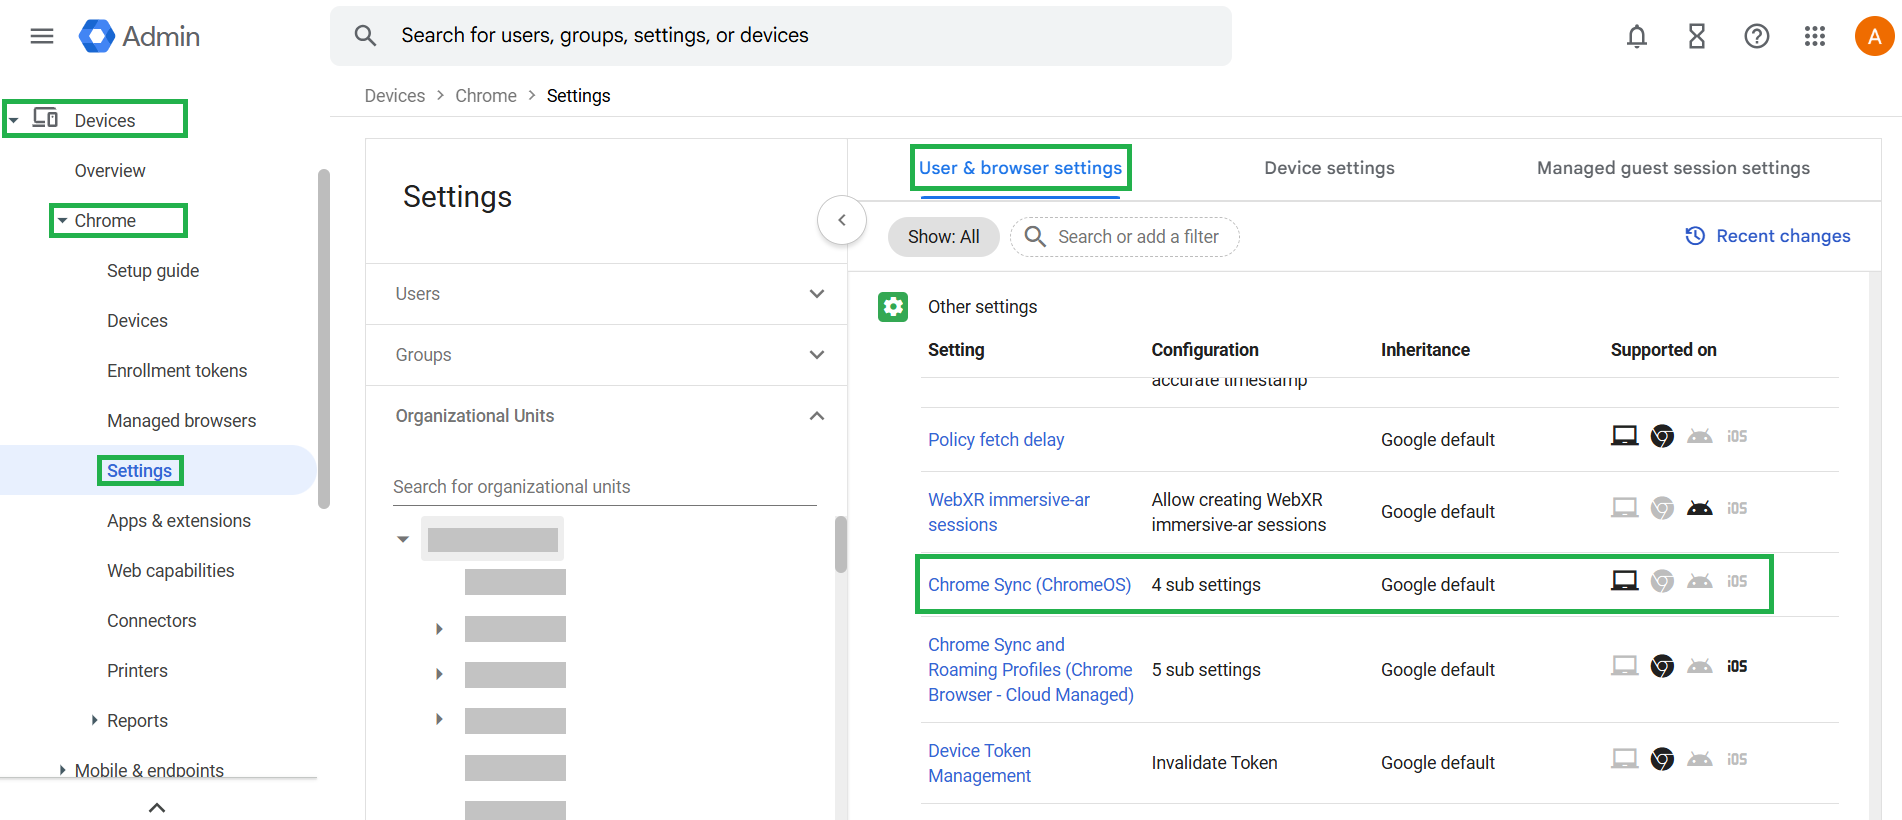
In Google admin console, navigate to Devices > Chrome > Settings > Users & browsers > Other settings > Chrome Sync (ChromeOS).
-
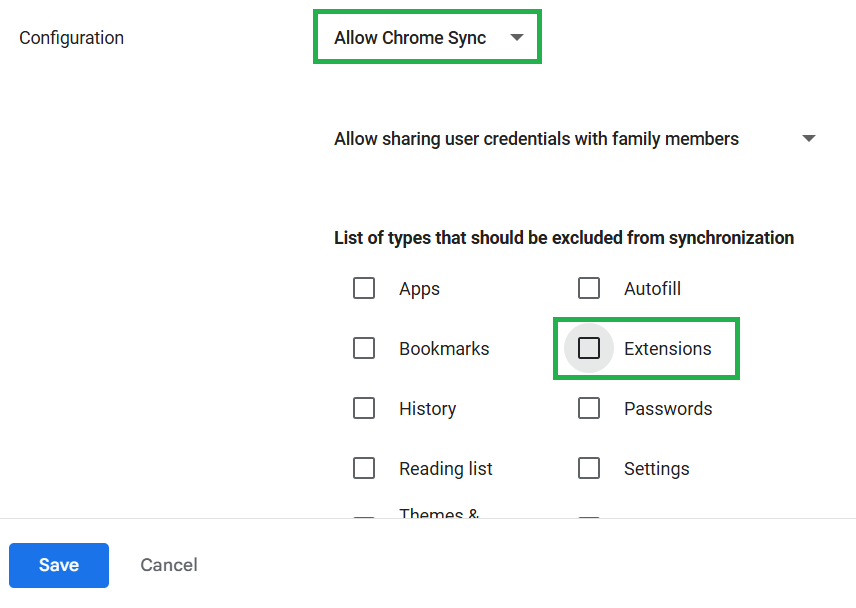
Ensure the ‘Allow Chrome Sync’ configuration is selected.
-
Uncheck ‘Extensions’ from the section for excluded sync types to ensure extensions are included in sync, and save your changes.