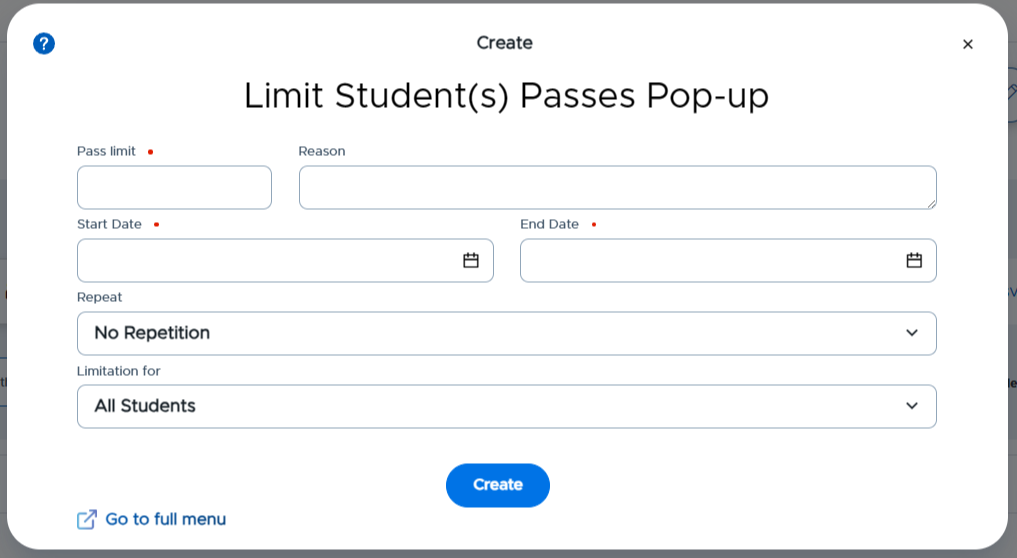
Limit Student Pass provides an Administrator with the ability to set limits on the number of student-created passes. Teacher-created passes and appointment passes DO NOT count against a student’s pass limit.
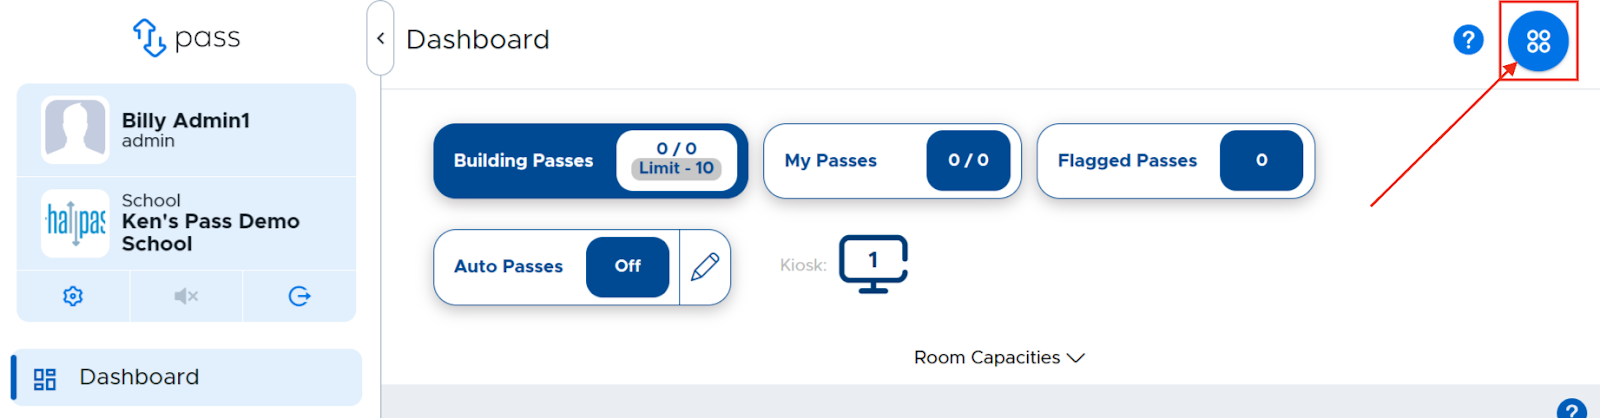
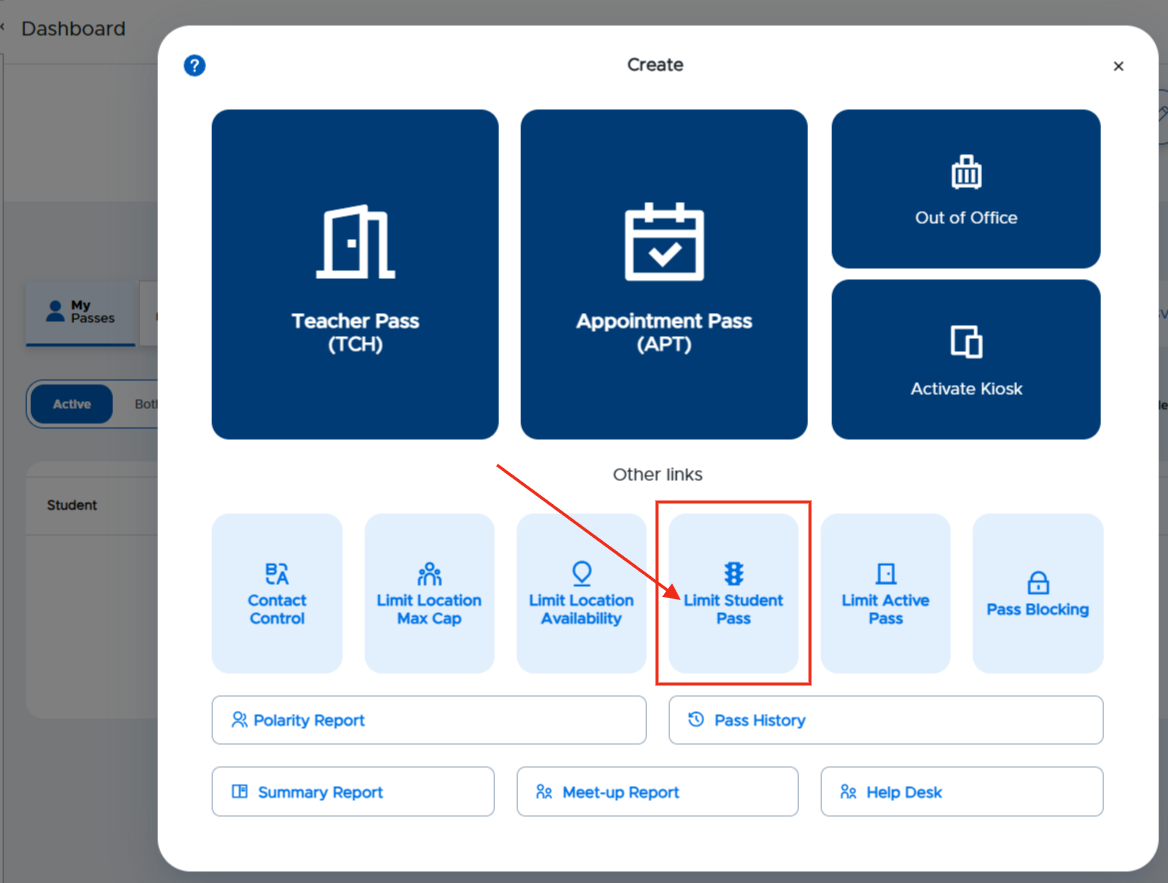
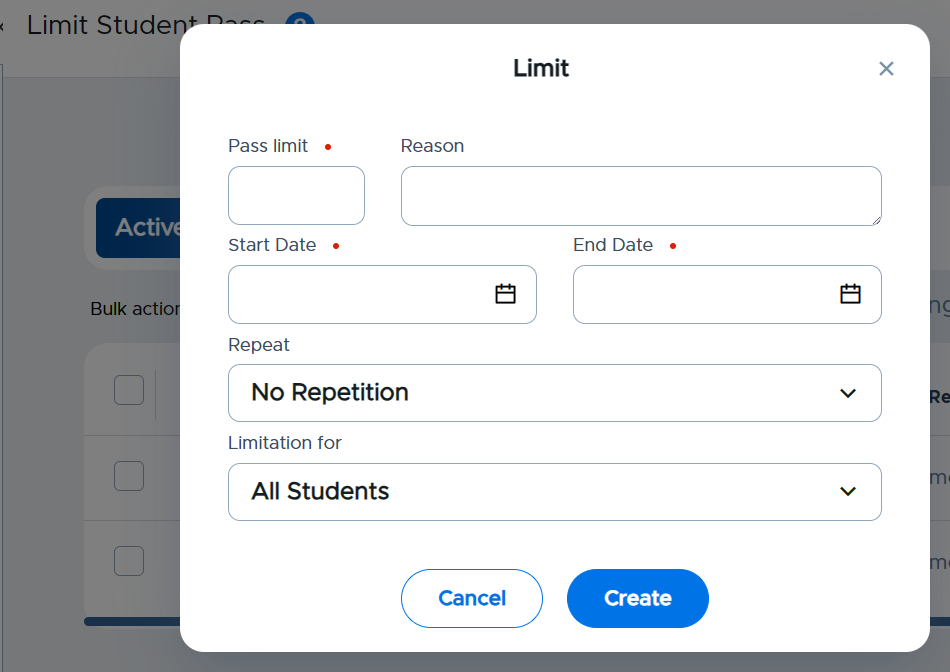
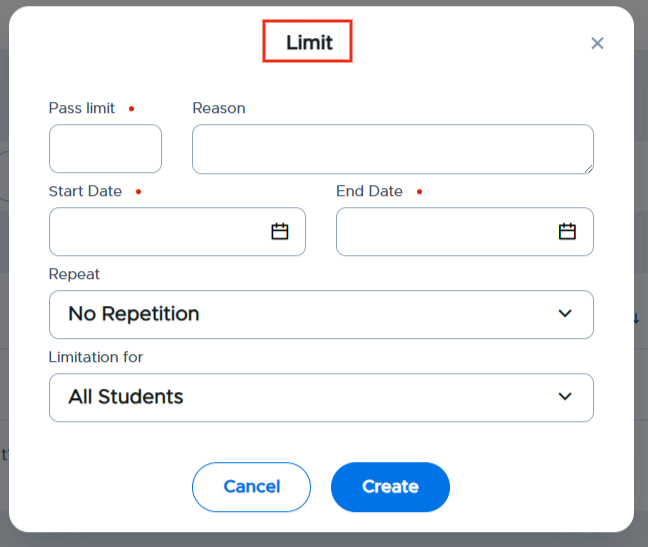
To add a limit, click on the blue Create button in the upper right corner of the screen and select the Limit Active Pass option and complete the fields; or from the Control Panel menu, click on Limits → Limit Student Pass. On this screen, click the blue + Limit button in the upper right corner and complete the fields. When finished, click the blue Create button.
When choosing your student, the multi-select dropdown will allow you to select one or more students at a time.
To add a student's name:
- From the dropdown menu, click Selected Students.
- Type the name, or scroll for the name, of that student.
- Click on that student's name.
- If other students' names are needed, type or search for their names and click on their name(s) to add them.
- When finished with your list of students, click Create.
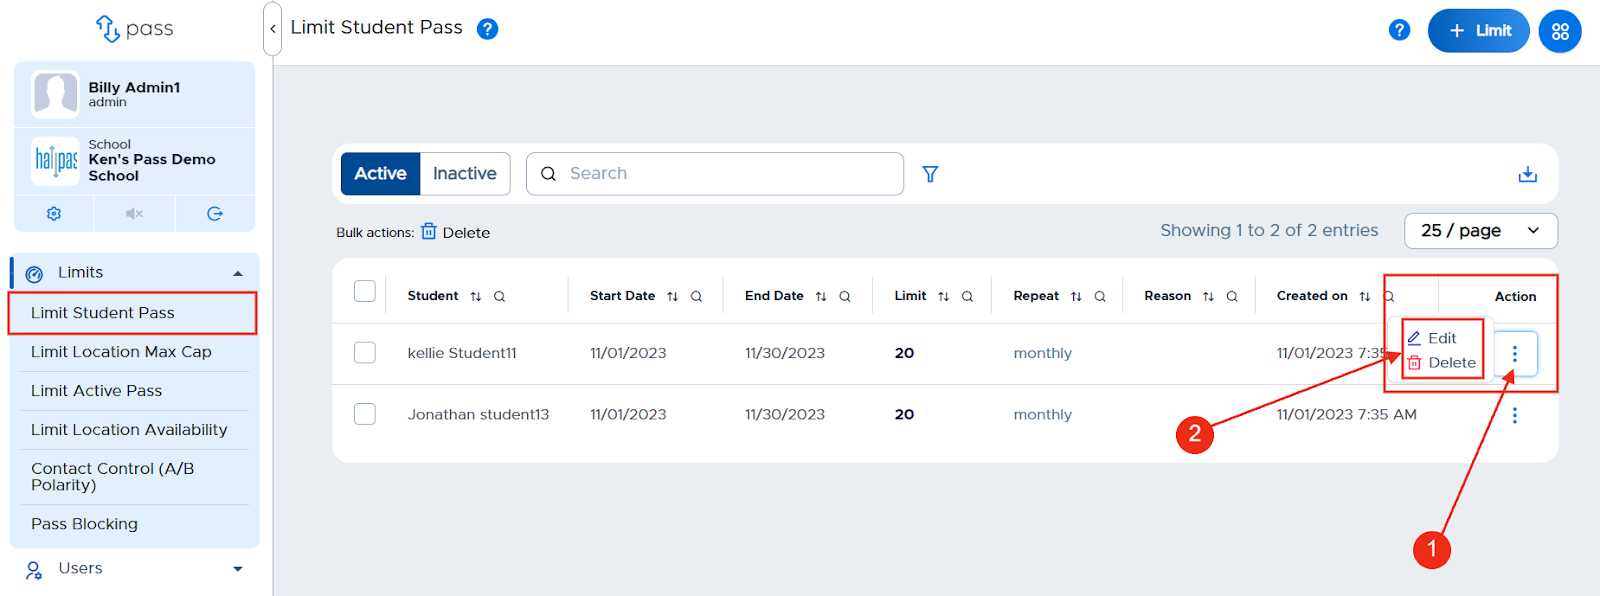
Limits → Limit Student Pass
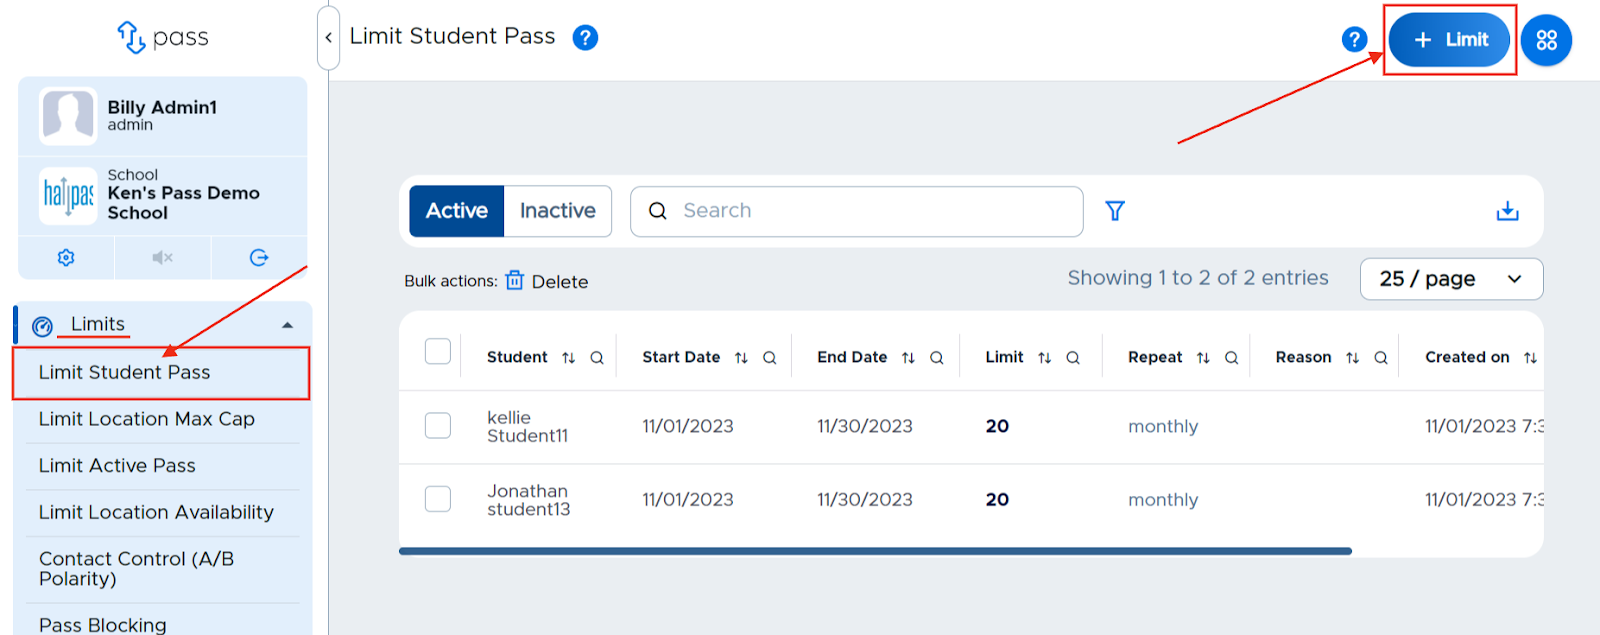
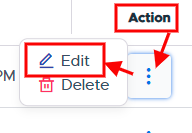
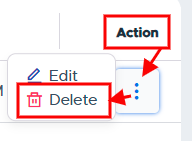
Once a limit has been set, it will show in the list on the Limit Student Pass screen. Admins can make changes to an active limit by clicking on the three dots to the right of the limit and choosing the appropriate option - Edit or Delete.
Adding a Pass Limit
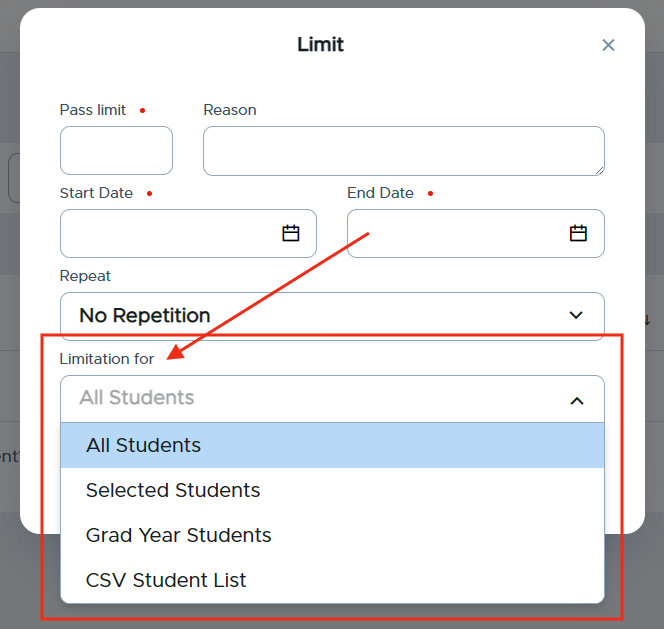
Pass Limits can be set for the following:
- All Students: A limit is set for all student users.
- Selected Students: A limit is set for specific student(s), who are added to the system individually by searching the student name.
- Grad Year Students: A limit is set for all students of a specific Grad Year, if Grad Year is being sent/included to Pass for each student.
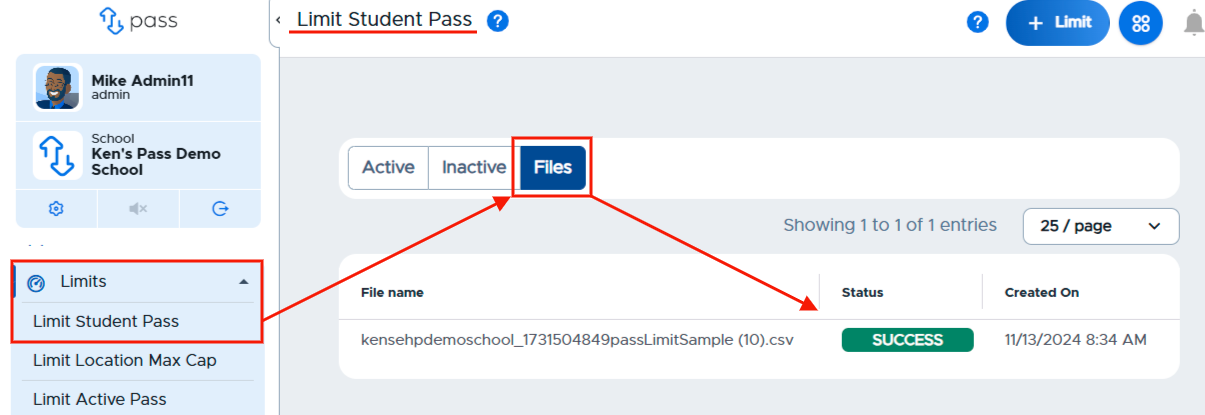
- CSV Student List: A limit is set for all students included on a CSV file, which is uploaded to the system. (The file only needs to contain a list of the student email addresses. There is a sample file available for download once this option is selected in the system.)
If you choose to upload a CSV Student List, you can easily track the status of that file on the Limit Student Pass page. In the upper left corner of the page, click Files. The file name, status, and the date the file was uploaded will be displayed.
Searching for specific students
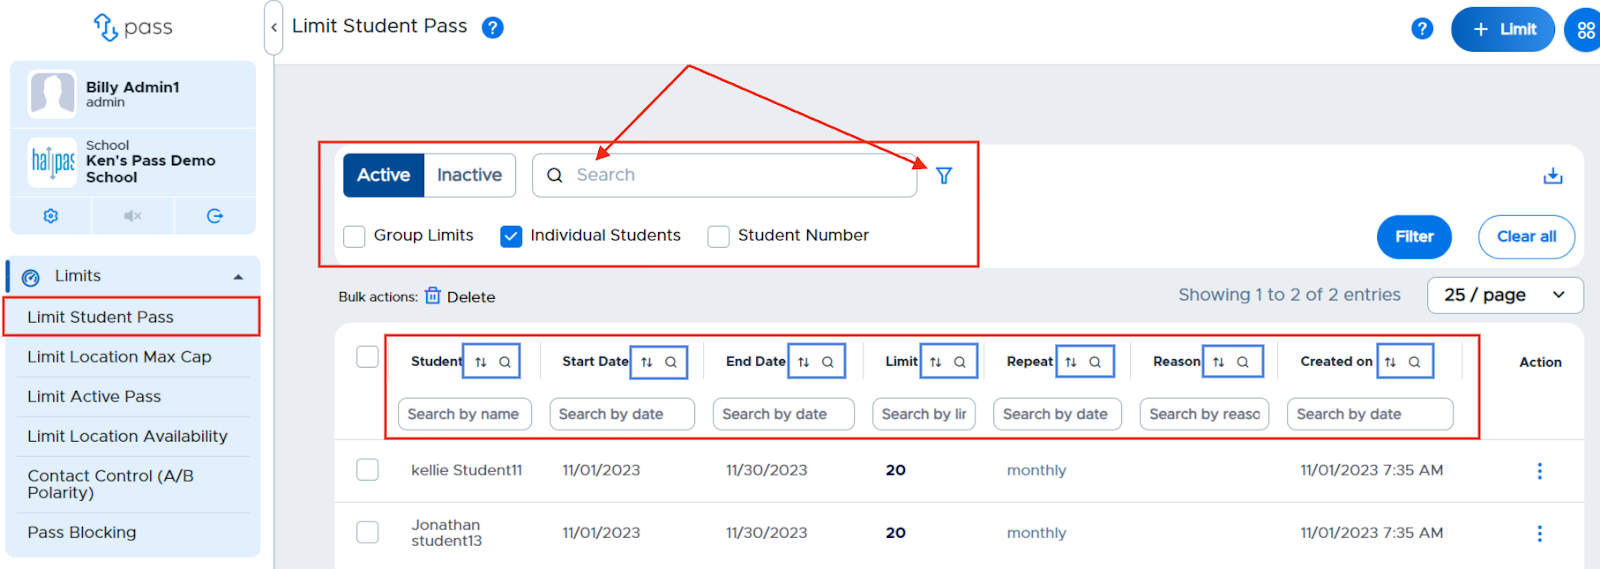
If you have a large number of students who have pass restrictions, you may find the Active/Inactive tabs, Search window, filter (select Student Number, and then click the blue Filter button), and column sort/search functionalities beneficial.

If you have a large number of students who have limitations, you may find the Active/Inactive tabs, Search window, filter (select Group Limits, Individual Students, and/or Student Number and then click the blue Filter button), and column sort/search functionalities beneficial.
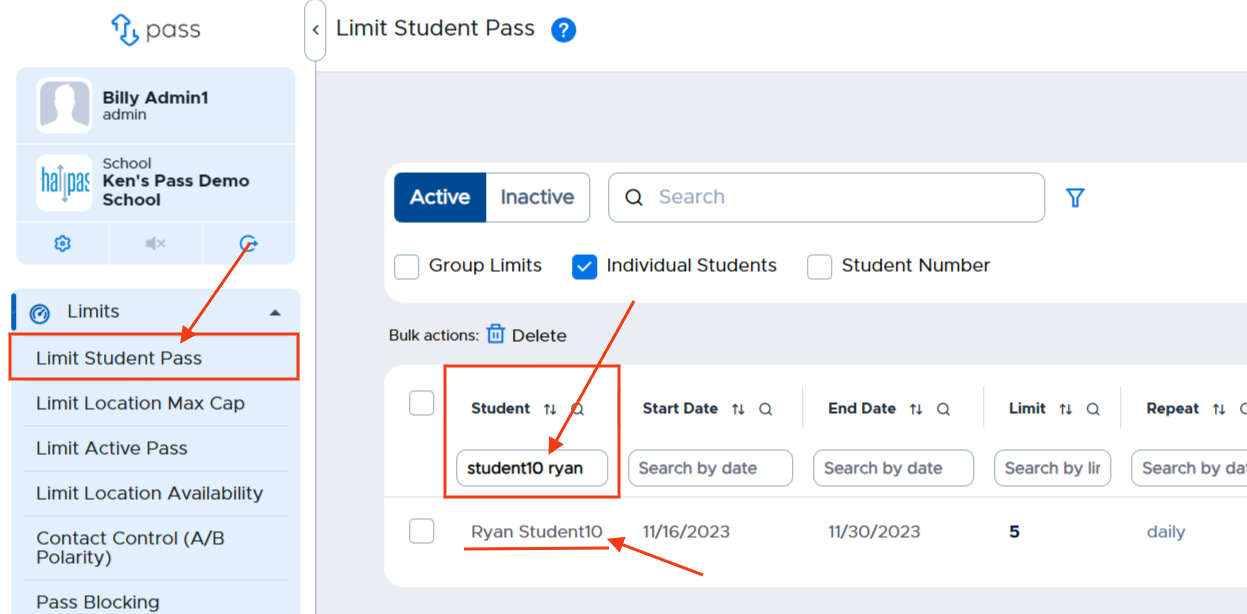
To search for a specific student, under the “Student” column, click in the Search by name field and type the name of the student. Utilize one of the following search parameters:
- First name (Ryan)
- Last name (Student10)
- Last name first name (Student10 Ryan - notice no comma between the two names)
Editing / Deleting Student Limit Entries
Once a limit has been set, it will show in the list on the Limit Student Pass screen. Admins can make changes to an active limit by clicking on the three (3) dots to the right of the limit and choosing the appropriate option - Edit or Delete.

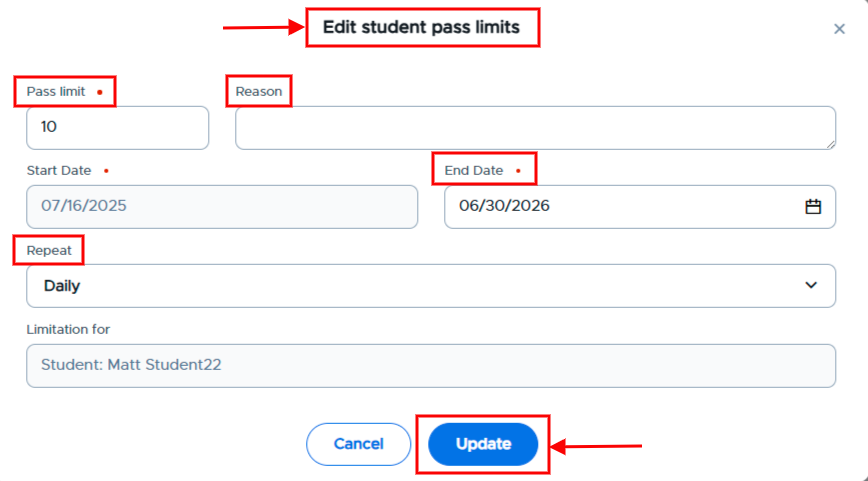
To Edit a specific student pass limit, click the three dots to the far right of the student’s name and click Edit.
On the popup screen, make the appropriate changes and then click Update. (Info that is grayed out cannot be edited.) The change will be reflected in the table.
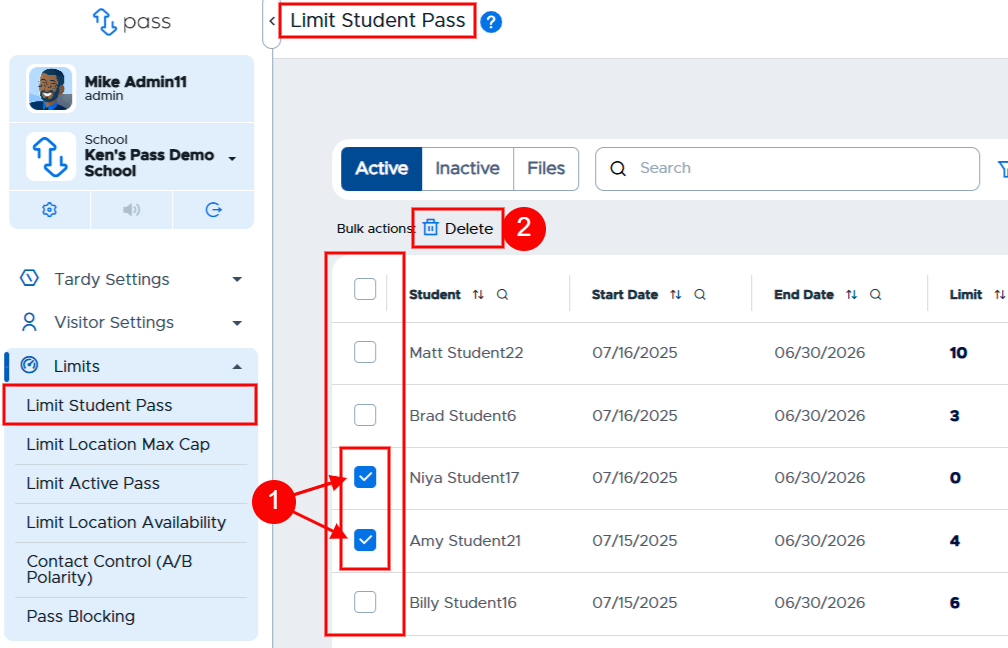
To delete student pass limits, admins have two options: delete individual entries or bulk delete entries.
Delete individual entries:
Click the three dots to the far right of the student’s name and click Delete.
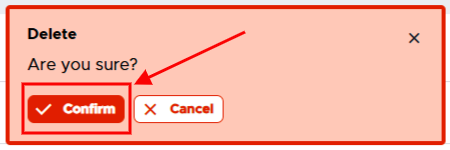
On the popup screen, click Confirm. The entry will be deleted from the table.

Bulk delete entries
Check the boxes to the left of the students’ names that you wish to delete and then click Delete to the right of Bulk actions under the Active/Inactive tabs.
On the popup screen, click Confirm. The entries will be deleted from the table.
Quick Tips
- If a student has two weekly limits (a school-wide daily limit of 2 and a personal daily limit of 10), the system will recognize the most restrictive limit. The student will only be allowed to create 2 passes a day. Same logic works with two weekly or two monthly limits.
- Stacking the limits (creating daily, weekly, and/or monthly limits) for a student is currently not available in the Pass system.
For more information, see the “Setting Student Pass Limits” video below.
Teacher Screens
When a student creates a pass but has a limit set, the teacher may not know this based on the active dashboard. The dashboard shows the teacher how many passes the student has used that day but not if there’s a limit set or what the limit is. Teachers will need to be aware of this in case students say to them that they can’t create a pass. (See the student screen example in the next section.)

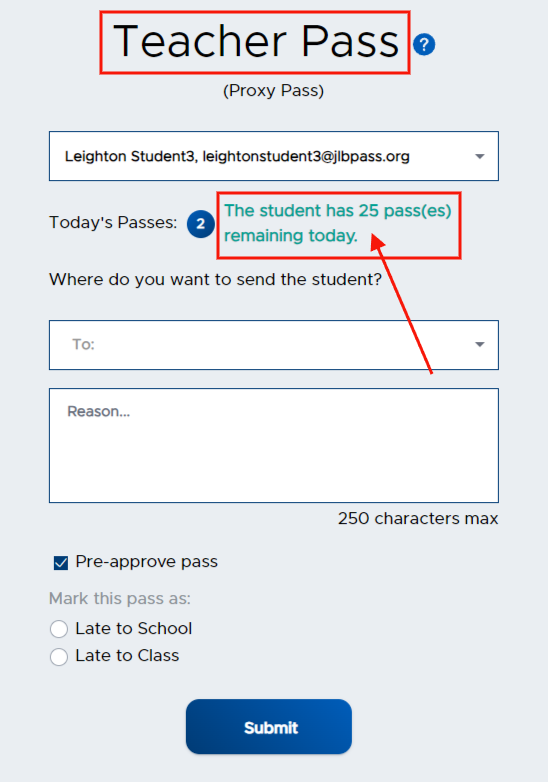
The Teacher (Admin or Staff user) is still able to create a Teacher Pass or Appointment Pass for students who have used their limited number of passes. If a Teacher creates a pass for a student with a limit, the teacher will see the following information on the Teacher Pass screen regarding the student’s pass limit.
Please note that “Today’s Passes” indicate ALL Pass types.
Student Screens
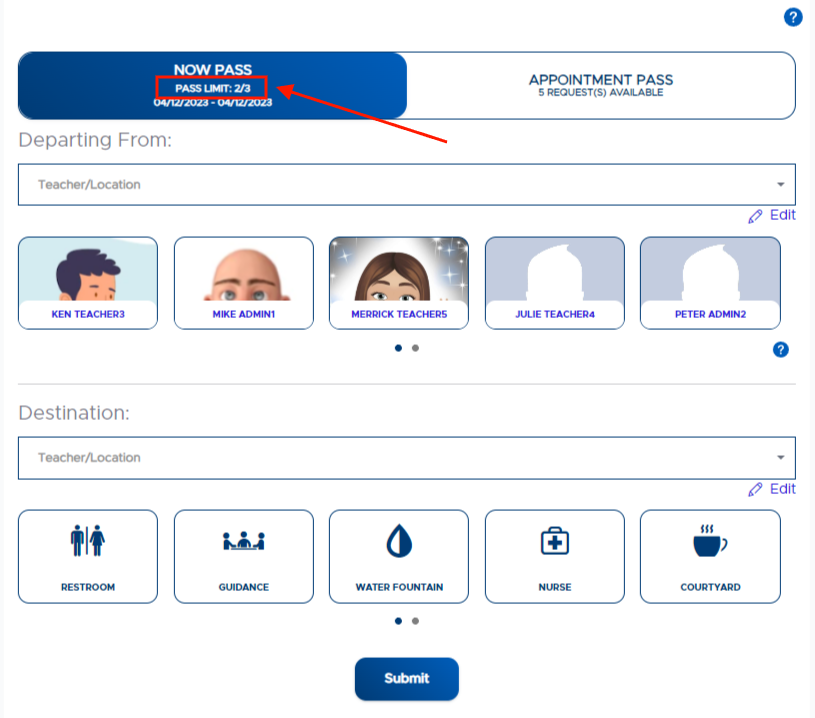
When a limit has been set, below is what a student will see when creating a pass.
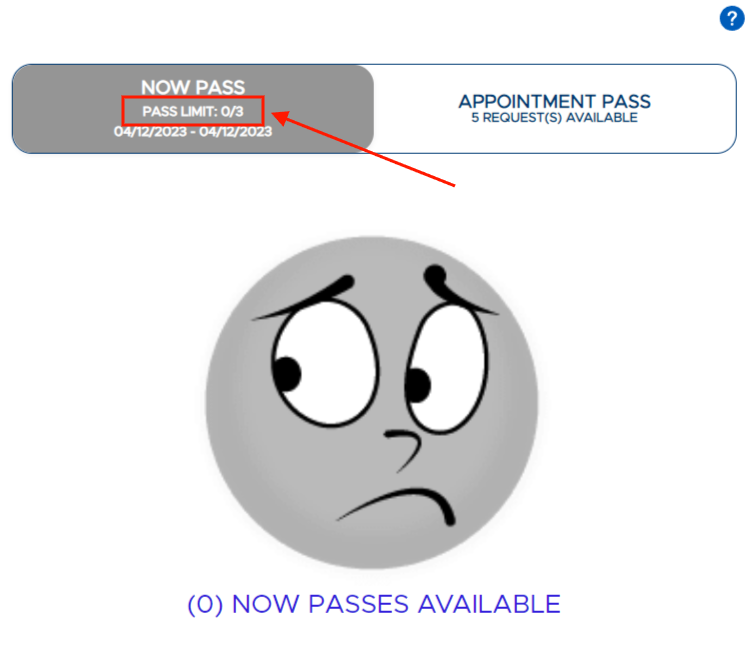
Below is what a student will see when they attempt to exceed the set limit.
Note
Admins can copy the limits to avoid recreating the same limits each year. Please refer to the "Copying Inactive Limits to Upcoming School Year" section of this guide.