In order for devices to automatically enroll into Securly MDM they must be assigned to Securly MDM in Apple School Manager. This can happen automatically by setting the default MDM server to Securly, or it can happen by manually assigning a device to Securly MDM.
If you purchased your devices directly from Apple, or from certain authorized resellers, your purchased devices will already be listed in Apple School Manager, ready to be assigned.
If you purchased your devices elsewhere, you may be able to import them into Apple School Manager using Apple Configurator. Check the Apple website for instructions on this procedure.
Setting the Default MDM Server
If you are switching from another MDM you may want to change the default to Securly MDM server after you have manually assigned, enrolled and verified some devices.
- In Apple School Manager, choose Preferences from the user menu at the bottom left.
- Choose MDM Server Assignment under the “Your MDM Servers” from the center menu.
- Under the “Default MDM Server Assignment” section on the right, choose the Securly MDM server for all device types then click Save.
All automated device enrollments will now be enrolled into Securly MDM.
Assigning Devices Manually
If you are switching from another MDM and wish to keep your defaults set to your old MDM until you test and verify Securly MDM, you can manually assign devices to Securly MDM.
- In Apple School Manager, choose Devices from the main menu.
- Find the device you wish to assign by using the Search box to search by serial number. You can also use filters to help find a device according to various criteria such as the order number or device type. Click on the device to select it.
TIP: You can assign multiple devices at once by using a filter, such as the Order Number filter, to display a list of all matching devices, then click “All Devices” at the top of the results list to select them or multi-select by holding CTRL or COMMAND while clicking each device. - Click “Edit MDM Server.”
- Click the option “Assign to the following MDM” then choose Securly MDM from the list and click Continue.
- Confirm any prompts.
- The device detail page should now show Securly MDM as the assigned MDM Server in the Overview section.
Verifying Assigned Devices in Securly MDM
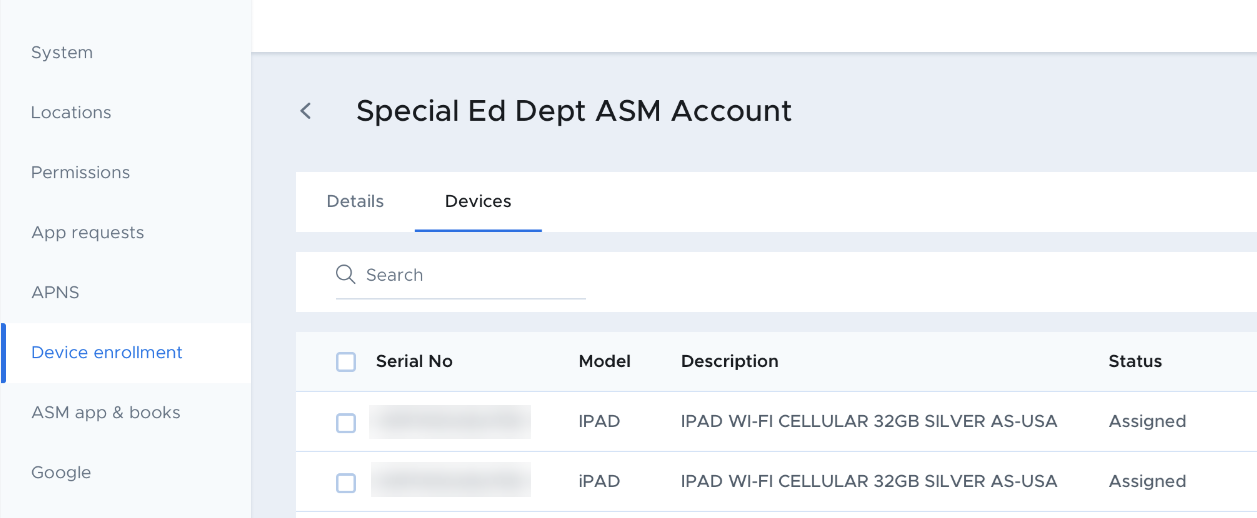
- To verify the devices that have been added automically or manually, navigate to Settings > Device Enrollment in Securly MDM.
- Under the Automated Enrollment tab, click on your ASM account.
- Click on Devices to view of a details like serial no, model, and status of all the devices that have been added.